Power Your Journey with BLUETTI Elite 300: https://bit.ly/42x0tiT
5% exclusive code: BLUETTISkill5
#elite300 #bluetti #springpowermood #TuringMarket
👇 Featured in this episode
Makita DBN900 18V Framing Nailer LXT
https://www.makitauk.com/product/dbn900.html
Barrettine Cut End Wood Preserver
🛒 https://amzn.to/4utzG3k
_______________________
A straight fence starts long before the first board goes up. In this guide, Sam shows the complete process of building a traditional feather edge fence, from setting out with a string line and digging post holes, through to concreting posts, fixing rails and gravel boards, and installing the feather edge boards. A well-built feather edge fence depends on accuracy at every stage, especially the initial setting out.
He also explains why feather-edge fencing is one of the UK’s most popular systems, how to follow natural ground contours, the materials he prefers, and the tools that improve speed and accuracy. Whether replacing a boundary fence or starting from scratch, the aim is always the same: a straight, durable, professional finish.
A straight fence starts long before the first board goes up. Sam demonstrates the full process of building a feather edge fence, from marking out and digging post holes to concreting posts, fixing rails, gravel boards, and installing boards. Careful preparation at the beginning determines how straight and strong the finished fence will be.
Feather Edge Fence: Building the Structure
The first step is setting out the line of the feather edge fence. A string line ensures straight alignment along the entire boundary, as even small errors will become obvious later. Accurate spacing between posts and consistent hole depth help maintain strength and stability over time.
Once the positions are marked, posts are set in concrete using a mix of one part cement to six parts ballast. The mix is kept fairly dry for strength. Leaving posts slightly over-length allows for adjustment, particularly on uneven ground where levels can change along the run of the feather edge fence.
Pressure-treated timber posts are commonly used because they offer a good balance of cost and durability. In more exposed areas, cedar can be used for increased longevity, although at a higher cost. At the base of the fence, gravel boards are installed to protect the structure from ground moisture and reduce long-term decay.
Rails are then fixed between the posts to create the main framework. Keeping these rails level and evenly spaced is essential, as they provide the structural support for the entire feather edge fence. Any misalignment here will affect the finished appearance and stability.
Once the structure is complete, the feather edge boards are fixed in overlapping layers to form a solid, weather-resistant barrier. Consistent spacing helps achieve a neat, uniform finish, while cordless nail guns can significantly speed up installation on longer runs.
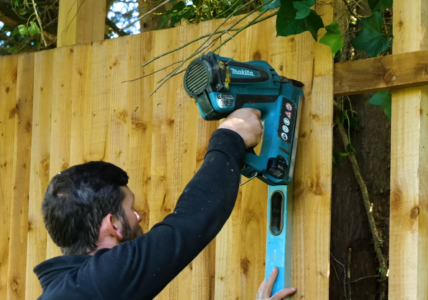
Unlike pre-made panel systems, a feather edge fence can follow the natural contours of the ground, making it highly adaptable to different sites. This flexibility is one of the reasons it remains one of the most widely used fencing methods in the UK.
In summary, building a feather edge fence is about careful planning, accurate setting out, and consistent workmanship. Each stage builds on the last to create a fence that is strong, straight, and built to last.
🔑 Key Insights
• Accurate setting out with a string line is the foundation of a straight, professional-looking fence.
• Building a feather edge fence on site allows you to follow the natural contours of the ground more easily than using pre-made panels.
• Pressure-treated spruce posts offer a good balance of durability, availability and cost for most fencing projects.
• Cedar posts can provide greater longevity but come at a significantly higher cost.
• A typical fencing concrete mix can be made using one part cement to six parts 10mm ballast, mixed fairly dry.
• Leaving posts over-length during installation provides flexibility before final trimming and finishing.
• Gravel boards help protect the feather edge boards from ground moisture and extend the life of the fence.
• Consistent board spacing and careful setting out are key to achieving a neat finished appearance.
• Cordless nail guns can significantly speed up feather-edge board installation compared with hand nailing.
• Feather-edge fencing is easy to maintain because individual boards can be replaced without dismantling the whole fence.