Friday, September 12, 2025
spot_img
Home Blog Page 11

Drax ~ The Eco Friendly Power Station.. Or Not?!

0

Newsletter ▶ https://skill-builder.uk/signup

Eco Friendly Power Station, Or Greenwashing?

Drax Power Station, located in North Yorkshire, England, is one of the largest power plants in the UK. It has been a subject of intense debate and scrutiny over its environmental impact and sustainability claims. Once primarily a coal-fired plant, Drax has transitioned a significant portion of its operations to biomass, specifically wood pellets, which it markets as a sustainable and carbon-neutral energy source. However, numerous environmental groups and scientists argue that this claim is misleading and a good example of greenwashing.

Greenwashing is a term used to describe the practice of companies disseminating disinformation to present an environmentally responsible public image. In the case of Drax, The “Eco friendly power station”, the central point of contention is its use of biomass. The power station claims that the process is carbon-neutral because the wood pellets are made from parts of trees that would otherwise go to waste and that new trees are planted to replace those used. The theory is that the carbon dioxide released when the wood is burned is reabsorbed by all the new trees, creating a closed loop cycle.

However, critics argue this is a gross simplification of a more complex issue. They point out that burning wood releases more carbon dioxide per unit of energy generated than coal. Additionally, while trees absorb carbon as they grow, this process takes decades to centuries, whereas the emissions from burning them are immediate. This time discrepancy is critical in the context of the urgent need to reduce greenhouse gas emissions to mitigate the worst impacts of climate change.

Moreover, the sourcing of the wood pellets has come under scrutiny. Much of the biomass used by Drax is imported from the United States, where environmentalists claim that harvesting trees to produce the pellets is contributing to deforestation and loss of biodiversity. The transportation of these pellets across the Atlantic also adds a significant carbon footprint, further undermining the plant’s claims of carbon neutrality.

Drax has received substantial government subsidies for its biomass operations, justified by its purported environmental benefits. Critics argue that this misallocates public funds that could be better spent on renewable energy sources like wind or solar. The subsidies are contingent on biomass being classified as a renewable energy source, a designation that many argue is based on flawed carbon accounting.

The controversy surrounding Drax is emblematic of a broader debate about the future of energy and the role of biomass within it. Proponents of biomass argue that it is a necessary transitional fuel that can replace coal and help balance the grid. At the same time, more intermittent renewable sources like wind and solar are scaled up. However, opponents contend that not all biomass is created equal and that in cases like Drax, it can do more harm than good regarding carbon emissions and broader environmental impacts.

The Drax Power Station and its shift toward biomass is a contentious issue. While the company promotes its operations as sustainable and carbon-neutral, many experts and environmentalists accuse it of greenwashing. They argue that the environmental credentials of Drax, The “Eco Friendly power station”, are misleading, masking the true impact of its biomass operations on the climate and ecosystems.

As the world grapples with the urgent need to transition to genuinely clean energy, the case of Drax highlights the complexities and pitfalls that can arise in this endeavour. It is a cautionary tale of the need for rigorous scrutiny and honesty in eco friendly power station and environmental claims and the dangers of greenwashing in the race to address the climate crisis.

Drax – Eco friendly Power Station

Snickers Workwear NEW Capsulized Work Trousers

0

The World’s First Work Trousers With Built-in, Certified Kneepads.

Unique, Tested and Certified to Exacting International Standards[1]

Snickers Workwear has been inventing and reinventing Work Trousers with Kneepads since 1975.

Renowned for continual innovation, the process continues with the launch of the world’s first built-in, certified kneepads which are completely integrated into a pair of Snickers Workwear’s premium stretch Work Trousers.

The unique AllroundWork, Stretch Trousers with Capsulized™ Kneepads and Holster Pockets deliver low-profile, comfortable impact protection. They’re an innovative combination of cutting-edge sportswear technology coupled with Snickers Workwear’s world-renowned comfort, functionality and sustainable fabric design technology.

snickersworkwear.com/campaign/capsulized

These street-smart hard-working slim-fit Trousers combine enhanced flexibility and comfort with a 2-way stretch fabric plus additional 4-way stretch panels at key stress points. There’s also CORDURA® reinforced holster, ruler, and cargo, pockets.

And, as is typical of all Snickers Workwear clothing, these durable and comfortable Work Trousers with the lightweight Capsulized™ kneepads provide in-place ergonomic protection all day, every day.

Snickers Workwear NEW Capsulized Work Trousers 2

Getting more information on the Snickers Workwear AllroundWork, Stretch Trousers with Capsulized™ Kneepads and Holster Pockets is easy. You call the Helpline on 01484 854788; check out snickersworkwear.co.uk or you can email sales@hultaforsgroup.co.uk

[1] Tested and Certified according to EN 14404 for Level 1 Knee Protection, snickersworkwear.com/list/protective-standards/en-14404-knee-protection .

Stop Builders Leaving The Industry Short

0

Newsletter ▶ https://skill-builder.uk/signup

Why are so many builders leaving the industry?

______________________

In addition to the factors mentioned by Roger, the issue of UK builders leaving the industry for other careers is multifaceted and influenced by a complex interplay of social, economic, and industry-specific factors. This trend is not just a consequence of one or two isolated issues but rather a result of several interrelated challenges that collectively impact the construction sector.

Here are some of the key reasons behind our Builders leaving:

Aging Workforce:

The construction industry has an ageing workforce, with a significant portion nearing retirement age. There’s been a struggle to attract younger workers to replace them, leading to a natural decline in the labour pool.

Working Conditions and Physical Demand:

Construction work is known for its physically demanding nature, which can exact a toll on the body over time, potentially resulting in enduring health challenges. Younger generations, observing these demands, may gravitate towards careers perceived as less physically taxing and offering improved work-life balance as viable alternatives.

Economic Uncertainty:

Economic fluctuations, characterised by periods of volatility and uncertainty, often exert significant influence on the stability of the construction sector. The unpredictability of job prospects, particularly exacerbated by impactful events such as Brexit and the COVID-19 pandemic, can diminish the appeal of remaining in construction careers. As a result, individuals may increasingly consider transitioning to industries perceived as offering greater stability and security during periods of economic turbulence.

Low Pay and Insecure Contracts:

In certain instances, the compensation offered within the construction industry may not match the competitive levels found in other sectors, particularly for entry-level roles. Moreover, the prevalence of short-term contracts can contribute to a sense of instability and uncertainty regarding job security among workers.

Lack of Training and Development:

There might be a perception of limited career progression or training opportunities within the industry. Young people, in particular, might be looking for careers where they can develop their skills and advance more readily.

Regulatory Challenges:

Builders frequently encounter a dynamic and evolving set of building regulations and standards, which can present challenges that are both frustrating and financially burdensome to navigate and comply with.

Technological Advancements:

In contrast to other industries that frequently provide opportunities to engage with cutting-edge technologies, the construction sector is sometimes perceived as lagging behind in adopting and integrating new technological advancements.

Cultural Perception:

The construction industry is occasionally burdened with a negative reputation, often perceived as a secondary or fallback career, rather than a primary choice profession. This prevailing perception can dissuade individuals from pursuing careers within the field, potentially limiting the industry’s ability to attract new talent and cultivate a robust workforce.

Mental Health Concerns:

The industry is known for its high-pressure environment, which can lead to stress and other mental health issues. There’s an increasing awareness of the importance of mental well-being, which might drive extra force behind builders leaving, to seek less stressful careers.

Alternative Opportunities:

With the rise of the digital economy, and the increasing availability of flexible working arrangements in various sectors, individuals are increasingly drawn to careers that provide superior benefits, flexibility, and alignment with personal interests and values.

These factors, along with others, contribute to a noticeable trend where individuals in the UK construction industry contemplate and transition to alternative career paths. Efforts to counteract this trend are centered on initiatives aimed at improving working conditions, offering competitive compensation packages, enhancing training and development opportunities, and shifting public perceptions of the construction industry.

By addressing these challenges comprehensively, stakeholders aim to put a slow on builders leaving, retain skilled workers and foster a sustainable future for the construction sector in the UK.

Upskilling Workers And Career Pathways Are The Answer

Christmas Message ~ Bloopers & Plumberparts Chat

0

Newsletter ▶ https://skill-builder.uk/signup

Merry Christmas to you all, and a happy new year!

Thanks to @plumberparts @Ultimate-roofing-square. @ukconstruction

Special thanks to Sam and Jen: https://www.facebook.com/sandjwardbespokefurniture/

DIY Fix For a Blocked Drain or Gully Outside

0

Newsletter ▶ https://skill-builder.uk/signup

Roger has a quick and straightforward fix for a blocked drain or gully, usually just outside your kitchen

______________________

Kitchen drains or gullies often get blocked due to the accumulation of substances commonly washed down the sink. Here are some of the common reasons for blockages:

Food Particles:
Tiny food particles, especially those that are fibrous or starchy, can stick to the pipes and eventually cause a blockage.

Grease and Oil:
Grease, fats, and oils solidify inside the pipes over time, creating a sticky surface that can trap other debris and gradually build up to a blockage.

Soap Scum:
Soap residues can combine with minerals in water to form a hard residue (soap scum) that can clog pipes.

Foreign Objects:
Sometimes, objects that shouldn’t be in the drain (like utensils, small toys, etc.) can accidentally fall in and cause a blockage.

If you don’t fancy Roger’s method of unblocking a kitchen drain, you can try several methods:

Boiling Water:
Pouring boiling water down the drain can sometimes dissolve or loosen a blocked drain caused be grease.

Drain Scoop

Why Do These Walls Have Damp Circles?

0

Newsletter ▶ https://skill-builder.uk/signup

? Ask Skill Builder Playlist: https://www.youtube.com/playlist?list=PLvRh7uimDQfeARPDGL8GLsJ1Saxlx6scI

Roger is back, this time to stare at damp circles. He suspects it’s a dot and dab issue.

“Dot and dab” is a widely used method in the construction and plastering industry for attaching plasterboard to masonry walls. This technique, also known as “dry lining,” involves applying adhesive in a series of “dots and dabs” on the wall surface before pressing the plasterboard into place. Here’s a detailed explanation of the process and its benefits.

Cold Floors & Walls in an Old House ~ What Can Nick Do?

0

Newsletter ▶ https://skill-builder.uk/signup

? Ask Skill Builder Playlist: https://www.youtube.com/playlist?list=PLvRh7uimDQfeARPDGL8GLsJ1Saxlx6scI

Help! Cold Floors and Walls..

Roger is back to look at Skill Builder viewer Nick’s insulation problem.

Here’s Nick’s message:

Hi, I hope you have some solutions to how to insulate these solid 9″ walls and sub floor.

I’ve endlessly researched information about how to insulate and how to manage condensation but there are so many ways to do it, and why you shouldn’t, that it’s driving me mad.

To 50mm lime plaster these two walls is £3300.

Thank you for your time, Nick

Ultimate Motorhome Battery? Power Queen 200Ah LiFePO4 Battery Tested

0

Support us by using our affiliate link:
🛒 https://uk.ipowerqueen.com/?ref=kdyhrunq

Ultimate Motorhome battery – Power Queen 12.8V 200Ah PLUS LiFePO4

[200A BMS with 2560W Max. Load Power] The Power Queen 200Ah PLUS LiFePO4 battery has a built-in 200A BMS (Battery Management System) to protect it from overcharging, over-discharging, over-current, and short circuits. The battery has 8 cells inside. The automotive grade cells are high-density and stable, it’s safe when used in daily life and friendly to the environment. The 200A BMS could allow us to connect more applications, supporting max. 2560W load power, making our lives more convenient, especially valuable on the road as a motorhome battery.

[1/3 Lighter Weight & Storage 100% Energy] The 12V 200Ah PLUS LiFePO4 battery is 48.58 lbs – lighter than the lead-acid battery capacity, which is 130 lb. Even in 1/3 weight, the lithium battery still has a powerful capacity. For example, the energy density of Power Queen 12V 200Ah PLUS is 52.69Wh/lb (2560Wh/48.58 lbslb=52.69Wh/lb), while comparable with lead-acid battery is 19.69Wh/lb (2560Wh/130lb=19.69Wh/lb), the lithium battery provides a longer operation time.

[Max. 40.96kWh Energy Storage Solutions] Power Queen 12V 200Ah PLUS batteries support up to 4 in series and 4 in parallel (Max 4S4P) to get more capacity (200Ah, 400Ah, 600Ah, Max.800Ah) and higher voltage (12.8V, 25.6V, 38.4V, Max.51.2V). Max connected 16 batteries to get a 51.2V 800Ah battery system with 40.96kWh energy. This robust storage solution could be widely used as a motorhome battery, home solar, emergency backup power systems, and RV trips.

[Eco-Friendly Energy & Save 1/2 Power Fees] Power Queen 12V 200Ah PLUS LiFePO4 battery provides 4000+ cycles times and 2560Wh energy, which means the 200Ah LiFePO4 battery produces 10240kWh (2560Wh*4000 cycles times=10240kWh) in its 10-year lifespan, which means you will save 1/2 of power fees compared with using the utility power. You could enjoy a self-reliant, colourful life using the battery in a solar source.

[5-Year Warranty & Delivered in 2-5 Working Days] Power Queen provides a 5-year 12V 200Ah PLUS LiFePO4 battery warranty. Power Queen do their best to provide customers with the safest battery and the most professional service. With local warehouses in CA, TX, PA, and GA, we can minimize the delivery time to 2-5 working days. Please be advised that the stock situation will affect delivery time. Feel free to contact us to get the stock situation of your nearest warehouse.

Attention: This battery is NOT suitable for use as a starter or golf cart battery. For more info, please consult Power Queen.

We’d Rather Watch Paint Dry – You’ll Never Guess What Happens!

0

Newsletter ▶ https://skill-builder.uk/signup

We’d Rather Watch Paint Dry..

Writing about paint drying might seem mundane, but it’s a process that involves several interesting aspects worth considering. Here are a few key points:

Chemical Process: Grasping the chemical process involved in paint drying is of paramount importance. The drying of most paints occurs in two distinct stages: evaporation and curing. In the initial stage, the solvent present in the paint evaporates, which results in the pigment and binder being left behind on the painted surface. The next stage, curing, involves the binder undergoing a chemical reaction—commonly oxidation or polymerization. This reaction causes the paint to solidify and adhere firmly to the surface.

The specific chemicals used in the paint formulation can significantly influence both the drying time and the final properties of the paint. Therefore, a thorough understanding of these chemical processes helps in predicting how long it will take for the paint to dry and ensures the achievement of the desired finish.

Environmental Factors: Environmental conditions have a profound impact on the paint drying process. Factors such as temperature, humidity, and airflow can greatly affect how quickly or slowly paint dries. Typically, higher temperatures and lower humidity levels can accelerate the drying process. However, it is important to note that excessive heat or wind can lead to problems such as uneven drying or cracking of the paint. Therefore, it is crucial to paint under optimal conditions, which are usually specified by the paint manufacturer. Adhering to these recommended conditions ensures that the paint dries properly and results in a smooth, durable finish. Understanding and controlling these environmental factors is essential for achieving the best possible outcome in any painting project.

Type of Paint: The drying time of paint varies significantly based on the type of paint being used. Oil-based paints, for instance, generally take a longer time to dry compared to water-based paints. This extended drying period for oil-based paints is due to the necessity for solvent evaporation and the longer curing time required for the paint to fully set and harden. Conversely, water-based paints dry faster as they primarily rely on water evaporation, which occurs more quickly. Therefore, understanding the specific type of paint and its unique drying characteristics is essential when planning and executing any painting project. This knowledge ensures that you allocate sufficient time for each stage of the painting process and achieve the best possible results.

Application Thickness: The thickness with which paint is applied also plays a crucial role in determining its drying time. When paint is applied in thicker layers, it takes a longer time to dry. This extended drying period occurs because the solvent in the paint needs more time to evaporate from the deeper layers, and the overall curing process slows down. To achieve optimal drying times and a smooth finish, it is important to apply paint in layers that adhere to the recommended thickness. This careful application helps in avoiding prolonged drying times and ensures that the paint cures properly, leading to a more durable and aesthetically pleasing finish.

Safety Considerations: As paint dries, it can release volatile organic compounds (VOCs) into the air. These can be harmful if inhaled in large quantities or over a prolonged period. Ensuring proper ventilation during and after painting is crucial for safety.

Patience is Key: Rushing the drying process can lead to problems like cracking, peeling, or an uneven finish. It’s essential to allow the paint to dry thoroughly before applying a second coat or using the painted surface.

While watching paint dry might not be the most exciting activity, the process involves a fascinating interplay of chemistry, physics, and environmental factors. Understanding these can lead to better results in any painting project.

Controlling How Paint Dries

Which Heating System Is Best in 2024?

0

Newsletter ▶ https://skill-builder.uk/signup

https://youtu.be/0EQ-pJmPZ-M

Which Heating System Is Best in 2024? Exploring Options for UK Homeowners.

As energy efficiency and sustainability become increasingly important, homeowners have various home heating choices. In the second instalment of our home heating series, Roger looks at heating systems and explains their features and benefits.

• Condensing Boilers
They are highly efficient boilers that condense water vapour in the exhaust gases to recover heat, leading to higher efficiency and reduced carbon emissions.

• Heat Pumps
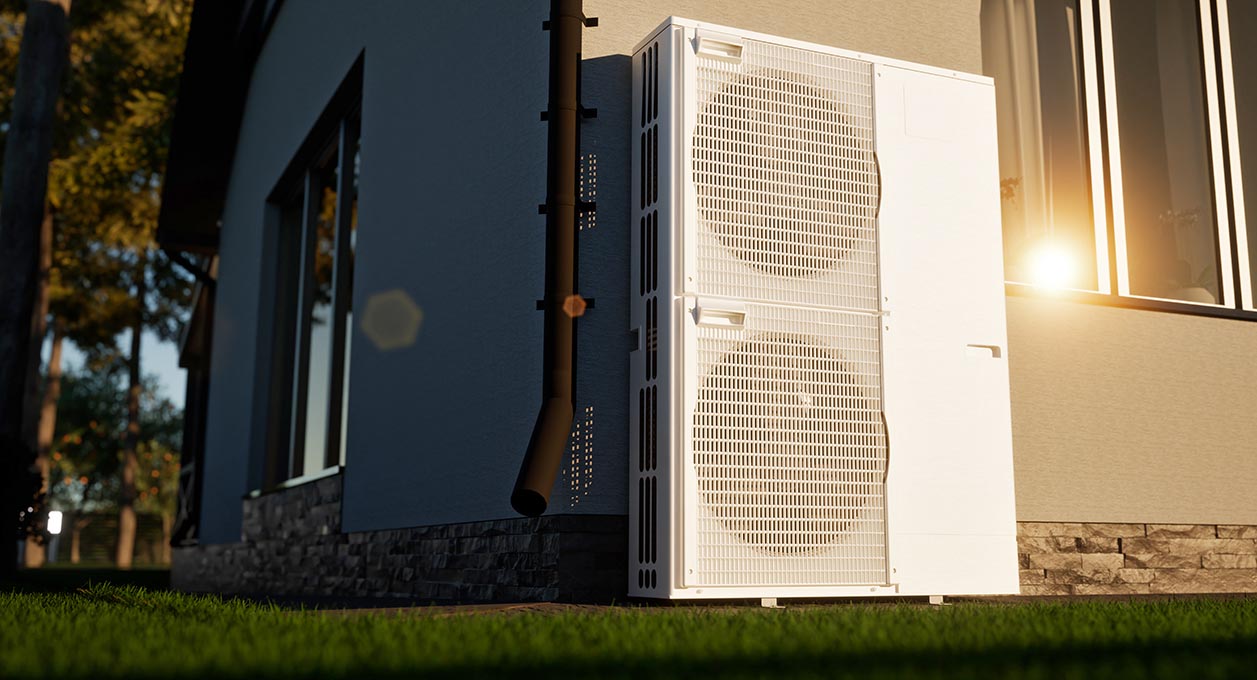
These systems extract heat from the air or ground outside your home and use it to heat your home and water, offering an energy-efficient alternative to traditional heating methods.

• Electric Radiators
Electric radiators convert electricity directly into heat, offering a simple, often cost-effective, and easy-to-install home heating solution.

• Solar Thermal Systems
These systems use solar panels to capture energy from the sun, which is then used to heat water stored in a cylinder for home use.

• Biomass Boilers
Biomass boilers burn natural materials like wood pellets, chips, or logs to provide heating and hot water, offering a renewable and carbon-neutral alternative to fossil fuels.

• Hybrid Systems
Hybrid heating systems combine a gas boiler with a renewable energy source like a heat pump, balancing eco-friendliness and reliable performance.

• Infrared Panels
Infrared panels emit heat in the form of infrared radiation, heating objects and people directly, making them a more efficient option for some homes.

• District Heating
This system provides heat to multiple buildings from a central source through a network of insulated pipes, offering efficient and eco-friendly heating for urban areas.

Home Heating Simplified

0

Newsletter ▶ https://skill-builder.uk/signup

This is the first in a series of videos where Roger explains the basics of heating your home.

Basics of Home Heating: A Comprehensive Guide

Efficient home heating is crucial for comfort and energy savings, especially during the colder months. Understanding the various heating systems, their maintenance, and tips for optimising their performance can make a significant difference in both your comfort and utility bills. Here’s a comprehensive guide on the basics of heating your home.

Understanding Different Heating Systems

  1. Central Heating Systems:
    • Furnaces: One of the most common home heating systems, furnaces heat air and distribute it through ducts. They can run on electricity, natural gas, or oil. Regular maintenance, including filter changes and annual inspections, can keep a furnace running efficiently.
    • Boilers: Boilers heat water and provide either hot water or steam for heating. The heated water is distributed through radiators or radiant floor systems. Boilers typically use natural gas, oil, or electricity.
    • Heat Pumps: Heat pumps transfer heat from outside to inside your home. They are highly efficient because they move heat rather than generating it. There are air-source heat pumps, which transfer heat from the air, and ground-source (or geothermal) heat pumps, which transfer heat from the ground.
  2. Direct Heating Systems:
    • Space Heaters: These are portable units that provide direct heat to specific areas. They can be electric, propane, or kerosene-powered. Space heaters are useful for supplemental heating but are not ideal for whole-home heating due to their limited range and potential safety risks.
    • Wood and Pellet Stoves: These stoves burn wood or pellets to provide heat. They are often used in conjunction with other heating systems. Regular cleaning and chimney maintenance are essential to prevent fires and ensure efficient operation.
  3. Radiant Heating Systems:
    • Radiant Floor Heating: This system involves installing heating elements beneath the floor, which can be electric cables or water-heated tubing. Radiant floor heating provides even, comfortable warmth and can be very efficient.
    • Radiant Panels: Mounted on walls or ceilings, these panels emit infrared heat that warms objects and people in the room directly. They can be powered by electricity or hot water.

Tips for Optimising Heating Efficiency

  1. Regular Maintenance:
    • Schedule annual inspections for your heating systems to ensure they are operating safely and efficiently.
    • Change or clean filters in furnaces and heat pumps regularly to maintain good airflow and reduce strain on the system.
    • Bleed radiators and check for leaks in boiler systems to ensure optimal performance.
  2. Sealing and Insulating:
    • Proper insulation in walls, attics, and floors can significantly reduce heat loss, making your heating system more effective.
    • Seal gaps and cracks around windows, doors, and ducts to prevent drafts and improve overall efficiency.
    • Consider adding weatherstripping to doors and windows to further reduce heat loss.
  3. Thermostat Settings and Upgrades:
    • Set your thermostat to a lower temperature when you’re not home or at night to save energy. A programmable thermostat can automate this process for you.
    • Smart thermostats offer advanced features like learning your schedule and optimizing heating patterns, which can lead to further energy savings.
  4. Maximizing Heat Distribution:
    • Use ceiling fans on a low setting to help distribute warm air more evenly throughout the room.
    • Ensure that vents, radiators, and baseboards are not obstructed by furniture or curtains to allow free flow of warm air.
  5. Alternative Heating Sources:
    • Utilize the sun’s natural heat by opening curtains during the day to let in sunlight and closing them at night to retain heat.
    • Consider supplemental heating options like electric blankets or heated mattress pads to reduce reliance on your primary heating system.

Safety Considerations

  1. Install Carbon Monoxide Detectors:
    • Home Heating systems that burn fuel can produce carbon monoxide, a dangerous gas. Install detectors on every level of your home and test them regularly.
  2. Fire Safety:
    • Keep flammable materials away from heat sources, including space heaters, stoves, and furnaces.
    • Ensure chimneys and vents are clear and in good condition to prevent fire hazards.
  3. Professional Servicing:
    • Hire licensed professionals for installation, repairs, and annual maintenance of your heating systems to ensure they are safe and functioning correctly.

By understanding your home’s heating system and taking steps to maintain and optimize it, you can enjoy a warm, comfortable living space while keeping energy costs in check. Regular maintenance, proper insulation, and smart thermostat usage are key to an efficient and effective heating system. Stay warm and safe by following these guidelines.

WHICH? Home Heating System


4o

Nightmare Heat Pump – Heat Geek Gives His Verdict

0

Part 1: https://youtu.be/Zar7RTQodnw

Roger is back with John, the nightmare heat pump owner, to see if Adam from @HeatGeek can help him.

https://www.youtube.com/@HeatGeek

Heat Pump League table
https://heatpumpmonitor.org

Live link to Adam’s beta pump (click on the bar chart)
https://emoncms.org/app/view?name=Primary&readkey=eec7334e58f2a6927a9ff7b27c8c7e63

Nightmare Heat Pump Summary

The simple application of weather compensation can significantly enhance the efficiency of your system. Currently, it operates on a fixed temperature with an on/off mechanism. In this modern era, no system, whether it uses gas or a heat pump, should function this way. Implementing this change alone could increase your Seasonal Coefficient of Performance (SCOP) to around 3.

Furthermore, blending valves, bypasses, and buffers have been left in the system unnecessarily. These components hinder efficiency by causing distortion, which dilutes the flow temperature. This dilution necessitates a higher-than-required flow temperature, negatively impacting overall efficiency. Removing these unnecessary components could likely improve efficiency to a mid-3 level, especially given the size of your radiators, even with the constraints of solid brick construction.

Additionally, while the fact that your system is a high-temperature unit does affect its performance, it is important to consider that it might have been the correct decision at the time of installation, particularly if no radiator upgrades were made then.

Aside from the straightforward and quick fixes that could be accomplished with just one day of labor, the most pressing issue is the considerable noise disturbance affecting your neighbour. The original installers failed to lay a proper base for the unit, which is a critical step for any installation. Without this solid foundation, the unit has shifted and tilted backward over time. This misalignment places undue strain on the bearings, which they are not designed to handle. Consequently, this results in the grinding noise you are hearing and causes the fan blades to come into contact with ice.

Additionally, the unit has suffered from poor maintenance. A proper service should not only ensure that the unit is level but also address the condition of the bearings. Unfortunately, these aspects have been neglected. A thorough servicing would include leveling the unit as a basic requirement and assessing the bearings to prevent further issues.

As a result of these issues, a complete stripdown and replacement of parts in the outdoor unit are necessary. This process is essential to restore proper functionality and eliminate the noise disturbance. If we can secure assistance from LG, I have a highly skilled Heat Geek technician who is FGas certified and can perform the necessary work on your system. Additionally, we can assist with any other aspects of the repair or maintenance required to address your nightmare heat pump.

If you decide to replace the entire unit, opting for a model that does not have a double compressor could yield significant improvements. With such an upgrade, you can anticipate achieving Seasonal Coefficient of Performance (SCOP) ratings in the mid-4 range. This efficiency is possible even in a home with solid brick construction, largely due to the substantial size of your radiators, which would complement the new system well.

Replacing an existing unit is actually a much more cost-effective and straightforward process compared to installing an entirely new system from scratch. To give you an idea of the potential costs involved, replacing your current unit with a 12kW model—such as a Vaillant arotherm plus or a Viessmann—would likely be in the vicinity of £7,000. This estimate assumes that the rest of your system is already in place and in good working condition.

It’s important to note that a precise calculation of the required capacity (kW) would need to be determined through a heat loss assessment to ensure the new unit meets your home’s specific heating needs. Despite this, the replacement cost is generally lower because it leverages the existing infrastructure, thereby reducing labor and material expenses associated with a full installation.

I am also open to offering any additional assistance where possible, ensuring that you get the most efficient and cost-effective solution for your home heating needs. No more nightmare Heat pump!

How Does A Heat Pump Work?

Keep Your Foundations Dry – How Helen Fixed Her Damp With a Shovel

0

Newsletter ▶ https://skill-builder.uk/signup

? Ask Skill Builder Playlist: https://www.youtube.com/playlist?list=PLvRh7uimDQfeARPDGL8GLsJ1Saxlx6scI

Keeping brickwork and foundations dry is crucial to maintaining the structural integrity and longevity of your home..

Roger is back to look at Skill Builder viewer Helen’s damp problem.

Here’s Helen’s message:

Hi Roger

We moved into our new home in August this year. We have a damp problem as the original guttering was dumping water at the north corner of the house.

We’ve re-routed the guttering and have managed to get rainfall 1.5m from the house.

After letting the corner dry out and removing soil a brick’s depth from slate DPC, what can we do to help keep brickwork and foundations dry?

Any recommendations and suggestions are gratefully accepted.

Thank you ?

Strategies To Keep brickwork And Foundations Dry

1. Proper Drainage

  • Gutters and Downspouts: The simplest step to keep foundations dry is to ensure gutters and downspouts are clean and in good condition to direct water away from your home. Gutters should be free of debris, such as leaves and twigs, which can cause blockages and prevent water from flowing freely. Regular cleaning, especially in the autumn when leaves are falling, is crucial. Additionally, inspect the gutters for any signs of damage, such as cracks or sagging sections, and repair them promptly. Downspouts, which channel water from the gutters to the ground, should also be checked regularly to ensure they are not clogged and are firmly attached to the gutter system.Extend downspouts at least 5-10 feet away from the foundation.
  • Grading: Proper grading around your home is another critical aspect of effective drainage. The ground surrounding your house should slope away from the foundation to direct water away from the structure. This slope should be gradual yet effective; a general guideline is a slope of 1 inch per foot for the first 6 feet extending from the foundation. This means that for every foot you move away from the house, the ground should drop by at least 1 inch.

2. Waterproofing

  • Foundation Waterproofing: Apply a waterproof coating or membrane to the exterior of the foundation. This prevents water from seeping through the walls.
  • Sealants: Use masonry sealants on brickwork to repel water. These sealants should be breathable to allow moisture within the wall to escape.

3. Landscaping

  • Plant Placement: Avoid planting trees and shrubs too close to the foundation, as their roots can interfere with drainage and even damage the foundation.
  • French Drains: Install French drains around the perimeter of your home to redirect water away from the foundation.

4. Maintenance

  • Crack Repair: Regularly inspect brickwork and foundations for cracks and repair them promptly using appropriate materials.
  • Mortar Joints: Repoint deteriorated mortar joints in brickwork to prevent water penetration.

5. Sump Pump

  • Installation: If you have a basement or crawl space, installing a sump pump can help remove water that collects around the foundation.
  • Battery Backup: Ensure your sump pump has a battery backup to function during power outages.

6. Vapor Barriers

  • Crawl Spaces: Install vapor barriers on the ground in crawl spaces to prevent moisture from rising into the foundation and brickwork.
  • Basements: Apply vapor barriers on interior basement walls and floors if moisture penetration is a problem.

7. Proper Ventilation

  • Ventilation: Ensure that crawl spaces and attics are well-ventilated to reduce moisture buildup. Use vents, fans, or dehumidifiers as necessary.

8. Roof Overhangs

  • Extended Eaves: Extended roof overhangs can help direct rainwater away from the walls and foundation of your home.

9. Regular Inspections

  • Routine Checks: Regularly inspect your home’s exterior, including the roof, walls, and foundation, for signs of water damage or potential problems.

10. Professional Assessment

  • Expert Evaluation: If you suspect serious moisture issues, consider hiring a professional to assess and recommend specific solutions tailored to your home.

By implementing these strategies, you can effectively keep your brickwork and foundations dry, thus protecting your home from water damage and ensuring its long-term durability.


4o

Are Steel Framed Houses the Future of Construction?

0

Newsletter ▶ https://skill-builder.uk/signup

Are Steel framed houses good news for both the householder and the construction company?

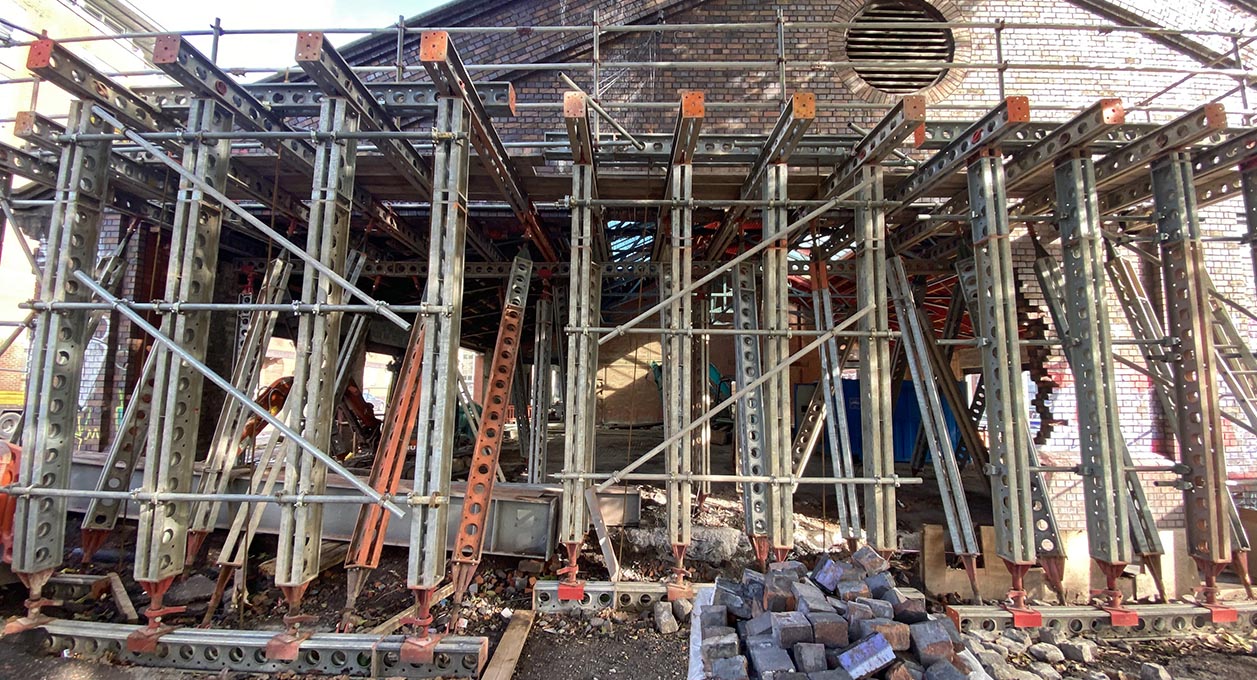
Roger spots a building project on his travels and wonders just this.

_________________________________

Alan Muse, Head of Construction Standards at the Royal Institution of Chartered Surveyors, commented on the use of steel in residential construction:

“Constructing Steel frames houses is not a new concept”… For residential construction, steel offers longevity; if it is fire-protected, it will last longer than wood frames, and it is watertight… However, steel is strong and, therefore, resistant to wind and earthquakes, it is adaptable and steel components can be made to any shape. It is particularly suited to the current trend for large spans in houses, as steel can span more quickly than cellular construction. It also encourages off-site fabrication which helps maintain high standards of construction.”

Another industry professional, Guy Mattinson from Albright Surveyors, shared his perspective, especially in relation to property value:

“In my experience, the method of construction will have little effect on the value of the property and I wouldn’t downvalue a property because it is steel-framed.”

Buying A Steel Framed House


Steel Framed Houses: A Modern Approach to Sustainable Living

Steel framed houses represent a contemporary and sustainable approach to residential construction, offering numerous benefits over traditional building methods. Steel, known for its strength, durability, and eco-friendliness, is increasingly being used as a primary material in residential buildings worldwide. Here’s a comprehensive look at the advantages and features of steel framed houses.

Strength and Durability

One of the most significant advantages of steel framed houses is their strength and durability. Steel is inherently strong and can withstand extreme weather conditions, earthquakes, and even fire better than traditional building materials like wood. This strength allows for larger open spaces and innovative architectural designs that may not be possible with other materials.

Sustainability

Steel is a highly sustainable building material. It is recyclable and can be reused indefinitely without losing its quality. Using steel in construction reduces the demand for virgin materials and minimizes construction waste. Additionally, steel framed houses often have a longer lifespan compared to traditional homes, further enhancing their environmental benefits.

Speed of Construction

Steel framed houses are quick to construct due to the prefabricated nature of steel components. Unlike traditional building methods that rely on on-site assembly of materials, steel frames are manufactured off-site to precise specifications and then assembled quickly on-site. This reduces construction time and labor costs significantly.

Design Flexibility

Steel allows for greater design flexibility in residential architecture. It can be easily molded and shaped into various configurations, accommodating modern design trends and personalized architectural styles. Steel framed houses can feature expansive windows, open floor plans, and striking contemporary aesthetics that appeal to homeowners seeking a modern living environment.

Energy Efficiency

Steel framed houses are inherently energy efficient. Steel’s thermal properties allow for better insulation, reducing heating and cooling costs throughout the year. Additionally, steel frames can accommodate thicker insulation materials without compromising structural integrity, further enhancing energy efficiency and indoor comfort.

Maintenance

Maintaining a steel framed house is relatively easy compared to traditional homes. Steel is resistant to pests, such as termites, which can be a significant issue in wood-framed structures. It also does not warp, rot, or crack over time, reducing the need for frequent repairs and maintenance.

Cost Considerations

While initial construction costs for steel framed houses may be slightly higher than traditional homes, the long-term benefits often outweigh the upfront investment. Reduced maintenance costs, energy savings, and enhanced durability contribute to the overall affordability and value of steel framed houses over their lifespan.

Conclusion

Steel framed houses represent a forward-thinking approach to residential construction, combining strength, sustainability, and design flexibility. As the demand for environmentally conscious building practices grows, steel framed houses offer a viable solution for homeowners looking to minimize their environmental footprint while enjoying modern, efficient, and durable living spaces. Whether for new construction or renovations, steel framed houses continue to redefine the future of sustainable living.

3.5

Noisy Radiator Mystery: Does Jim from Plumberparts Have a Solution?

0

Newsletter ▶ https://skill-builder.uk/signup
Check out Jim’s channel @plumberparts

? Ask Skill Builder Playlist: https://www.youtube.com/playlist?list=PLvRh7uimDQfeARPDGL8GLsJ1Saxlx6scI

Noisy radiators can be a common issue in homes..

Often due to trapped air or the buildup of mineral deposits within the system. These noises can range from clanking or banging sounds to hissing or gurgling noises. Regular bleeding of radiators to release trapped air and occasional flushing of the heating system can help alleviate these issues and ensure efficient and quiet operation of your radiators.

This is a tough one, so Roger calls in the cavalry in the form of James Lawrence of Plumberparts.

This is Kevin’s message:

I have been watching you on TV and now YouTube for over 20 years. We moved 2 years ago back to the UK after living in France.

Now in Cornwall, we have a converted barn that wasn’t done very well 20 years ago, and we spent 2022 having most things updated by a very good local builder.

He had many trades and recommended a plumber who was also good but very busy (holiday homes, etc).

We didn’t rip out the C/H system (oil as serviceable with a boiler less than 3 years old) New radiators all around with new TRVs.

In the kitchen, we have a tall grey column radiator but the trv valve came with it and all others are Drayton.

The kitchen rad however, is very noisy radiator and as the builder said, sounded like the plumber had left his spanners inside.

It’s a metallic sound when the boiler fires and a hissing sound when on full. The plumber came back and adjusted the flow into rad, which made a bit of difference.

We have been leaving it off as living and kitchen is open plan, so that noisy radiator can be intrusive. Plumber suggests it might be cheap TRV, have you any suggestions?


Here are effective strategies to diagnose and resolve common causes of a noisy radiator

1. Bleeding the Radiator

Cause: One of the most common reasons for radiator noise is trapped air bubbles within the system. When air gets trapped, it creates noises such as gurgling or banging as water passes through.

Solution: Bleeding the radiator involves releasing trapped air from the system. Start by turning off your heating system and allowing the radiator to cool. Use a radiator key or screwdriver to open the bleed valve slowly, letting air escape until water starts to flow steadily. Close the valve tightly once water begins to flow consistently.

2. Flushing the Heating System

Cause: Over time, mineral deposits and sludge can accumulate within the heating system, causing blockages and uneven water flow, leading to noise.

Solution: Flushing the heating system involves draining and cleaning out these deposits. Consult a professional for this process, which may include adding a descaling agent to break down deposits and flushing the system with clean water.

3. Checking for Sloped Radiators

Cause: Radiators that are not properly sloped can cause water to pool in certain areas, leading to noises like gurgling or bubbling.

Solution: Ensure that your radiators are installed with a slight slope towards the bleed valve. This allows air to escape easily and water to flow evenly through the radiator.

4. Inspecting Valves and Fittings

Cause: Loose valves or fittings can cause rattling or knocking noises as the radiator heats up and expands.

Solution: Tighten loose valves and fittings using a wrench or pliers. Be careful not to overtighten, as this can damage the valve or fitting.

5. Professional Inspection

Cause: If these DIY methods do not resolve the issue, there may be more complex issues such as a faulty pump or boiler, or internal corrosion within the radiator.

Solution: Consult a qualified heating engineer or plumber for a thorough inspection. They can diagnose the problem accurately and recommend appropriate repairs or replacements.

Conclusion

Addressing a noisy radiator promptly not only restores peace and quiet to your home but also ensures efficient heating and prolongs the lifespan of your heating system. Regular maintenance, such as bleeding radiators and flushing the heating system, is key to preventing recurring noise issues. By understanding the causes and implementing these solutions, you can enjoy a comfortable and quiet home environment throughout the heating season.


3.5

Stop Penetrating Damp Coming Through Your Walls

0

Newsletter ▶ https://skill-builder.uk/signup

Stormdry Masonry Waterproofing Cream (5 Litre)
? https://amzn.to/46y4Jya

? Ask Skill Builder Playlist: https://www.youtube.com/playlist?list=PLvRh7uimDQfeARPDGL8GLsJ1Saxlx6scI

Penetrating damp is a common issue in buildings where moisture infiltrates through walls, floors, or ceilings from the outside environment. It often manifests as damp patches, water stains, or peeling paint, particularly during wet weather.

Roger looks at another damp problem featuring Skill Builder viewer Darren.

Here’s Darren’s message:

Hi Roger

I think it’s either penetrating damp or rising damp, but I’m at a loss how to solve it, either Stormdry like you have proved in many videos, or Dry Rod I think it’s called, that you have again demonstrated lots of times.

I need some guidance on how I actually go about solving the damp coming through to my garage.

It looks like it is coming in from the corners, the bottom of some of the bricks not all of them and at the front of the garage the house blocks some of the driving rain. Would like it if you can offer your expertise on this.

Regards

Darren


Causes of Penetrating Damp

Penetrating damp can arise from various sources:

  1. Roof Defects: Broken or missing tiles, damaged flashing, or blocked gutters can allow water to penetrate the roof space.
  2. Wall Cracks: Cracks in the exterior walls or deteriorating mortar joints can provide an entry point for rainwater.
  3. Faulty Windows and Doors: Poorly sealed windows and doors or damaged frames can let water seep into the building.
  4. Porous Brickwork: Over time, brickwork can become porous, allowing water to pass through and dampen the interior walls.
  5. Faulty Gutters and Downpipes: Blocked or leaking gutters and downpipes can overflow, directing water onto the walls and into the building.

Identifying Penetrating Damp

Recognizing the signs of penetrating damp early is crucial:

  1. Damp Patches: Persistent damp patches on walls, ceilings, or floors, especially after rain, are a clear indicator.
  2. Mold Growth: Black mold in localized areas often points to moisture penetration.
  3. Peeling Paint or Wallpaper: When the dampness seeps into interior walls, it can cause paint or wallpaper to peel or bubble.
  4. Musty Odor: A constant musty smell can be a sign of dampness and mold growth.
  5. Stains and Discoloration: Brown or yellow stains on walls and ceilings indicate water ingress.

Addressing Penetrating Damp

Effectively tackling penetrating damp involves several steps:

  1. Repairing Roof Defects: Inspect the roof for broken tiles, damaged flashing, and blocked gutters. Replace any damaged tiles, repair flashing, and ensure gutters are clear and functional.
  2. Sealing Cracks and Gaps: Fill in any cracks in the exterior walls with appropriate sealants or mortar. Ensure window and door frames are well-sealed and repair any damage.
  3. Waterproofing Brickwork: Apply a breathable water-repellent coating to the exterior brickwork. This prevents water penetration while allowing trapped moisture to escape.
  4. Maintaining Gutters and Downpipes: Regularly clean and inspect gutters and downpipes to ensure they are not leaking or blocked. Repair or replace any faulty sections.
  5. Improving Drainage: Ensure that the ground around the building slopes away from the foundation to prevent water pooling and seeping into the walls.

Preventive Measures

To prevent future issues with penetrating damp:

  1. Regular Inspections: Periodically inspect the exterior of your building for signs of wear and tear, particularly after severe weather.
  2. Timely Maintenance: Address minor repairs promptly to prevent them from developing into more significant issues.
  3. Proper Ventilation: Ensure good ventilation in your home to help manage moisture levels and prevent damp and mold growth.

Conclusion

Penetrating damp, if not addressed promptly, can lead to severe damage and health issues. By understanding its causes, recognizing the signs, and taking proactive measures to repair and prevent it, you can maintain a dry, healthy, and structurally sound building. Regular maintenance and timely repairs are key to protecting your home from the adverse effects of penetrating damp.

What’s This Mystery Space Hidden Under a Trapdoor?

0

Newsletter ▶ https://skill-builder.uk/signup

? Ask Skill Builder Playlist: https://www.youtube.com/playlist?list=PLvRh7uimDQfeARPDGL8GLsJ1Saxlx6scI

Roger looks at Kevin’s strange water-filled room under his garden shed.

How to Replace a Kitchen Sink Basket Strainer

0

Newsletter ▶ https://skill-builder.uk/signup

McAlpine BWSTSS-TOP Kitchen Sink Stainless Steel Strainer Plug
? https://amzn.to/46oMc7w

Roger shows you how to replace the basket strainer in your kitchen sink waste.

Kitchen Sink Basket Replacement

The kitchen sink basket, often referred to as the sink strainer or drain assembly, plays a crucial role in your kitchen plumbing. It catches food debris while allowing water to drain away, preventing clogs and ensuring smooth operation. Over time, these baskets can wear out, corrode, or become inefficient, necessitating a replacement. Replacing a kitchen sink basket is a relatively straightforward task that can be tackled with some basic tools and a little know-how. Here’s a step-by-step guide to help you through the process.

Why Replace a Kitchen Sink Basket?

There are several reasons you might need to replace your kitchen sink basket:

  1. Leaks: Over time, the seal around the sink basket can deteriorate, leading to leaks.
  2. Corrosion: Continuous exposure to water can cause the metal to corrode.
  3. Clogs: Persistent clogs and slow drainage might indicate that the basket is damaged or clogged beyond repair.
  4. Upgrades: You might want to upgrade to a more efficient or aesthetically pleasing model.

Tools and Materials You’ll Need

Before starting, gather the following tools and materials:

  • Adjustable wrench
  • Plumber’s putty
  • Screwdriver
  • Pliers
  • Bucket or towel
  • New sink basket assembly

Step-by-Step Replacement Guide

1. Prepare the Work Area

Clear the space under the sink to give yourself room to work. Place a bucket or towel underneath the sink to catch any water that might spill when you remove the old basket.

2. Remove the Old Sink Basket

  • Disconnect the Drain Pipe: Use an adjustable wrench to loosen the slip nut that connects the drain pipe to the sink basket. Once loose, pull the pipe away from the basket.
  • Loosen the Lock Nut: Underneath the sink, you’ll find a large lock nut securing the basket to the sink. Use pliers or an adjustable wrench to loosen and remove this nut. You might need to hold the basket from above to prevent it from spinning.
  • Remove the Basket: Once the lock nut is removed, push the old basket up and out from the sink. If it’s stuck, gently tap it with the handle of a screwdriver to loosen it.

3. Clean the Area

Before installing the new basket, clean the area around the sink drain opening. Remove any old plumber’s putty or debris to ensure a smooth and clean surface for the new basket.

4. Apply Plumber’s Putty

Roll a small amount of plumber’s putty into a rope-like shape and apply it around the underside of the new sink basket’s flange. This putty creates a watertight seal between the basket and the sink.

5. Install the New Sink Basket

  • Position the Basket: Insert the new basket into the sink drain opening, pressing it down firmly to spread the putty and create a seal.
  • Secure the Basket: From underneath the sink, slide the rubber gasket, friction ring, and lock nut onto the basket’s threaded tailpiece. Tighten the lock nut by hand until snug, then use pliers or an adjustable wrench to give it an extra quarter turn. Be careful not to overtighten, as this can damage the components or the sink.
  • Clean Excess Putty: Wipe away any excess plumber’s putty that squeezes out from around the flange on the sink surface.

6. Reconnect the Drain Pipe

Reconnect the drain pipe to the new sink basket’s tailpiece and tighten the slip nut using your adjustable wrench. Ensure it’s snug but not overtightened, to avoid stripping the threads.

Test for Leaks

Once everything is reconnected, run water into the sink to test for leaks. If you notice any dripping, gently tighten the connections as needed. Ensure that the basket is securely in place and that all connections are dry.

Maintenance Tips

  • Regular Cleaning: Periodically clean the sink basket to prevent buildup of debris and ensure efficient drainage.
  • Inspect Seals: Occasionally check the seal around the sink basket for signs of wear or leaks.
  • Avoid Harsh Chemicals: Use gentle cleaning agents to prolong the life of your sink basket and prevent corrosion.

Conclusion

Replacing a kitchen sink basket is a practical and cost-effective way to maintain your kitchen’s plumbing system. By following these steps and using the right tools and materials, you can easily replace a worn-out or leaking sink basket, ensuring a leak-free and efficient kitchen sink. Regular maintenance and timely replacements will keep your kitchen running smoothly and prevent potential water damage.

On a Lonely Beach A Tradesman’s Tale Unfolds

0

Newsletter ▶ https://skill-builder.uk/signup

Roger and his dear old friend John Walls talk about their lives and growing up in the boomer generation.

Heat Pumps ~ Get Your Facts Straight!

0

Newsletter ▶ https://skill-builder.uk/signup

? Heat Pump Playlist: https://www.youtube.com/playlist?list=PLvRh7uimDQffZJv7Jxzn7Kj1GKxlGrr4j

Roger looks at how heat pumps are versatile systems for heating and cooling, offering energy-efficient alternatives to traditional HVAC systems. They operate by transferring heat, rather than generating it, utilizing a few distinct types:

Air-Source Heat Pumps: The most common type, air-source heat pumps extract heat from outdoor air to heat homes in winter and reverse the process to cool in summer.

Ground-Source Heat Pumps: These utilize the earth’s stable temperature as a heat source or sink, offering high efficiency, particularly in extreme climates.

Water-Source Heat Pumps: These draw heat from a nearby water source, like a lake or well, offering efficient heating and cooling, especially in areas with abundant water resources.

Absorption Heat Pumps: Powered by natural gas, solar energy, or geothermal heated water, these are an alternative in areas where electricity is costly or less available.

Each type offers unique benefits, catering to different environmental and energy requirements, making heat pumps a flexible solution for diverse heating and cooling needs.