Home Blog Page 16

CHMM Controversy – Government Scraps Boiler Tax

0

Newsletter â–¶ https://skill-builder.uk/signup â—€

https://youtu.be/FOqBNmcFMBQ

Roger looks at the CHMM scheme controversy

The UK’s ‘Clean Heat Market Mechanism’ (CHMM), a policy initiative to reduce the country’s carbon footprint, has faced significant criticism for its implementation and, particularly, its strategy of fining gas boiler manufacturers. This approach accelerated the transition from traditional gas boilers to greener heating solutions. However, the mechanism has stumbled, primarily due to its push towards air source heat pumps (ASHPs) as the primary alternative, a solution that has proven unsuitable for many households.

One of the critical shortcomings of the CHMM is its underestimation of the challenges associated with the widespread adoption of ASHPs. While these pumps are celebrated for their efficiency and lower carbon emissions, they are not a one-size-fits-all solution. Many homes in the UK are not insulated adequately to make full use of ASHP technology. This inadequacy leads to inefficient heating and, paradoxically, increased energy use in some cases. Moreover, the initial installation cost of ASHPs is prohibitively high for a significant portion of the population, further discouraging the shift away from gas boilers.

The policy’s punitive approach towards gas boiler manufacturers has also backfired. Instead of fostering innovation and encouraging the development of more affordable and efficient green heating technologies, it has merely added financial strain. Manufacturers have passed these fines onto consumers, inflating the price of gas boilers and making the transition to green alternatives even less accessible.

Furthermore, the government’s one-track push for ASHPs overlooked the necessity for a diversified strategy that includes a range of sustainable heating technologies. This narrow focus has stifled exploring and adopting other potentially more suitable green heating solutions, such as biomass boilers or solar thermal systems, which could be more appropriate for certain homes or regions.

In conclusion, while the goal of the CHMM to reduce carbon emissions by promoting cleaner heating methods is commendable, its execution has been flawed. The focus on penalising gas boiler manufacturers and the narrow promotion of air source heat pumps have been ineffective and alienated the public and industry stakeholders.

To truly advance towards a sustainable heating future, the UK government needs to reassess its approach, consider the diverse needs of its population, and promote a range of suitable green heating technologies. This strategy should be accompanied by supportive measures, such as subsidies for insulation and green heating installations, to make the transition feasible and fair for all.

Brick Wall Cracks: Investigating Common Causes

0

Newsletter â–¶ https://skill-builder.uk/signup â—€

? Ask Skill Builder Playlist: https://www.youtube.com/playlist?list=PLvRh7uimDQfeARPDGL8GLsJ1Saxlx6scI

Roger is back with more cracked brickwork to examine.

______________________________

WHY DO BRICK WALL CRACKS APPEAR?

Brick walls are admired for their aesthetic appeal and durability, often serving as a sturdy façade for buildings for decades. The timeless beauty of brick, coupled with its robustness, makes it a favoured choice for construction. However, even the strongest brick walls are not immune to cracking, a problem that can arise from various causes, including the use of a mortar mix that is too firm. Understanding why brick walls crack helps prevent damage and ensures effective repairs, thereby maintaining the structural integrity and visual charm of the building.

One of the primary reasons behind brick wall cracks is the natural settling or shifting of a building’s foundation. Over time, buildings settle into the ground, which can cause stress on the brick walls, leading to cracks. This settling is a gradual process, often influenced by the soil conditions and the weight of the structure. For example, clay soils can expand and contract significantly with moisture changes, causing foundations to move. Similarly, the sheer weight of a large building can compress the soil beneath, leading to gradual settlement.

Environmental factors, such as extreme temperature changes, also play a significant role in the development of cracks in brick walls. As temperatures fluctuate, bricks expand and contract, creating stress that can eventually lead to cracks. This is particularly problematic in climates with wide temperature variations between seasons or even between day and night. When the mortar is not flexible enough to absorb these movements, it can crack or separate from the bricks, leading to visible damage.

Another contributing factor to brick wall cracks is related to the quality and composition of the mortar mix used during construction. Mortar acts as a bonding agent between bricks, providing structural integrity and some degree of flexibility. However, if the mortar mix is too firm, it lacks the necessary flexibility to accommodate the slight movements of bricks caused by thermal expansion, moisture changes, or settling. This rigidity can lead to cracks as the bricks shift, unable to move without breaking the bond or causing the mortar itself to crack.

Moisture infiltration is another significant culprit in the formation of cracks in brick walls. When water penetrates the brickwork, it can cause both the bricks and mortar to expand, leading to stress and eventual cracking. Poor drainage around the building exacerbates this problem by allowing water to pool near the walls, increasing the likelihood of moisture penetrating the bricks. When water enters the brickwork, it can freeze and expand in cold weather, pushing the bricks apart and creating cracks. This freeze-thaw cycle is particularly damaging in climates with significant temperature variations.

In addition to these factors, other construction-related issues can contribute to brick wall cracks. For example, inadequate support for brick arches or lintels can result in sagging and subsequent cracking. The use of inferior-quality bricks or improper bricklaying techniques can also weaken the overall structure, making it more susceptible to cracking.

Addressing brick wall cracks requires a comprehensive approach. One key aspect is using the correct mortar mix—one that balances strength and flexibility. Lime-based mortars, for instance, offer greater flexibility compared to modern cement-based mortars, allowing for better accommodation of brick movements. Proper construction techniques, such as ensuring adequate support for structural elements and using high-quality bricks, are also crucial in preventing cracks.

Adequate drainage around the building is essential to prevent moisture infiltration. This involves directing water away from the foundation through proper grading and the use of gutter systems. Regular maintenance, including repointing deteriorated mortar joints and sealing cracks, helps preserve the integrity of brick walls and prevents minor issues from escalating into major problems.

By understanding and addressing these underlying causes, homeowners and builders can help ensure the longevity and beauty of brick structures. Taking proactive measures to maintain brick walls not only enhances their appearance but also extends their lifespan, preserving their structural integrity for future generations. Regular inspections and timely repairs are essential for mitigating the factors that contribute to brick wall cracks, ensuring these iconic architectural elements continue to stand the test of time and remain durable.

Another common cause of cracking in brick walls is related to the mortar mix used during construction. Mortar acts as a bonding agent between bricks, providing structural integrity and flexibility. However, if the mortar mix is too firm, it lacks the flexibility to accommodate the slight movements of bricks caused by thermal expansion, moisture changes, or settling. This rigidity can lead to cracks as the bricks shift, unable to move without breaking the bond or the mortar itself cracking.

Moisture infiltration is another significant culprit, causing expansion in the bricks and mortar, which can lead to cracks over time. Poor drainage around the building exacerbates this problem by allowing water to pool near the walls, increasing the likelihood of moisture penetrating the bricks. When water enters the brickwork, it can freeze and expand in cold weather, pushing the bricks apart and creating cracks. This freeze-thaw cycle is particularly damaging in climates with significant temperature variations.

In addition to these factors, other construction-related issues can contribute to brick wall cracks. For example, inadequate support for brick arches or lintels can result in sagging and subsequent cracking. The use of inferior-quality bricks or improper bricklaying techniques can also weaken the overall structure, making it more susceptible to cracking.

Addressing brick wall cracks requires a comprehensive approach. One key aspect is using the correct mortar mix—one that balances strength and flexibility. Lime-based mortars, for instance, offer greater flexibility compared to modern cement-based mortars, allowing for better accommodation of brick movements. Proper construction techniques, such as ensuring adequate support for structural elements and using high-quality bricks, are also crucial in preventing brick wall cracks.

Adequate drainage around the building is essential to prevent moisture infiltration. This involves directing water away from the foundation through proper grading and the use of gutter systems. Regular maintenance, including repointing deteriorated mortar joints and sealing cracks, helps preserve the integrity of brick walls and prevents minor issues from escalating into major problems.

By understanding and addressing these underlying causes, homeowners and builders can help ensure the longevity and beauty of brick structures. Taking proactive measures to maintain brick walls not only enhances their appearance but also extends their lifespan, preserving their structural integrity for future generations. Regular inspections and timely repairs are essential for mitigating the factors that contribute to brick wall cracks, ensuring these iconic architectural elements continue to stand the test of time and remain durable.

How Much CO2 Does a Climate Change Conference Produce?

0

Newsletter â–¶ https://skill-builder.uk/signup â—€

The United Nations Climate Change Conference is riddled with hypocrisy

The Paradox of Climate Commitment: A Closer Look at the United Nations Climate Change Conference

The United Nations Climate Change Conference (UNCCC), often celebrated as a beacon of global environmental action, paradoxically frequently becomes a stage for an unsettling display of hypocrisy. Delegates from around the world converge to discuss strategies to combat climate change, with the event itself intended to catalyse urgent action towards reducing greenhouse gas emissions. Yet, the arrival of many of these delegates in private jets—symbols of carbon excess—casts a shadow over the proceedings.

The irony is stark and troubling. The conference, which aims to address the critical need to curb greenhouse gas emissions, sees its purpose partially undermined by the carbon footprint of its attendees. Private jets emit significantly more carbon per passenger compared to commercial flights, amplifying the environmental impact. This contradiction between the conference’s goals and the behavior of its participants raises serious questions about the sincerity and commitment of some attendees toward the cause they publicly champion.

The use of private jets by delegates is more than a mere logistical detail; it represents a broader disconnect between rhetoric and action. The substantial emissions generated by these flights seem to stand in direct opposition to the very essence of the Climate Change Conferences mission. This glaring incongruity highlights a concerning aspect of the global climate conversation: the apparent disparity between what is preached and what is practiced.

While the Climate change conference serves as a critical platform for forging international agreements and promoting sustainable policies, the sight of private jets lined up at airports near the conference venue sends a contradictory message. It suggests that while climate change is a global priority, the urgency of the message is not being fully internalised by those in positions of power. This spectacle of private jet arrivals not only undermines the credibility of the conference but also weakens the moral authority of its messages.

Critics argue that this pattern of behavior exemplifies a broader issue within international climate policy. They contend that true leadership in the fight against climate change requires leading by example, which includes making more sustainable choices in all aspects of life, including travel. The reliance on private jets by those advocating for climate action suggests a level of detachment from the realities faced by the average person and the sacrifices necessary to achieve meaningful environmental progress.

Moreover, this contradiction risks alienating the public and grassroots activists, who often make significant personal sacrifices to attend such conferences, frequently opting for lower-carbon modes of travel. The visible hypocrisy can erode trust and reduce the perceived legitimacy of the efforts being made at these high-level gatherings. It creates a perception that climate action is something to be discussed and debated by elites, while the broader populace bears the brunt of the required changes.

To restore credibility and reinforce the sincerity of the climate movement, it is imperative that those attending such conferences align their actions with their advocacy. This means considering the environmental impact of their travel choices and seeking alternatives that reflect the values they promote. By doing so, they can demonstrate genuine commitment to the cause and inspire others to follow suit.

In conclusion, the United Nations Climate Change Conference, a critical forum for addressing global climate issues, faces a significant credibility challenge when its delegates arrive in private jets. This practice not only contradicts the conference’s mission but also raises questions about the authenticity of the participants’ commitment to combating climate change. For the UNCCC to truly lead by example, it must encourage its attendees to adopt more sustainable travel practices, thereby aligning their actions with their advocacy and reinforcing the urgency and importance of the climate crisis.

This contradiction is not merely symbolic. It represents a deeper issue within the fight against climate change – the gap between rhetoric and action. While the United Nations Climate Change Conference brings together world leaders, scientists, and activists to negotiate and set targets for reducing emissions, the actions of some attendees tell a different story. It highlights a concerning trend where environmental responsibility is preached but not practised.

Moreover, this practice feeds into a broader narrative of elitism and inaccessibility that plagues climate change discussions. The extravagant carbon footprint of private jet travel by a few casts a shadow over the efforts of many genuinely committed to finding solutions. It perpetuates the idea that climate change is a problem to be solved by the masses, not by those in positions of power and influence.

In conclusion, the use of private jets by some attendees of the climate change conference serves as a potent symbol of the challenges facing global climate action. It underscores the need for genuine commitment and consistency in environmental stewardship, especially by those who lead the conversation. As the world grapples with the escalating climate crisis, actions must align with words, ensuring that the fight against climate change is inclusive and authentic.

More about The United Nations Climate Change Conference

The Ultimate Laser Engraver & Cutter – xTool P2

0

See the xTool Winter Flash Sale Deals.
xTool P2: https://www.xtool.com/?ref=kzG6BNA4sWTh-D&utm_medium=5306&utm_source=influencer

Trade in any open diode machine for an enclosed xTool and get up to $500 off. Plus, get a free Fire Safety Set for your peace of mind.
xTool Trade-in: https://www.xtool.com/?ref=kzG6BNA4sWTh-D&utm_medium=5306&utm_source=influencer

xTool P2 Versatile and Smart Desktop 55W CO2 Laser Cutter

The XTool P2 Laser Engraver is an advanced laser cutting and engraving machine, designed to cater to the needs of both professionals and hobbyists. It is renowned for its versatility, precision, and user-friendly features, making it an essential tool for a wide range of creative and practical applications.

One of the standout attributes of the XTool P2 is its remarkable versatility. Equipped with a powerful laser, this machine can engrave on a broad array of materials, including wood, leather, acrylic, and even metal. This capability allows users to personalize various items such as jewellery, signs, home décor, and more, offering a vast potential for creativity and customisation.

Precision and accuracy are key features of the XTool P2 laser engraver. It utilizes a diode laser that provides a fine focus for intricate and detailed work, ensuring that engravings are crisp and clear every time. The machine’s adjustable speed and power settings further enhance its precision, allowing users to customize the engraving process to suit different materials and design requirements. This flexibility ensures high-quality results across a variety of projects.

Ease of use is another significant advantage of the XTool P2. It is designed with user-friendly software that is compatible with various operating systems, making it straightforward to design and execute projects. The software supports multiple file formats, giving users the flexibility to work with a wide range of design options. This feature makes the machine accessible to both beginners and experienced users, simplifying the process of creating detailed and customised engravings.

Safety is a paramount consideration in the design of the XTool P2. The machine includes essential safety features such as an emergency stop button and a protective cover to shield users from laser exposure. These features ensure that the XTool P2 laser engraver can be operated safely in a variety of environments, providing peace of mind for users.

The robust construction and durability of the XTool P2 laser engraver are also notable. Built to withstand regular use, the machine is suitable for different environments, from busy workshops to home studios. Its compact size makes it ideal for small spaces, without compromising on the quality and scale of projects it can handle. This durability and practical design ensure that the XTool P2 can meet the demands of frequent use, maintaining its performance over time.

Overall, the XTool P2 Laser Engraver is a comprehensive and high-quality tool that combines superior engraving capabilities with ease of use and safety. It stands out as an ideal choice for both beginners and experienced users in the field of laser engraving. Whether used for professional projects or personal hobbies, the XTool P2 offers a reliable and versatile solution for all engraving needs. Its combination of advanced features and user-friendly design makes it a valuable addition to any creative toolkit, enabling users to achieve precise and professional results in their engraving endeavours.

________________________________

Materials You Should Never Use With A Laser Engraver

1. PVC
PVC stands for Poly Vinyl Chloride. It is a polymer that produces chlorine gas when exposed to a laser. First, the gas is irritating, which causes irritation and burns in your eyes, nose, skin, and respiratory tract. Secondly, the nature of the gas is corrosive. It can harm the machine’s frame, which is made of metal. It can also harm the laser and other parts of the machine. Thus, if you want to use the machine for a long time and keep yourself safe, you should never cut or engrave PVC.

2. ABS
The second prohibited laser-cutting material is Acrylonitrile butadiene styrene(ABS). When cut through with a laser, it produces cyanide gas, which is a toxic gas that can lead to death if it is in a high concentration.

3. Polycarbonate
Polycarbonate tends to discolour when heated by the laser. Besides, it’s prone to catching fire.

4. Polystyrene and Polypropylene Foam
These are two types of foams, and both are not suitable for laser cutting. Firstly, they catch fire quickly, and when you try to cut them using a laser machine, they only melt; no cutting at all.

5. HDPE
You cannot cut it with a laser because it melts and gets gooey when exposed to a laser. Secondly, it can also catch fire.

6. Coated Carbon Fiber
If the carbon fibre is coated, then its coating can release various toxic gasses when laser cut. These fumes are very harmful and can lead to respiratory diseases.

https://skill-builder.uk/laser-cutting-engraving-with-the-cr-laser-falcon

Removing a Radiator for Decorating ~ Trade Top Tip

0

Newsletter â–¶ https://skill-builder.uk/signup â—€

Roger has a quick tip for anyone removing a radiator for decorating

Removing a radiator may seem like a daunting task, but with the right preparation and approach, it can be accomplished efficiently. Whether you’re renovating a room, replacing an old radiator, or simply performing maintenance, knowing how to safely remove a radiator is crucial to avoid potential water leaks and damage.

Removing A Radiator – Preparation

Before removing a radiator, gather the necessary tools and materials:

  • Adjustable wrench
  • Towels or cloths
  • Bucket or tray
  • Pipe cutter or radiator valve key (if needed)
  • Sealant or caps for pipe ends

Steps to Remove a Radiator:

  1. Turn off the heating system: Shut off the heating system and allow the radiator to cool completely. This prevents hot water from leaking out when you disconnect the radiator.
  2. Prepare for water drainage: Place towels or cloths under the radiator and have a bucket or tray ready to catch any water that may spill when disconnecting pipes.
  3. Release pressure: Use the radiator valve key to release any pressure in the radiator. Place a tray underneath to catch any residual water.
  4. Close radiator valves: Use an adjustable wrench to close both the lockshield valve (the one with a plastic cap) and the thermostatic valve (the one with a control knob).
  5. Disconnect pipes: Use an adjustable wrench to loosen the nuts connecting the radiator valves to the pipes. Place the bucket or tray underneath to catch any remaining water as you disconnect.
  6. Remove the radiator: Lift the radiator carefully off its brackets. It may still contain residual water, so handle it with care to avoid spills.
  7. Cap or seal pipes: Once the radiator is removed, cap or seal the exposed pipes with sealant or caps to prevent leaks and maintain the integrity of your heating system.

Tips for Success:

  • Label connections: If you plan to reinstall the same radiator or a new one in the future, label the pipes and valves to ensure correct reinstallation.
  • Work with a partner: Radiators can be heavy and awkward to handle alone. Enlist the help of a partner to lift and maneuver it safely.
  • Inspect for damage: Check the radiator and pipes for any signs of corrosion or damage while they are accessible. Address any issues before reinstalling or replacing.

Safety Considerations:

  • Protective gear: Wear gloves and eye protection to safeguard against sharp edges and potential spills.
  • Electrical safety: If electrically powered, ensure the power is completely disconnected before beginning.

Conclusion

Removing a radiator requires careful preparation and attention to detail to avoid water damage and ensure the safe disconnection of heating pipes. By following these steps and safety precautions, you can effectively remove a radiator for maintenance, renovation, or replacement purposes. Always consult professional advice if unsure, especially with complex heating systems or unfamiliar procedures. With the right approach, you can successfully manage your home heating maintenance with confidence.

Banks Buying Homes ~ Is This Detrimental For You?

0

Newsletter â–¶ https://skill-builder.uk/signup â—€

Banks Buying Homes – A Novel Trend, But What Will It Mean?

In recent years, the UK housing market has witnessed a novel and transformative trend: banks increasingly showing interest in the property rental sector. This significant shift has the potential to reshape the housing landscape in the UK, with far-reaching implications for renters, homeowners, and the economy at large.

Traditionally, banks have served as the gatekeepers of mortgages, facilitating individuals’ ability to purchase homes by providing the necessary financial backing. However, their recent move into property management and the rental market, signifies a new role as direct stakeholders in the housing sector. This transition, where banks are now purchasing homes for rental purposes, raises critical questions about the future of housing affordability and availability in the UK.

One potential effect of banks buying homes and entering the rental market, is the introduction of increased professionalism and standardisation. Banks, with their substantial financial resources and regulatory oversight, are likely to bring a more systematic and efficient approach to property management. This could lead to significant improvements in the quality of rental accommodations, ensuring better maintenance, more reliable services, and quicker resolution of tenant issues. Renters might benefit from enhanced living conditions and a more predictable rental experience.

However, there are considerable concerns about the implications for housing prices and rental costs. Banks, driven by profit motives and the need to provide returns to shareholders, might prioritise higher rental yields. This could lead to an increase in rental costs, exacerbating the issue of housing affordability in the UK. In major cities like London, where rental prices are already steep, this trend could make it even more challenging for tenants to find affordable housing options.

Moreover, the involvement of banks in property rentals might significantly impact the availability of houses for purchase. If banks begin to hold a substantial portion of properties for rental purposes, this could reduce the number of homes available for sale on the open market. Consequently, house prices could be driven up due to reduced supply, making homeownership even more elusive for the average person, particularly for first-time buyers. This shift could fundamentally alter the dynamics of the housing market, potentially increasing the divide between renters and homeowners.

Another critical aspect to consider is the effect on small landlords. Banks buying homes and entering the rental market could create stiffer competition, potentially pushing out individual landlords who have traditionally played a significant role in providing rental housing. This shift might lead to a less diverse rental market, with large corporate entities holding more sway and control. The presence of big players like banks could standardize practices, but also reduce the personal touch and flexibility that smaller landlords often provide.

While banks buying homes in the UK rental market could bring particular efficiencies and improvements in property management, it also raises significant concerns about affordability, availability, and market diversity. The professionalisation of the rental market might lead to better living conditions for tenants, but the potential increase in rental prices and the reduction in properties available for purchase could exacerbate existing challenges in the housing market.

As the Banks Buying Homes trend evolves, it will be crucial for policymakers and regulatory bodies to closely monitor and address potential challenges to ensure a balanced and equitable housing market. Measures might be needed to prevent excessive rent increases, protect the interests of small landlords, and ensure that aspiring homeowners still have ample opportunities to purchase properties. By carefully managing the transition and mitigating potential negative impacts, the UK can strive to create a housing market that benefits all stakeholders, fostering stability and sustainability in the long term.


Banks Buying Homes – The Impact on First Time Buyers

Small Kitchen Design on a Budget: Affordable DIY Upgrades

0

DIY Kitchens – Revolutionising beautiful kitchens online
https://diy-kitchens.com

See how their kitchens are made:
https://diy-kitchens.com/about-diy-kitchens

See how DIY Kitchens compare to Wren, Howdens, Magnet, Wickes, B&Q and Ikea.
https://diy-kitchens.com/about-diy-kitchens/price-and-quality-comparison

https://youtu.be/GEb0xdY4leQ

___________________________

SMALL KITCHEN DESIGN

Designing a small kitchen involves meticulous planning and innovative use of available space to ensure both functionality and aesthetics. Here are some critical considerations to keep in mind:

Maximize Storage: Efficient storage solutions are indispensable in a small kitchen design. To utilize every inch of space effectively, consider installing cabinets that extend all the way up to the ceiling. These tall cabinets can provide ample storage for items that are not used daily but need to be accessible. Additionally, deep drawers can be an excellent option for storing larger items such as pots and pans, allowing easy access and organization.

To further optimize space, incorporate specialized storage solutions like pull-out shelves, which allow you to reach items stored in the back of the cabinet easily. Corner cabinets can be equipped with lazy Susans, which rotate to bring items to the front, making use of awkward corner spaces that are often underutilized. These creative storage solutions can significantly enhance the functionality of your small kitchen by ensuring that every nook and cranny is put to good use.

In summary, thoughtful storage planning is crucial in a small kitchen. By maximizing vertical space with high cabinets and using innovative storage solutions like deep drawers, pull-out shelves, and lazy Susans, you can create an efficient and organized kitchen that makes the most of its limited space.

Streamline Appliances: Select appliances that fit the scale of your small kitchen design. Compact or multi-functional appliances, such as a combination microwave and convection oven, can save valuable space. Built-in appliances can also help maintain a sleek and uncluttered look.

Work Triangle Efficiency: Focus on the arrangement of the sink, refrigerator, and stove, known as the work triangle. In a small kitchen, this triangle should be compact to minimize movement and enhance efficiency.

Light and Color: Light colors can make the space feel larger and more open. Glossy finishes and reflective surfaces can further enhance the sense of space. Good lighting is crucial; consider under-cabinet lights for task areas and bright, ambient lighting for the overall space.

Minimalist Design: A clutter-free, minimalist design can make a small kitchen feel more spacious. Avoid heavy ornamentation. Opt for sleek, clean lines and simple hardware to create a sense of order and openness.

Multipurpose Surfaces: Incorporate multifunctional surfaces, such as a fold-down table or a kitchen island on wheels, which can be used for dining, prep work, or additional storage.

Ventilation: Effective ventilation is vital in a small kitchen where odors and heat can build up quickly. A quality range hood or a strategically placed window can help maintain a comfortable environment.

Remember, the key to a successful small kitchen design is balancing functionality with aesthetics. Every element should serve a purpose while contributing to an overall sense of harmony and openness.

___________________________

ABOUT DIY KITCHENS

Established in 1982 as a family business, it has been trading online for the past 21 years.

They are the UK’s largest online supplier of cheap kitchen units with thousands of happy customers.

They have 12 state-of-the-art facilities across Yorkshire that cover over 540,000 sq ft, many of which are where their kitchen cupboards are manufactured.

They’re committed to re-investing in the facilities to cope with increased customer demands.

They offer over 50,000 quality branded products, including kitchen units, kitchen doors, appliances, sinks & taps, kitchen worktops, handles, kitchen accessories & Innova Kitchens.

___________________________

CHAPTERS

00:00 DIY Kitchens
00:21 Old Kitchen
01:20 Planner App
01:57 Dry Assembled
03:51 Hanging Cupboards
06:50 Sink Plumbing
08:30 Cutting Worktop
10:48 Final Assembly
13:09 Finished Job
___________________________

Special thanks go to Ivan Coverdale

Ivan Coverdale Property Maintenance
Ayr, Scotland
Phone: 07871 240604

Home Furnishing Ideas

The Damp Wall Mystery ~ Can You Solve It?

0

Newsletter â–¶ https://skill-builder.uk/signup â—€

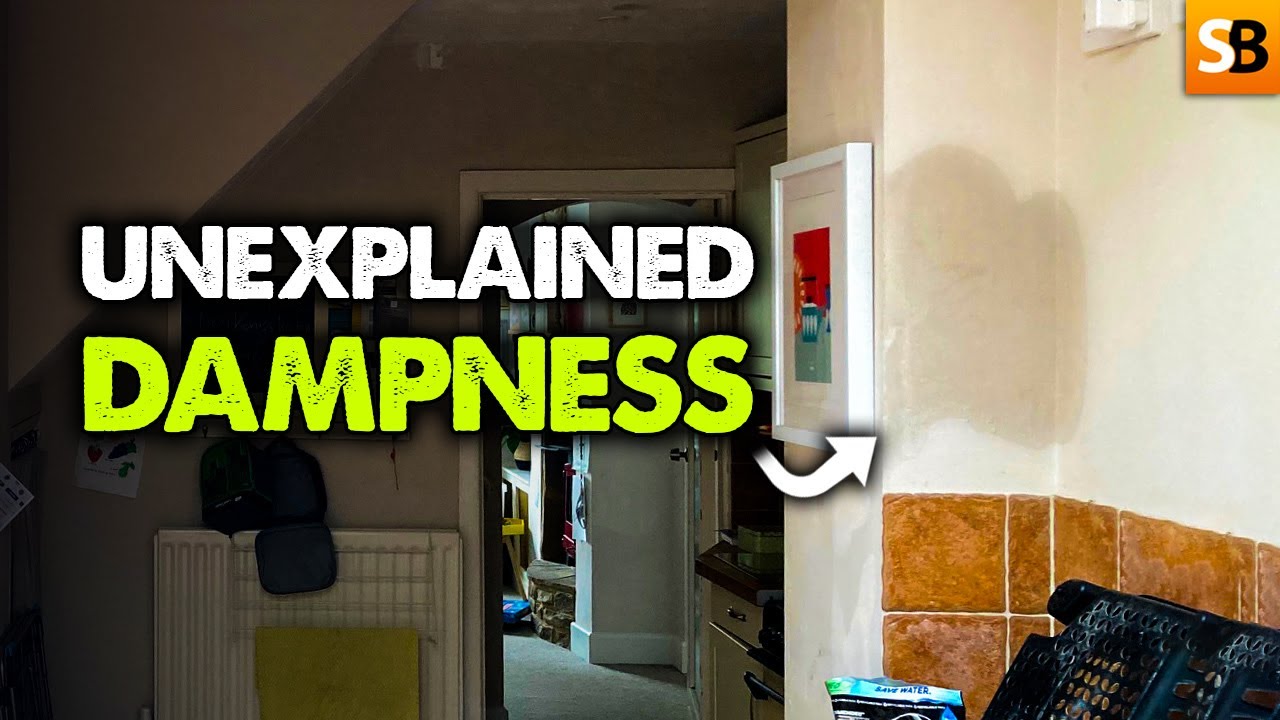
Karim has a damp wall and needs Roger’s support

Here’s his message:

Hi Roger, please see the attached photos/video.

The flooring in my mum’s room is SPC (vinyl, with stone backing 6mm), but other parts of the house have real wood flooring.

Let me know if you want more videos/photos.

Thanks, Karim

Ask Skillbuilder Playlist

Understanding the Causes of Damp Walls

Damp walls are a common issue that can lead to various problems in homes and buildings, from structural damage to health concerns. Identifying the root causes of dampness is crucial for effective remediation and prevention. Here are the primary causes of damp walls:

1. Condensation

Condensation occurs when moist air comes into contact with a cooler surface, such as a wall, causing the moisture in the air to condense into water droplets. This is often seen in areas with poor ventilation, such as bathrooms, kitchens, and basements. Factors contributing to condensation include:

  • Inadequate Ventilation: Lack of airflow prevents moist air from being expelled, leading to accumulation on walls.
  • Temperature Differences: Significant temperature differences between the indoor air and the wall surface can exacerbate condensation.
  • High Humidity Levels: Activities like cooking, showering, and drying clothes indoors increase indoor humidity, promoting condensation.

2. Rising Damp

Rising damp is the upward movement of moisture from the ground through porous building materials like bricks and mortar. It typically affects the lower parts of walls and can cause paint to peel, plaster to bubble, and salt deposits to form. Key causes include:

  • Absence or Failure of Damp-Proof Course (DPC): A DPC is a barrier designed to prevent ground moisture from rising into walls. If it’s missing, damaged, or improperly installed, rising damp can occur.
  • Soil Conditions: Highly absorbent soils can retain more moisture, increasing the risk of rising damp in nearby structures.

3. Penetrating Damp

Penetrating damp is caused by water entering a building through external walls, roofs, or windows. Unlike rising damp, it can affect any part of a wall and often results from issues such as:

  • Poor Exterior Maintenance: Cracked or damaged walls, missing roof tiles, and deteriorated pointing can allow water to penetrate the building.
  • Defective Guttering and Downpipes: Blocked, broken, or improperly installed gutters and downpipes can direct water onto walls, leading to dampness.
  • Leaking Roofs and Windows: Gaps or leaks in roofs and around windows can let rainwater seep into walls.

4. Plumbing Issues

Leaks from internal plumbing can cause localized damp patches on walls. Common sources of plumbing-related damp include:

  • Leaking Pipes: Bursts or slow leaks in water pipes within walls can lead to dampness.
  • Faulty Appliances: Malfunctioning appliances like dishwashers or washing machines can leak water that soaks into walls.

5. Construction Defects

Poor construction practices can lead to damp walls. These defects may include:

  • Inadequate Waterproofing: Insufficient waterproofing during construction can allow moisture to penetrate walls.
  • Improperly Installed Insulation: Insulation that is poorly installed or lacks a moisture barrier can trap moisture within walls.

6. Environmental Factors

Environmental conditions can also contribute to damp walls, such as:

  • Proximity to Water Bodies: Buildings near rivers, lakes, or coasts may experience higher humidity and increased risk of dampness.
  • Severe Weather: Prolonged heavy rain, storms, and flooding can overwhelm a building’s defenses, leading to damp walls.

Consequences of Damp Walls

Damp walls can lead to several serious issues, including:

  • Structural Damage: Prolonged dampness can weaken building materials, leading to structural instability.
  • Health Risks: Damp environments promote mold growth, which can cause respiratory issues, allergies, and other health problems.
  • Aesthetic Problems: Damp can cause unsightly stains, peeling paint, and damaged plaster, affecting the appearance of interiors.

Prevention and Remediation

Preventing and addressing damp walls requires a combination of good building practices, regular maintenance, and timely repairs:

  • Install and Maintain a Damp-Proof Course: Ensure a proper DPC is in place and repair any damages promptly.
  • Improve Ventilation: Use extractor fans, dehumidifiers, and proper ventilation systems to reduce humidity levels.
  • Maintain the Building Envelope: Regularly inspect and repair roofs, gutters, downpipes, and external walls to prevent water ingress.
  • Address Plumbing Issues: Fix leaks and maintain plumbing systems to prevent internal water damage.
  • Use Waterproofing Solutions: Apply waterproof coatings and sealants to vulnerable areas to prevent moisture penetration.

Understanding the causes of damp walls and taking proactive measures can help protect your property from the damaging effects of moisture. Regular inspections, maintenance, and timely interventions are key to keeping your walls dry and your building healthy.

Waste Disposal – Why Do We Put Up With This Rubbish?

0

Newsletter â–¶ https://skill-builder.uk/signup â—€

The Growing Challenge of Waste Disposal in the UK: A Precursor to Fly-tipping

In the United Kingdom, the escalating difficulty of disposing of waste materials has become a significant concern, with the ominous shadow of fly-tipping looming ever more significant. As the country grapples with stringent regulations, limited access to recycling centres, and escalating disposal costs, responsibly getting rid of waste has become arduous for many citizens.

The UK has seen a substantial increase in waste production over the years, yet the infrastructure for its management has not kept pace. The resulting bottleneck has led to overburdened waste disposal sites and a complex web of bureaucratic procedures that can discourage even the most environmentally conscious individual. For households and businesses alike, the time, cost, and effort required to dispose of waste correctly can be prohibitive, leading some to resort to illegal dumping.

Fly-tipping, the illicit waste disposal on land not licensed for such purposes, has surged. It’s a blight that scars urban backalleys and rural landscapes alike. The environmental consequences are profound—contaminated soil, waterways choked with debris and harmed wildlife are just a few of the repercussions. Moreover, it represents a significant economic burden, with local councils spending millions annually to clean up dumped waste, a cost ultimately borne by taxpayers.

The rise in fly-tipping incidents correlates strongly with the tightening of regulations around waste disposal. Permits are now required to dispose of certain types of waste, and many local recycling centres have reduced hours or closed altogether due to budget cuts. Additionally, the increased fees for disposing of bulkier items have left many feeling that fly-tipping is a more accessible albeit illegal alternative.

This challenge is compounded by a lack of awareness. Many are unaware of the proper disposal channels, leading to unintentional non-compliance. Education is a vital component in the fight against waste mismanagement. It’s crucial to inform the public about the correct disposal methods and the long-term detriments of fly-tipping.

The government and local authorities are attempting to combat the issue through various measures. Surveillance has increased, with harsher penalties for those caught fly-tipping. However, without addressing the root cause—accessibility to waste disposal facilities and the complexity of the disposal process—these punitive measures may not be enough to deter the determined or desperate individual.

Community action has increased, with local groups organizing litter-picking events and raising awareness about waste disposal. Such initiatives are commendable and foster a collective responsibility towards our environment. Yet, the systemic issues of waste management infrastructure need national attention.

The UK faces a critical juncture in its waste management policies. The difficulty in disposing of waste materials strains the environment and the public purse and cultivates the illegal and harmful practice of fly-tipping. A coordinated effort that simplifies the disposal process enhances accessibility and prioritizes environmental education is imperative. Only by tackling these core issues can we hope to see a decline in fly-tipping and a move towards a cleaner, greener UK.

Waste Carriers Guidance

Moving a Door Frame Over ~ Simple DIY Guide

0

Newsletter â–¶ https://skill-builder.uk/signup â—€

Special thanks go to Ivan Coverdale

Ivan Coverdale Property Maintenance
Ayr, Scotland
Phone: 07871 240604

________________________

Moving a door frame in an old Victorian house

Renovating and moving a door frame in an older building can be particularly challenging due to the age and distinctive construction style of such structures. The architectural elements and materials used in older buildings often require special care and attention to ensure that the renovation is done correctly and preserves the building’s integrity. The process involves multiple detailed steps, each requiring precision and proper technique.

Tools and Materials Needed
• Safety gear (gloves, goggles, dust mask)
• Brick chisel and hammer
• Reciprocating saw or angle grinder
• Spirit level and measuring tape
• Wooden studs and plywood
• Plaster and plastering tools
• Construction adhesive and screws

Step 1: Planning and Preparation for moving a door frame

Assess the Wall: The first and most crucial step is to determine if the wall in question is load-bearing. This assessment is vital for the structural integrity of the building. If the wall is load-bearing, you must consult a structural engineer to ensure that removing the door frame will not compromise the building’s stability. The engineer may recommend additional support structures, such as a temporary wall or a lintel.

Measure the New Location: Accurate measurements are essential for a smooth installation. Carefully measure the dimensions of the new location for the door frame. Mark these measurements on the wall to guide the cutting and construction process. Precision at this stage of moving a door frame, can save time and prevent mistakes later.

Prepare the Area: Before you begin any demolition work, ensure the area is clear of any obstructions. Remove furniture, decor, or any items that could be damaged or get in the way. Additionally, cover floors and nearby surfaces to protect them from dust and debris. Safety is paramount, so make sure the working area is secure and that you are wearing appropriate safety gear.

Step 2: Removing the Old Frame

• Carefully dismantle the existing door frame.
• Remove any nails or screws fixing the frame to the wall.

Step 3: Cutting Out Old Bricks

• Mark the outline for the new door on the brick wall.
• Use a brick chisel, hammer, or reciprocating saw to carefully remove the bricks within the marked area.
• Continuously check for level and plumb to ensure a straight cut.

Step 4: Constructing the Studwork

• Measure and cut wooden studs to fit the new opening.
• Assemble the frame using screws and construction adhesive.
• Ensure the frame is securely attached to the surrounding structure.

Step 5: Fitting the New Door Frame

• Install the new door frame within the stud work.
• Use a spirit level to ensure it’s perfectly level and plumb.
• Secure the frame to the stud work.

Step 6: Plastering and Finishing

• Apply plasterboard to cover the stud work, cutting it to fit snugly around the door frame.
• Plaster over the plasterboard for a smooth finish.
• Sand and paint as required to match the existing wall.

Safety Considerations

• Always wear appropriate safety gear.
• Be cautious of electrical wiring or plumbing in the wall.
• Consider the structural integrity of the wall throughout the process.

Moving a door frame in an old Victorian house is a delicate process that requires careful planning, professional consultation, and meticulous execution. By following these detailed steps and collaborating with structural engineers and experienced contractors, you can successfully relocate a door frame while preserving the historical integrity and aesthetic charm of your Victorian home. This approach ensures that the renovation is not only functional but also respectful of the property’s unique heritage

The Ultimate Hinge Jig – Hangs Doors Quickly And Easily

Build a Better Soakaway in a Day!

0

Newsletter â–¶ https://skill-builder.uk/signup â—€

Thanks go to Sam and Jen. Check them out on Facebook:
https://www.facebook.com/sandjwardbespokefurniture

Soakaways are an essential yet often under appreciated component of modern drainage systems

Playing a critical role in managing water runoff, particularly in regions prone to heavy rainfall or characterised by impermeable soil. These structures are designed to allow water to gradually seep back into the ground, thereby diverting it away from buildings, roads, and other infrastructure that could be adversely affected by water accumulation. They are crucial for managing excess surface water and preventing flooding, erosion, and other water-related issues.

The primary importance of soakaways lies in their role in flood prevention. By providing a designated area where water can seep slowly back into the earth, soakaways mitigate the risk of surface water buildup that can lead to flooding. This is particularly vital in urban areas where concrete and asphalt prevent the natural absorption of rainwater. The increased runoff can overwhelm storm drains without soakaways and lead to urban flooding, with costly and destructive consequences.

Soakaways also contribute significantly to water conservation. In areas where water can be scarce, allowing rainwater to filter back into the ground helps to replenish groundwater supplies. As rainwater passes through the layers of soil in a soakaway system, it undergoes a natural filtration process. The soil acts as a filter, removing various pollutants and contaminants from the water. This natural filtration significantly reduces the levels of pollution in the water, improving its quality before it re-enters the groundwater system. Cleaner groundwater means that when this water eventually makes its way to rivers, streams, and other water bodies, it contributes to a healthier and less polluted aquatic environment, playing a subtle yet crucial role in maintaining the local ecosystem’s health.

Many plants, animals, and microorganisms rely on consistent groundwater levels to survive. When groundwater is replenished, it supports the growth of vegetation, which in turn provides habitat and food for various wildlife species. This interconnected web of life is sustained, in part, by the effective management of rainwater through soakaways.

In addition to environmental benefits, soakaways can offer economic advantages. By managing water runoff effectively, they reduce the burden on sewage systems and mitigate the potential damage to roads, properties, and landscapes. This can lead to significant repair costs and maintenance savings for local governments and property owners.

The effectiveness of a soakaway is heavily dependent on several critical factors related to its design and construction. To function optimally, a soakaway must be meticulously planned and executed, ensuring it is appropriately sized and situated for the specific area it is intended to serve. Additionally, the type of soil present in the location plays a significant role in determining the soakaway’s efficiency and long-term performance. Regular maintenance is also essential to prevent blockages caused by leaves, silt, and other debris, which can hinder its operation.

In conclusion, soakaways are a simple yet powerful tool for managing water runoff. They offer a cost-effective and environmentally friendly way to prevent flooding, conserve water, and protect our urban and natural landscapes. As we face increasing challenges from climate change and urbanization, the role of soakaways in sustainable water management is more critical than ever.

Drax ~ The Eco Friendly Power Station.. Or Not?!

0

Newsletter â–¶ https://skill-builder.uk/signup â—€

Eco Friendly Power Station, Or Greenwashing?

Drax Power Station, located in North Yorkshire, England, is one of the largest power plants in the UK. It has been a subject of intense debate and scrutiny over its environmental impact and sustainability claims. Once primarily a coal-fired plant, Drax has transitioned a significant portion of its operations to biomass, specifically wood pellets, which it markets as a sustainable and carbon-neutral energy source. However, numerous environmental groups and scientists argue that this claim is misleading and a good example of greenwashing.

Greenwashing is a term used to describe the practice of companies disseminating disinformation to present an environmentally responsible public image. In the case of Drax, The “Eco friendly power station”, the central point of contention is its use of biomass. The power station claims that the process is carbon-neutral because the wood pellets are made from parts of trees that would otherwise go to waste and that new trees are planted to replace those used. The theory is that the carbon dioxide released when the wood is burned is reabsorbed by all the new trees, creating a closed loop cycle.

However, critics argue this is a gross simplification of a more complex issue. They point out that burning wood releases more carbon dioxide per unit of energy generated than coal. Additionally, while trees absorb carbon as they grow, this process takes decades to centuries, whereas the emissions from burning them are immediate. This time discrepancy is critical in the context of the urgent need to reduce greenhouse gas emissions to mitigate the worst impacts of climate change.

Moreover, the sourcing of the wood pellets has come under scrutiny. Much of the biomass used by Drax is imported from the United States, where environmentalists claim that harvesting trees to produce the pellets is contributing to deforestation and loss of biodiversity. The transportation of these pellets across the Atlantic also adds a significant carbon footprint, further undermining the plant’s claims of carbon neutrality.

Drax has received substantial government subsidies for its biomass operations, justified by its purported environmental benefits. Critics argue that this misallocates public funds that could be better spent on renewable energy sources like wind or solar. The subsidies are contingent on biomass being classified as a renewable energy source, a designation that many argue is based on flawed carbon accounting.

The controversy surrounding Drax is emblematic of a broader debate about the future of energy and the role of biomass within it. Proponents of biomass argue that it is a necessary transitional fuel that can replace coal and help balance the grid. At the same time, more intermittent renewable sources like wind and solar are scaled up. However, opponents contend that not all biomass is created equal and that in cases like Drax, it can do more harm than good regarding carbon emissions and broader environmental impacts.

The Drax Power Station and its shift toward biomass is a contentious issue. While the company promotes its operations as sustainable and carbon-neutral, many experts and environmentalists accuse it of greenwashing. They argue that the environmental credentials of Drax, The “Eco Friendly power station”, are misleading, masking the true impact of its biomass operations on the climate and ecosystems.

As the world grapples with the urgent need to transition to genuinely clean energy, the case of Drax highlights the complexities and pitfalls that can arise in this endeavour. It is a cautionary tale of the need for rigorous scrutiny and honesty in eco friendly power station and environmental claims and the dangers of greenwashing in the race to address the climate crisis.

Drax – Eco friendly Power Station

Snickers Workwear NEW Capsulized Work Trousers

0

The World’s First Work Trousers With Built-in, Certified Kneepads.

Unique, Tested and Certified to Exacting International Standards[1]

Snickers Workwear has been inventing and reinventing Work Trousers with Kneepads since 1975.

Renowned for continual innovation, the process continues with the launch of the world’s first built-in, certified kneepads which are completely integrated into a pair of Snickers Workwear’s premium stretch Work Trousers.

The unique AllroundWork, Stretch Trousers with Capsulized™ Kneepads and Holster Pockets deliver low-profile, comfortable impact protection. They’re an innovative combination of cutting-edge sportswear technology coupled with Snickers Workwear’s world-renowned comfort, functionality and sustainable fabric design technology.

snickersworkwear.com/campaign/capsulized

These street-smart hard-working slim-fit Trousers combine enhanced flexibility and comfort with a 2-way stretch fabric plus additional 4-way stretch panels at key stress points. There’s also CORDURA® reinforced holster, ruler, and cargo, pockets.

And, as is typical of all Snickers Workwear clothing, these durable and comfortable Work Trousers with the lightweight Capsulizedâ„¢ kneepads provide in-place ergonomic protection all day, every day.

Snickers Workwear NEW Capsulized Work Trousers 2

Getting more information on the Snickers Workwear AllroundWork, Stretch Trousers with Capsulized™ Kneepads and Holster Pockets is easy. You call the Helpline on 01484 854788; check out snickersworkwear.co.uk or you can email sales@hultaforsgroup.co.uk

[1] Tested and Certified according to EN 14404 for Level 1 Knee Protection, snickersworkwear.com/list/protective-standards/en-14404-knee-protection .

Stop Builders Leaving The Industry Short

0

Newsletter â–¶ https://skill-builder.uk/signup â—€

Why are so many builders leaving the industry?

______________________

In addition to the factors mentioned by Roger, the issue of UK builders leaving the industry for other careers is multifaceted and influenced by a complex interplay of social, economic, and industry-specific factors. This trend is not just a consequence of one or two isolated issues but rather a result of several interrelated challenges that collectively impact the construction sector.

Here are some of the key reasons behind our Builders leaving:

Aging Workforce:

The construction industry has an ageing workforce, with a significant portion nearing retirement age. There’s been a struggle to attract younger workers to replace them, leading to a natural decline in the labour pool.

Working Conditions and Physical Demand:

Construction work is known for its physically demanding nature, which can exact a toll on the body over time, potentially resulting in enduring health challenges. Younger generations, observing these demands, may gravitate towards careers perceived as less physically taxing and offering improved work-life balance as viable alternatives.

Economic Uncertainty:

Economic fluctuations, characterised by periods of volatility and uncertainty, often exert significant influence on the stability of the construction sector. The unpredictability of job prospects, particularly exacerbated by impactful events such as Brexit and the COVID-19 pandemic, can diminish the appeal of remaining in construction careers. As a result, individuals may increasingly consider transitioning to industries perceived as offering greater stability and security during periods of economic turbulence.

Low Pay and Insecure Contracts:

In certain instances, the compensation offered within the construction industry may not match the competitive levels found in other sectors, particularly for entry-level roles. Moreover, the prevalence of short-term contracts can contribute to a sense of instability and uncertainty regarding job security among workers.

Lack of Training and Development:

There might be a perception of limited career progression or training opportunities within the industry. Young people, in particular, might be looking for careers where they can develop their skills and advance more readily.

Regulatory Challenges:

Builders frequently encounter a dynamic and evolving set of building regulations and standards, which can present challenges that are both frustrating and financially burdensome to navigate and comply with.

Technological Advancements:

In contrast to other industries that frequently provide opportunities to engage with cutting-edge technologies, the construction sector is sometimes perceived as lagging behind in adopting and integrating new technological advancements.

Cultural Perception:

The construction industry is occasionally burdened with a negative reputation, often perceived as a secondary or fallback career, rather than a primary choice profession. This prevailing perception can dissuade individuals from pursuing careers within the field, potentially limiting the industry’s ability to attract new talent and cultivate a robust workforce.

Mental Health Concerns:

The industry is known for its high-pressure environment, which can lead to stress and other mental health issues. There’s an increasing awareness of the importance of mental well-being, which might drive extra force behind builders leaving, to seek less stressful careers.

Alternative Opportunities:

With the rise of the digital economy, and the increasing availability of flexible working arrangements in various sectors, individuals are increasingly drawn to careers that provide superior benefits, flexibility, and alignment with personal interests and values.

These factors, along with others, contribute to a noticeable trend where individuals in the UK construction industry contemplate and transition to alternative career paths. Efforts to counteract this trend are centered on initiatives aimed at improving working conditions, offering competitive compensation packages, enhancing training and development opportunities, and shifting public perceptions of the construction industry.

By addressing these challenges comprehensively, stakeholders aim to put a slow on builders leaving, retain skilled workers and foster a sustainable future for the construction sector in the UK.

Upskilling Workers And Career Pathways Are The Answer

Christmas Message ~ Bloopers & Plumberparts Chat

0

Newsletter â–¶ https://skill-builder.uk/signup â—€

Merry Christmas to you all, and a happy new year!

Thanks to @plumberparts @Ultimate-roofing-square. @ukconstruction

Special thanks to Sam and Jen: https://www.facebook.com/sandjwardbespokefurniture/

DIY Fix For a Blocked Drain or Gully Outside

0

Newsletter â–¶ https://skill-builder.uk/signup â—€

Roger has a quick and straightforward fix for a blocked drain or gully, usually just outside your kitchen

______________________

Kitchen drains or gullies often get blocked due to the accumulation of substances commonly washed down the sink. Here are some of the common reasons for blockages:

Food Particles:
Tiny food particles, especially those that are fibrous or starchy, can stick to the pipes and eventually cause a blockage.

Grease and Oil:
Grease, fats, and oils solidify inside the pipes over time, creating a sticky surface that can trap other debris and gradually build up to a blockage.

Soap Scum:
Soap residues can combine with minerals in water to form a hard residue (soap scum) that can clog pipes.

Foreign Objects:
Sometimes, objects that shouldn’t be in the drain (like utensils, small toys, etc.) can accidentally fall in and cause a blockage.

If you don’t fancy Roger’s method of unblocking a kitchen drain, you can try several methods:

Boiling Water:
Pouring boiling water down the drain can sometimes dissolve or loosen a blocked drain caused be grease.

Drain Scoop

Why Do These Walls Have Damp Circles?

0

Newsletter â–¶ https://skill-builder.uk/signup â—€

? Ask Skill Builder Playlist: https://www.youtube.com/playlist?list=PLvRh7uimDQfeARPDGL8GLsJ1Saxlx6scI

Roger is back, this time to stare at damp circles. He suspects it’s a dot and dab issue.

“Dot and dab” is a widely used method in the construction and plastering industry for attaching plasterboard to masonry walls. This technique, also known as “dry lining,” involves applying adhesive in a series of “dots and dabs” on the wall surface before pressing the plasterboard into place. Here’s a detailed explanation of the process and its benefits.

Cold Floors & Walls in an Old House ~ What Can Nick Do?

0

Newsletter â–¶ https://skill-builder.uk/signup â—€

? Ask Skill Builder Playlist: https://www.youtube.com/playlist?list=PLvRh7uimDQfeARPDGL8GLsJ1Saxlx6scI

Help! Cold Floors and Walls..

Roger is back to look at Skill Builder viewer Nick’s insulation problem.

Here’s Nick’s message:

Hi, I hope you have some solutions to how to insulate these solid 9″ walls and sub floor.

I’ve endlessly researched information about how to insulate and how to manage condensation but there are so many ways to do it, and why you shouldn’t, that it’s driving me mad.

To 50mm lime plaster these two walls is £3300.

Thank you for your time, Nick

Ultimate Motorhome Battery? Power Queen 200Ah LiFePO4 Battery Tested

0

Support us by using our affiliate link:
🛒 https://uk.ipowerqueen.com/?ref=kdyhrunq

Ultimate Motorhome battery – Power Queen 12.8V 200Ah PLUS LiFePO4

[200A BMS with 2560W Max. Load Power] The Power Queen 200Ah PLUS LiFePO4 battery has a built-in 200A BMS (Battery Management System) to protect it from overcharging, over-discharging, over-current, and short circuits. The battery has 8 cells inside. The automotive grade cells are high-density and stable, it’s safe when used in daily life and friendly to the environment. The 200A BMS could allow us to connect more applications, supporting max. 2560W load power, making our lives more convenient, especially valuable on the road as a motorhome battery.

[1/3 Lighter Weight & Storage 100% Energy] The 12V 200Ah PLUS LiFePO4 battery is 48.58 lbs – lighter than the lead-acid battery capacity, which is 130 lb. Even in 1/3 weight, the lithium battery still has a powerful capacity. For example, the energy density of Power Queen 12V 200Ah PLUS is 52.69Wh/lb (2560Wh/48.58 lbslb=52.69Wh/lb), while comparable with lead-acid battery is 19.69Wh/lb (2560Wh/130lb=19.69Wh/lb), the lithium battery provides a longer operation time.

[Max. 40.96kWh Energy Storage Solutions] Power Queen 12V 200Ah PLUS batteries support up to 4 in series and 4 in parallel (Max 4S4P) to get more capacity (200Ah, 400Ah, 600Ah, Max.800Ah) and higher voltage (12.8V, 25.6V, 38.4V, Max.51.2V). Max connected 16 batteries to get a 51.2V 800Ah battery system with 40.96kWh energy. This robust storage solution could be widely used as a motorhome battery, home solar, emergency backup power systems, and RV trips.

[Eco-Friendly Energy & Save 1/2 Power Fees] Power Queen 12V 200Ah PLUS LiFePO4 battery provides 4000+ cycles times and 2560Wh energy, which means the 200Ah LiFePO4 battery produces 10240kWh (2560Wh*4000 cycles times=10240kWh) in its 10-year lifespan, which means you will save 1/2 of power fees compared with using the utility power. You could enjoy a self-reliant, colourful life using the battery in a solar source.

[5-Year Warranty & Delivered in 2-5 Working Days] Power Queen provides a 5-year 12V 200Ah PLUS LiFePO4 battery warranty. Power Queen do their best to provide customers with the safest battery and the most professional service. With local warehouses in CA, TX, PA, and GA, we can minimize the delivery time to 2-5 working days. Please be advised that the stock situation will affect delivery time. Feel free to contact us to get the stock situation of your nearest warehouse.

Attention: This battery is NOT suitable for use as a starter or golf cart battery. For more info, please consult Power Queen.

We’d Rather Watch Paint Dry – You’ll Never Guess What Happens!

0

Newsletter â–¶ https://skill-builder.uk/signup â—€

We’d Rather Watch Paint Dry..

Writing about paint drying might seem mundane, but it’s a process that involves several interesting aspects worth considering. Here are a few key points:

Chemical Process: Grasping the chemical process involved in paint drying is of paramount importance. The drying of most paints occurs in two distinct stages: evaporation and curing. In the initial stage, the solvent present in the paint evaporates, which results in the pigment and binder being left behind on the painted surface. The next stage, curing, involves the binder undergoing a chemical reaction—commonly oxidation or polymerization. This reaction causes the paint to solidify and adhere firmly to the surface.

The specific chemicals used in the paint formulation can significantly influence both the drying time and the final properties of the paint. Therefore, a thorough understanding of these chemical processes helps in predicting how long it will take for the paint to dry and ensures the achievement of the desired finish.

Environmental Factors: Environmental conditions have a profound impact on the paint drying process. Factors such as temperature, humidity, and airflow can greatly affect how quickly or slowly paint dries. Typically, higher temperatures and lower humidity levels can accelerate the drying process. However, it is important to note that excessive heat or wind can lead to problems such as uneven drying or cracking of the paint. Therefore, it is crucial to paint under optimal conditions, which are usually specified by the paint manufacturer. Adhering to these recommended conditions ensures that the paint dries properly and results in a smooth, durable finish. Understanding and controlling these environmental factors is essential for achieving the best possible outcome in any painting project.

Type of Paint: The drying time of paint varies significantly based on the type of paint being used. Oil-based paints, for instance, generally take a longer time to dry compared to water-based paints. This extended drying period for oil-based paints is due to the necessity for solvent evaporation and the longer curing time required for the paint to fully set and harden. Conversely, water-based paints dry faster as they primarily rely on water evaporation, which occurs more quickly. Therefore, understanding the specific type of paint and its unique drying characteristics is essential when planning and executing any painting project. This knowledge ensures that you allocate sufficient time for each stage of the painting process and achieve the best possible results.

Application Thickness: The thickness with which paint is applied also plays a crucial role in determining its drying time. When paint is applied in thicker layers, it takes a longer time to dry. This extended drying period occurs because the solvent in the paint needs more time to evaporate from the deeper layers, and the overall curing process slows down. To achieve optimal drying times and a smooth finish, it is important to apply paint in layers that adhere to the recommended thickness. This careful application helps in avoiding prolonged drying times and ensures that the paint cures properly, leading to a more durable and aesthetically pleasing finish.

Safety Considerations: As paint dries, it can release volatile organic compounds (VOCs) into the air. These can be harmful if inhaled in large quantities or over a prolonged period. Ensuring proper ventilation during and after painting is crucial for safety.

Patience is Key: Rushing the drying process can lead to problems like cracking, peeling, or an uneven finish. It’s essential to allow the paint to dry thoroughly before applying a second coat or using the painted surface.

While watching paint dry might not be the most exciting activity, the process involves a fascinating interplay of chemistry, physics, and environmental factors. Understanding these can lead to better results in any painting project.

Controlling How Paint Dries