Wednesday, October 15, 2025
spot_img
Home Blog Page 15

Spray Rendering — Is it a DIY job?

0

EWI Store: https://ewistore.co.uk

Roger has tried external wall insulation. Now it’s time to check out the spray-on silicone render from the EWI Store.

FEATURED PRODUCTS

Euromair Spray Machines
https://ewistore.co.uk/product-category/external-wall-insulation/tools/spray-machine

Silicone Render (EWI-075) – 25KG
https://ewistore.co.uk/shop/external-wall-insulation/silicone-render-ewi-075-25kg

RELATED VIDEOS

Installing External Wall Insulation
https://youtu.be/96WN8AtAvNg

Shabby Render/Stucco Facelift
https://youtu.be/ixq-g_2kAHA

Sand and Cement Rendering
https://youtu.be/G-DQ44vTZsU

____________________________________

Spray render, commonly known as spray-on render, is an advanced wall-finishing technique that has transformed the traditional rendering process. Instead of manually applying render mixtures with tools like trowels, spray render involves using specialized machinery to spray the mixture onto walls. This technique can be used internally and externally and is suitable for many surfaces, including brick, block, and concrete.

The primary advantage of spray-on render is efficiency. Manual rendering is labour-intensive and time-consuming, requiring skilled labour to achieve a uniform finish. In contrast, spray rendering offers faster application, covering large areas in a fraction of the time. This speed does not compromise on quality; the finish achieved with spray rendering is often smoother and more consistent than its hand-applied counterpart.

The consistency of the mixture is vital. The render is mixed to a specific consistency suitable for spraying, ensuring it adheres properly to the surface while reducing the potential for air pockets or imperfections.

This uniform application aids in providing better insulation and waterproofing properties. Additionally, because the machinery regulates the mixture’s pressure and flow, the likelihood of waste is significantly reduced, making the process more cost-effective in larger projects.

Furthermore, spray rendering can be more adaptable regarding finish and texture. Various finishes can be achieved depending on the chosen mixture and machine settings, from smooth and flat to textured and patterned. This gives architects and homeowners greater flexibility in design choices.

Spray render is a modern advancement in the construction industry, offering speed, efficiency, and versatility. As technology evolves, techniques like spray rendering pave the way for streamlined construction processes, ensuring cost-effective, high-quality results.

Breaking Ground: 2023 Extension Build Ep.1

0

Sam and Jen from SJ Ward Builders start a new single-storey side extension project.

Check out Sam & Jen on Facebook:
https://bit.ly/3eh17v0

CHECK OUT SAM & JEN’S PLAYLIST
🎬 https://youtube.com/playlist?list=PLvRh7uimDQfe7HR2XDO90ppTiztt1FPgM

The Initial Stages of Building an Extension: From Groundworks to Concrete Foundations

Embarking on a home extension project is an exhilarating journey that transforms your living space and your lifestyle. Adding more room to your house might sound simple, but the groundwork leading up to the moment the concrete foundations are poured is intricate and requires meticulous planning. In this deep dive, we’ll take you through the initial stages of building an extension, emphasising the importance of groundwork and pouring concrete foundations.

1. The Vision and Design Phase:
Before a single shovel hits the ground, it’s crucial to have a clear vision for your extension. This involves careful considerations regarding the purpose of the space, the design aesthetics, and how it would integrate with the existing structure. Engaging an architect or designer at this stage can be invaluable, as they can provide expertise and innovative solutions to make the most of your space.

2. Site Survey and Assessment:
This step involves thoroughly examining your property to identify potential issues affecting the extension. A site survey determines the type, size, and depth of foundations required, factoring in soil type, nearby trees, and the water table level. This process often identifies possible challenges early on, ensuring no unexpected setbacks during construction.

3. Securing Permits and Permissions:
Depending on where you live, constructing a home extension might require planning permissions or building permits. Applying for these early is imperative, ensuring that all design aspects comply with local regulations. This can sometimes be a lengthy process, but ensuring that your extension is legal and safe is essential.

4. Groundwork and Site Preparation:
With permissions in place and a plan in hand, the actual construction work begins. Groundwork is essentially the process of preparing the site for the new extension. This includes clearing the site of any debris or vegetation, setting out the exact boundaries of the extension, and excavating the area where the foundations will be laid.

One crucial aspect of the groundwork phase is ensuring that the site is appropriately drained. Water accumulation can compromise the stability and longevity of your extension, so it’s paramount to establish efficient drainage systems at this stage.

5. Laying the Foundations:
Foundations are the bedrock of any extension. They bear the weight of the new structure, ensuring its stability and durability. The type of foundation required depends on several factors determined during the site assessment. Common types include strip foundations, trench fill foundations, and raft foundations.

Once the trenches are excavated to the required depth (taking into account the frost line, soil type, and the load-bearing capacity of the ground), steel reinforcements might be placed in, especially for larger extensions or in areas with softer soil. These reinforcements add an extra layer of strength and stability to the concrete foundation.

The final step in this stage is pouring the concrete. It’s vital to ensure that the mix is right, considering the specific requirements of your site. The concrete is then poured into the trenches, levelled, and allowed to cure. Curing is critical; it ensures the concrete reaches its desired strength and durability.

In conclusion, while a home extension might revolve around the aesthetic and functional benefits, the initial stages are grounded in rigorous planning, assessments, and meticulous groundwork. Laying a robust foundation – literally and figuratively – ensures that your extension stands the test of time, offering you a space that enhances your home and life.

Victorian Kitchen Attraction – Why Britain’s Millennials Swoon Over Edwardian, Vintage Gothic and Victorian Kitchens

0
Classic Victorian Kitchen Charm, Edwardian Serenity & Gothic Mystique..

Deep breath. That’s the smell of your history simmering on the hob. It is in these cherished kitchen spaces, hallowed by the echoes of the past, that Britons, young and old alike, find themselves drawn to. Lured in by the charm of Edwardian serenity, the mystique of vintage gothic, and the grandeur of the classic Victorian. But why?

Turn Back the Clock 

Emma Carlow, noted interior design expert, muses- “Design is an exploration of our identity”. True to her words, this resurgent inclination towards traditional kitchen designs reflects more than mere nostalgia. It’s as if British youth are striving to stir up a soup of self-realisation in these timeless kitchens.

Relevance in the Resurgence: A Study

A study by the University of Oxford propounds that 35% of young Brits between the ages of 18 to 30 favour a traditional kitchen style. Academic Simon Quinn observes, “These kitchens provide a tangible link to their heritage. It’s a statement of legacy, of belonging.”

Edwardian Elegance

The Edwardian kitchen, where functionality waltzes gracefully with understated charm. Our lives twirl around like spoons in this kitchen, stirring memories of the past, folding them into the whip of the present.  “The edgy yet understated feel of the Edwardian style holds contemporary allure for the younger generation,” says celebrated architect Isabel Knight.

Vintage Gothic 

The vintage gothic style, capes of dark tones punctuated by rich woodwork reminiscent of a Bronte novel. Its atmospheric underpinning resonates with the young, inner charm of which mirrors the subtle, mysterious layers of young souls. “Gothic kitchens have this unique ability to transport us to a different realm. This escape, albeit in a familiar setting, is what the younger generation primarily connects with,” articulates Tony Smith, veteran interior decorator.

The Majestic Gourmet – Classic Victorian Kitchen

The classic Victorian kitchen is magnificent (as many would describe it), a beating heart of a home that’s positively glowing with happiness, packed with treasured moments, thrilling accounts, and infectious laughter. Plus, it’s absolutely brimming with whispers of magical, secret ingredients. It’s not surprising that young Brits are head over heels in love with it!

Victorian kitchens have this rich mix of colours. Think moody greys, striking blacks, and the elegance of off-whites, thrown together with the majestic depths of rich woods. It’s like a timeless painting you can’t help but be drawn into. It’s these colours adding irresistible charm – an inviting warmth that dances around with the mystery of shadows, creating an enchanting, comforting world.

“The unique colour palette of a Victorian kitchen adds depth, richness and a kind of welcoming warmth,” says Monica Harris, a famous designer. “Their inherent cosy vibe and the sense of security they provide really resonate with young spirits. It’s like being enveloped in an embrace that’s as nostalgic as it’s exciting and new.”

Appliances – The Lifelines 

Underneath the aesthetic triumph, ensuring optimal functionality of these kitchens, are the ever-important appliances – the lifelines. Regular maintenance of these tools matters more than ever, for it’s like feeding the hearth that keeps the home warm.

Steve Jenkins, chief engineer at WG, explains, “Consistent servicing adds to the longevity of the appliances and, in turn, to the charm of these classic kitchen styles. A well-functioning appliance is in perfect sync with the soul of the kitchen.” A BBC Lifestyle report also underscores the importance of proper appliance maintenance, calling them “the heartbeats within the beautiful body of a timeless kitchen”.

The Perfect Blend

It is not only about loving the old, it’s about blending the old with the new. Young Britons aren’t just donning Edwardian, gothic, or Victorian as cloaks of the past, but as fashion-forward garments.

They’re melting pots, stirring the flavours of their heritage with a modern twist, creating a masterpiece that’s nothing short of a homage to their legacy. And cooking it up in a kitchen that withstands the test of time – that’s most certainly more than a trend. It’s a style. It’s a lifestyle.

More From Skillbuilder – Fabric Wallpaper & Wall Panels

How a Carpenter Became an Inventor

0

Roger chats with Dan Cox about life as an inventor carpenter.

Dan’s Ultimate Roofing Square and Essential Hinge Jig.
🛒 https://www.essential-carpenter-tools.co.uk

OTHER DAN COX VIDEOS

The Oast House
https://youtu.be/2_LNrxL2gvE

6 Roofing Squares Compared
https://youtu.be/7qlQW3j6OIQ

Dan Demonstrates The Ultimate Roofing Square
https://youtu.be/_TmXZ0cGNEI

How To Fit Herringbone Joist Struts
https://youtu.be/8rgIu8XeLLE

Roof Framing Masterclass
https://youtu.be/OSDUZPV8GB0

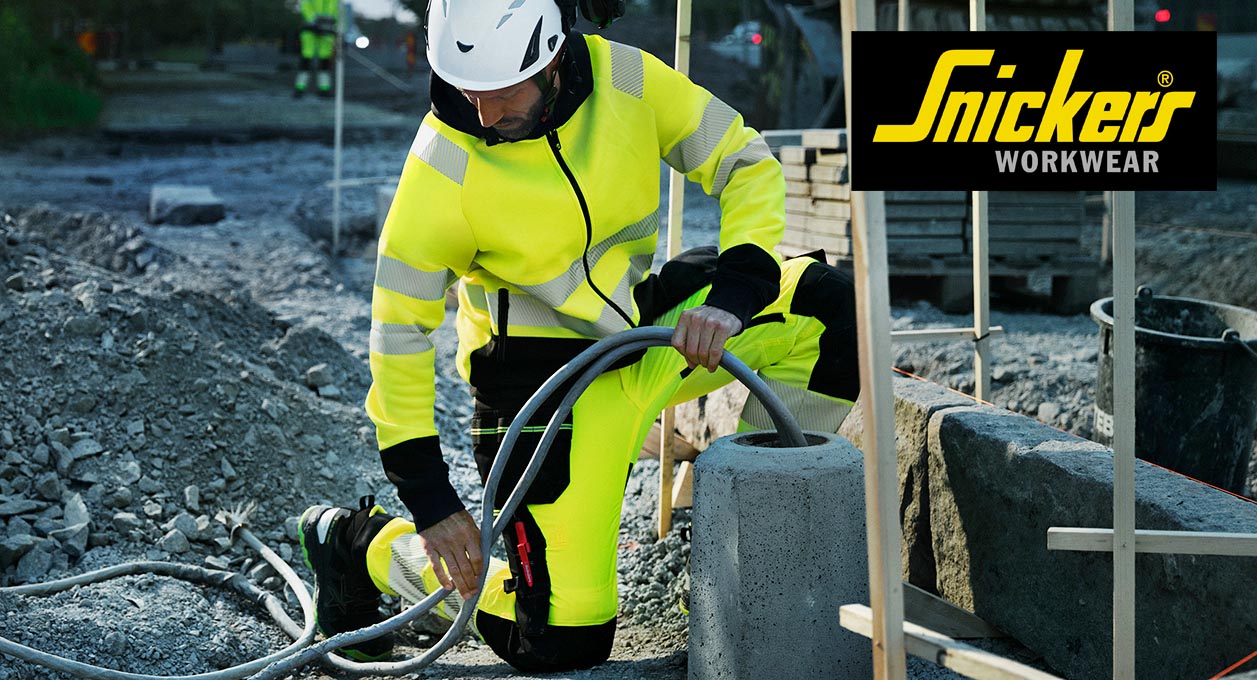
Snickers Workwear’s New Hybrid Jacket

Workwear – Protectivewear  – Performancewear – Leisurewear.

The new Hybrid multi-purpose work jacket is a street-smart, highly versatile garment. Great on site or for leisurewear, it’s made of flexible, wicking jersey fabric with Repreve® [1] fabric insulation in the shoulder and upper body area.

The Hybrid provides great freedom of movement and elasticated comfort for all types of work and warmth or ventilation when you need it.

Whatever top layer clothes you need – for work, play or protection against hazards – Snickers Workwear has a range of Jackets that will work on-site for both men and women, consistently delivering optimal performance, comfort and good looks.

snickersworkwear.com/products/work-jackets

Just check out the features of Snickers Workwear Jackets, there will be one to suit you – wherever you are, whatever you need, whatever you’re doing.

Snickers Hybrid Jacket

The Repreve® fibre, made from recycled materials, helps us reduce our climate footprint without compromising on the strength or performance of our products. https://repreve.com

The Dream Material of Every Carpenter and Builder

0

MEDITE TRICOYA EXTREME: https://shorturl.at/wyzIU
Thanks to Robin Clevett: @ukconstruction

Medite Tricoya Extreme, often referred to as MTE, is a groundbreaking innovation in wood-based materials that has revolutionized the construction and design industries. It is an engineered wood product that offers the traditional beauty and warmth of wood, combined with exceptional durability and longevity that competes with the most resilient man-made materials.

MTE is produced by employing an acetylation process, a cutting-edge technology that alters the wood at a cellular level. The process involves treating the wood fibers with acetic anhydride, which significantly enhances its dimensional stability and resistance to decay. The result is an incredibly durable material that can withstand all weather conditions, from the scorching heat of the desert to the freezing cold of the polar regions, without suffering any significant structural degradation.

One of the most distinctive features of Medite Tricoya Extreme is its versatility. It is suitable for a wide range of applications where traditional wood materials would fall short, including cladding, fascia and soffit panels, window components, outdoor furniture, and even play frames and tree houses. It’s a game-changer in areas of high humidity or where exposure to harsh weather is a concern, as it maintains its shape and form, resisting swelling, shrinking, and warping.

Environmentally conscious, MTE is manufactured using FSC certified wood, promoting sustainable forestry practices. It also boasts of having a significantly lower carbon footprint than many of its counterparts in construction materials. This product is recyclable and can also be safely disposed of at the end of its life, reducing the environmental impact and contributing to a circular economy.

One cannot discuss MTE without acknowledging its impressive durability. With a guarantee of up to 50 years above ground and 25 years in-ground, Medite Tricoya Extreme outperforms many traditional hardwood options. This hard-wearing, long-lasting material does not compromise on aesthetics, providing an authentic wood finish that can be painted, stained, or otherwise finished to complement any design scheme.

In terms of workability, MTE is similar to high-quality wood products. It can be cut, shaped, and joined using traditional woodworking tools and techniques, making it a popular choice among carpenters and builders who value both form and function.

Medite Tricoya Extreme is a testament to the advancements in material science and technology, offering a sustainable, durable, and highly versatile solution that is transforming the landscape of construction and design. This high-performance wood-based product embodies the perfect amalgamation of natural aesthetics and longevity, providing an excellent material choice for both indoor and outdoor applications.

The Aiden Project : An Ambitious Self-Build

0

The Aiden Project🔨
https://www.youtube.com/@THE-AIDEN-PROJECT

We visit YouTuber Aiden Harper, who is just down the road from Skill Builder HQ.

👇 Check out @THE-AIDEN-PROJECT videos

Timber Frame Lodge Complete Build
🎬 https://youtu.be/J2DDPVaeOho

Tanking the Foundation
🎬 https://youtu.be/H2Q2Y21WztM

How to Frame and Trim a Splayed Velux Roof Window
🎬 https://youtu.be/s7BlB_25P_0

Aiden has 8.47K subscribers. Let’s so if we can get to 10k by 9pm!

SB Lindab MVHR System
🎬 https://youtu.be/0EQ-pJmPZ-M

Starlink High-Speed Internet
https://www.starlink.com

Connect to high-speed, low-latency internet, even in the most remote and rural locations.
Speeds in the UK currently range from 100-230 Mbps (may be lower during peak hours).

_____________________________
The challenges of a self-build

Embarking on a self-build project presents an exciting opportunity to create a bespoke space tailored to one’s preferences. However, it isn’t without its share of challenges. Funding and financial management form the heart of these obstacles from the onset. Securing sufficient funding for the project is an uphill task, with banks often cautious about lending for self-builds due to the inherent risks. Even when funding is available, financial planning and cost management can become overwhelming, as unexpected costs can quickly escalate.

Secondly, sourcing the ideal plot can be time-consuming and fraught with competition, given the scarcity of suitable land in some areas. Even after securing a location, there may be restrictive covenants or complex planning laws to navigate. Understanding local building codes and securing planning permissions can become a bureaucratic labyrinth for the uninitiated, potentially leading to costly delays.

Once the project is underway, project management becomes a significant challenge. Coordinating with various professionals – from architects and surveyors to builders and electricians – demands efficient organizational skills, strong communication, and an understanding of the construction process. Inevitable changes and setbacks require adaptability and robust problem-solving capabilities.

Moreover, self-build projects can be technically complex. From designing energy-efficient homes that meet sustainability targets to integrating modern technology, a self-builder needs to stay informed about the latest industry standards and technological advancements. This technical know-how also extends to the practical aspects of construction. Even if the self-builder hires contractors for the actual construction, they need to understand the intricacies of the build to ensure the project is executed to their specifications.

Quality control and time management are additional hurdles. Ensuring the workmanship is of high quality and adheres to building regulations while trying to keep the project on schedule can be a delicate balancing act. Delays can be caused by anything from bad weather to supply chain issues, which disrupt timelines and escalate costs.

Lastly, the emotional toll of a self-build should not be underestimated. The process can be stressful, with a constant stream of decisions to make and problems to solve. It requires significant personal investment and can be draining both mentally and physically.

In summary, while a self-build project offers the promise of a dream home, it brings many challenges that require careful planning, financial acumen, technical understanding, excellent project management, quality control, and an iron will. But with perseverance and the right support, these challenges can be overcome, leading to a uniquely satisfying accomplishment.

Nilfisk Pressure Washer Repair – Quick & Easy Fix

0

Roger’s Nilfisk pressure washer repair has made his day.

The Nilfisk E 160.1 is a powerful pressure washer.

If you need power out of your washer, look no further than the E 160.1, which packs an impressive 160 bar maximum pressure. This sturdy and easy-to-handle machine is perfect for tackling large cleaning tasks.

The flexibility of this washer means you can effectively remove ingrained, stubborn dirt from harder areas and more subtle stains from soft surfaces. And with the high pressure and 10-metre steel-armed hose combined, you can effectively clean extensive surface areas in no time. Features such as the one-hand operated hose reel and telescopic handle take the pressure and strain out of working for long periods, and the rubber suspension means you won’t be bothered by the noise. Click&Clean connectivity gives you access to a host of Nilfisk accessories designed to enhance your cleaning.

• 160 bar max pressure
• Highly durable aluminium pump and long-life induction motor
• Automatic start/stop system
• 10m reinforced steel-armed hose and one-hand operated hose reel
• Telescopic handle with sturdy aluminium tubes
• Rubber suspension ensures a lower noise
• Easy storage of gun, lance, nozzles and foam sprayer onboard and convenient storage of electric cable
• Click&Clean connectivity
• The X-TRA model features an in-built trolley for increased mobility
• Foam sprayer (450 ml) included – Use any detergent you wish and detach from the lance at any time to avoid waste

5 Tips For Working With Railway Sleepers

0

Initially designed to support railway tracks, wooden sleepers have become an increasingly popular landscaping trend thanks to their durability and industrial aesthetic. In fact, searches for ‘garden sleeper ideas’ have increased on Pinterest by 40% in the last 12 months.

And it seems many are looking to DIY it. Search data reveals homeowners are turning to Google for advice on things such as ‘how to lay sleepers’  which is up 60% in the last year. For anybody looking to take on a DIY sleeper project themselves, Chris Moorhouse, Timber and Gardening Category Director at Wickes, has five tips for working with garden sleepers:

“Wooden sleepers were originally used to lay railway tracks but are now a popular landscaping material. From retaining walls to raised flower beds and from garden paths to chunky outdoor furniture, their durability and affordability make them perfect for garden projects.

“But they can be challenging to work with. Plus, they need to be laid properly, and treated periodically to maintain condition. These tips will help with choosing and working with materials, and making sure your project stands the test of time.”

Consider a flat-pack kit

“If your DIY skills aren’t great, there’s no shame in going for a raised garden bed kit instead. There’s a massive range these days. Some come flat-packed and with pre-drilled timber and full instructions which make them easy to assemble. But they still create a talking point for your garden.”

Choose the wood wisely

“There’s always a trade-off when it comes to choosing between railway sleepers. Hardwood sleepers such as oak are more hard-wearing, lasting up to 150 years with proper care. However, they are also more expensive and heavier, making them harder to work with.

“More budget-friendly softwood sleepers, like spruce, are more prone to decay but should last for 15 years if the wood is regularly treated. They’re also more lightweight, making them much easier to lift and cut. You should be able to cut through softwood sleepers with a universal handsaw, but a circular saw power tool is recommended for hardwood varieties.”

Work in situ

“Railway sleepers can be incredibly heavy and could cause substantial injury. Jumbo sleepers weigh as much as 60kg each so to protect your back, it’s best to work with them in situ, on the ground.”

Consider a membrane

“Covering the sides of your sleepers that will be in contact with the earth with a waterproof membrane or bitumen paint can be a good idea. This will keep moisture away from the wood and will prevent rotting, extending the lifespan of your sleepers by up to 20 years.”

Treat the timber

“Applying an exterior woodwork paint will protect your timber, extending the life of your garden project. Consider the lasting power of each treatment, as well as the effect.

“Bitumen paint acts as a waterproof coating and is great for painting the underside of sleepers.”

“Wood dye works like a filter which allows the grain of the wood to show through while altering the colour of the wood. It should be reapplied every few years.

“Similarly, wood stain enhances the natural grain of the wood while protecting the wood from the elements. Again, this will need to be applied every few years.

“A clear wood oil will penetrate the surface of the wood to create a natural sheen and replace the oil lost through weathering. Opt for one which doesn’t contain any UV filters if you want your sleepers to achieve that aged, silvery look over time. Bear in mind this will need reapplying annually.

“It’s particularly important to treat cut ends with a wood preservative as the exposed grain will be more susceptible to decay.”

Find out more about working with sleepers over at Wickes: wickes.co.uk/ideas-advice/working-with-sleepers

Expert Tips for Using Your Router Like a Pro

0

Dan Cox shares some handy router tips.

SHOPPING

HiKOKI M12VE Variable Speed Router
🛒 https://amzn.to/46W2Gp0

DeWalt D26204K Plunge & Fixed Base Router
🛒 https://amzn.to/3O6vXVw

Festool Router OF 1400 EQ-Plus
🛒 https://amzn.to/3Y9DNCw

Festool Router OF 1010 REBQ-Plus
🛒 https://amzn.to/474UqmB

Makita DRT50 18v LXT Cordless Router Trimmer
🛒 https://amzn.to/3OqUR3x

Dan’s Ultimate Roofing Square and Essential Hinge Jig.
🛒 https://www.essential-carpenter-tools.co.uk

In the realm of woodworking, routers are the unsung heroes, quietly but robustly shaping our world in ways few laymen could fathom. At their essence, routers are powerful and versatile woodworking tools used to hollow out, or ‘route,’ an area in hard material, typically wood or plastic. The sheer versatility and precision of routers have made them indispensable to a carpenter’s tool collection.

Routers, introduced initially as hand tools, have evolved significantly over time. Today, electrically powered versions are prevalent, enabling craftsmen to achieve intricate detailing with unmatched precision and consistency. Routers come in two types: fixed base and plunge. While a fixed-base router is ideal for edge cuts and moulding designs, the plunge router shines for interior cutting. Each variant has its role in crafting, and owning both can significantly enhance a carpenter’s ability to handle diverse projects.

But why are routers so essential? To start with, they are the master sculptors of the carpentry world, allowing for the creation of decorative mouldings, intricate edges, and fancy finishes. They can also execute joinery tasks such as creating dovetails, box joints, mortises, and tenons. The breadth of router bits available in various shapes and sizes broadens their application range, enabling many complex designs that would be difficult, if not impossible, to achieve by hand.

Routers also shine in their ability to duplicate patterns and designs consistently. Using a guide bushing and template, one can recreate the same way across multiple pieces accurately. This feature makes routers a cornerstone in furniture and cabinet production, where design consistency is key.

Another strength of routers is their capability to make quick and clean cuts. Their high-speed rotation ensures a cleaner finish, reducing the need for excessive sanding post-routing. Moreover, with proper feed direction and bit selection, tear-outs can be minimized, providing a smooth and professional output every time.

However, as with any tool, the magic of the router is unleashed only when it’s wielded correctly. Mastering the router requires understanding the nature of the wood, selection of the correct bit, and adopting the appropriate routing technique. It’s also essential to prioritize safety by using guards, hold-downs, and a well-fitted dust mask to protect oneself from flying chips and dust.

In its humble might, the router is the epitome of the blend between skill and machinery in woodworking. It embodies the craft’s essence – creating functional pieces while allowing room for intricate artistry. Its expansive application range and ability to deliver precision and consistency make it an essential asset in any carpenter’s toolkit. Whether you’re crafting a simple picture frame or an elaborate cabinet, the router is a dependable ally that can help transform raw materials into pieces of functional art.

Snickers Workwear Trousers – Working as Hard as You do!

0

Hi-tech fabrics, functionality and fit are the hallmarks of this market-leading working clothes range.

For discerning professional tradesmen and women, trousers that deliver maximum functionality, comfort, protection and mobility are key factors in their brand choices.

That’s why the sustainable, street-smart, body-mapping features of Snickers Workwear Work Trousers make them the clothes of choice for those who want to work at their best.

snickersworkwear.com/list/product-guide/trousers-made-to-fit

The AllroundWork trousers suit any kind of work in any trade. FlexiWork trousers deliver superior freedom of movement. While LiteWork trousers keep you cool, dry and ventilated.

Then there’s RuffWork trousers, reinforced and tough for the roughest work on site.

ProtecWork protective wear for hazardous environments and certified High-Vis trousers when personal visibility on site is a priority.

Snickers Workwear Trousers also deliver certified protection with the patented KneeGuard® system and CORDURA® reinforcement for greater flexibility, comfort and durability.

All in all, this makes them the optimal choice for craftsmen and women who need to get every job done comfortably, efficiently and sustainably on-site.

See more about Snickers on Skill Builder

Leaking Flat Roof? NOT With The Dryseal System

0

Hambleside Danelaw Dryseal Roofing System
🔗 https://www.hambleside-danelaw.co.uk/dryseal-flat-roofing

The Hambleside Danelaw Dryseal roofing system is an innovative and progressive solution that offers an alternative to traditional GRP (Glass Reinforced Plastic) roofing. It is more than just a product; it represents a transformation in the roofing industry, offering the peace of mind of a leak-free, durable, and low-maintenance roofing system.

With the increasing demands of modern construction and the necessity for sustainable, efficient, and long-lasting materials, the need for an evolution in roofing solutions was paramount. The answer to this demand is the Dryseal roofing system. This distinctive product is a preformed GRP system specially designed for flat roofing, detailed work, and any surface that requires a weatherproofing barrier. It guarantees a leak-free roofing solution that can outlast traditional methods by many years.

What sets Dryseal apart from other systems is its unique design. Dryseal consists of various components, such as preformed GRP edge trims and preformed internal and external corners, which are mechanically fixed to the roof’s structure. This modular approach ensures accurate fitting and sealing. The flat sheeting that forms the system’s main body is then laid and securely bonded with a specially formulated resin, creating an unbroken, durable surface. The resin bonds with the existing surface and the components, creating a seamless and robust barrier against the elements.

Compared to traditional GRP roofing, which is formed and finished on-site, Dryseal’s components are factory-produced. This ensures consistent quality, eliminates the variability of on-site laminating, and reduces the risk of human error. The system is also considerably quicker and easier to install than traditional GRP systems. This saves on labour costs and significantly reduces the time a roof is exposed during construction.

Another outstanding feature of the Dryseal roofing system is its sustainability. The system is highly durable, with a design life of more than 20 years, which is significantly longer than traditional roofing systems. Additionally, it requires minimal maintenance, which further extends its lifespan. These factors make Dryseal an environmentally friendly choice, as it reduces the need for replacement and maintenance materials over time.

Not only does Dryseal provide a highly efficient, reliable, and durable solution, but it also offers versatility in aesthetics. The system can be top-coated in any colour, matching or complementing any architectural style or design. This flexibility enables architects and homeowners to maintain the integrity of their design vision without compromising on their roofing system’s practical and protective aspects.

A crucial advantage of the Dryseal roofing system is its leak-free assurance. Because of its unique design and installation method, Dryseal eliminates the common leakage problems associated with traditional GRP roofing. Its modular, preformed components fit together seamlessly, ensuring no gaps or weak points where water can penetrate.

In conclusion, the Hambleside Danelaw Dryseal roofing system is a revolutionary step forward in roofing technology. It provides a robust, leak-free solution that outperforms traditional GRP systems in terms of durability, efficiency, and aesthetics. Its unique design and installation method ensure consistent quality, reduce installation time, and minimize the risk of leaks. With its superior performance and environmental benefits, the Dryseal roofing system represents the future of roofing. It’s not just a better alternative to traditional GRP roofing – it’s a game-changer in the industry.

@HamblesideDanelaw

Carpenter’s Pencils ~ Which Is The Best?

0

Dan Cox shows us his favourite carpenter’s pencils and marker pens.

SHOPPING

Pica 6060 Big Dry Longlife Construction Marker
(Refillable Carpenter’s Mechanical Pencil)
🛒 https://amzn.to/3OisW5z

TRACER Complete Deep Hole Marking Kit
(Deep Hole Construction Pencil, Permanent Marker Pen & 120mm Lead Set)
🛒 https://amzn.to/46Wq7ie

Ox Tuff Carbon
(Marking Pencil Value Pack OX-P503201)
🛒 https://amzn.to/44MbkVl

Rexel Blackedge Carpenter’s Pencils
(Hard Pack of 12)
🛒 https://amzn.to/46QP1zA

Dan’s Ultimate Roofing Square and Essential Hinge Jig.
🛒 https://www.essential-carpenter-tools.co.uk

Dining Area Makeover – Fabric Wallpaper & Wall Panels Are The Superior Choice

0
The face of current dining area decor

Design trends come and go, but two stylish trends that have re-emerged with a bang are traditional wall paneling and fabric wallpaper – especially for dining areas. Composed of sophisticated elements like suede for wallpaper and elegant wood for wall panels, these modern-retro trends are assertively redefining the face of current home decor.

Maximizing Warmth and Durability

What makes fabric wallpaper an excellent choice, particularly for dining areas? Its ability to craft an inviting, warm atmosphere where ordinary meals evolve into cherished family gatherings. But choosing wallpaper is not confined to its aesthetic appeal; an important expectation is its longevity too. This is where super-durable wood panelling and fabric wallpapers, come into play. They are not only an eyeful but surprisingly resilient. Respected magazines like Southern Living, affirm the robustness of fabric wallpapers married with classic wood panelling, together they can handle the daily entanglements of a busy dining room.

The Green & Fashionable Choice

A recent Institute of Interior Design finding revealed that designers have been falling head over heels for fabric wallpaper and wood wall panelling; they can’t help but swoon over its robust nature and the rich and classy vibe. Another element that gives it an edge, it’s more environmentally friendly compared to regular wall coverings. The magic of fabric wallpaper and wood panelling lies in its versatility–it can smoothly fit into any design aesthetics, from modern minimalism to vintage elegance – it’s like owning a rainbow of design possibilities for your dining area.

The Smallest Touches Can Have The Biggest Impact

Remodelling your dining area with fabric wallpaper and wood panelling extends your focus beyond just the walls. It would be a mistake to neglect elements like matching curtains and rugs as well as artwork which can harmonize with the wallpaper textures and wood panelling colours. Art on the wall significantly enhances the dining room aesthetics, but choosing the right frame for your art should not be taken lightly either; picture frames of the right size can add a refined touch. Remember the saying, “Minor details can majorly slay.” Small, sophisticated strokes such as choosing a suitable frame for art can elevate your decor from  ‘meh’ to ‘wowzers’.


DIY Installation – Simplified

The thought of putting up fabric wallpaper and wood panelling might seem as big as climbing Everest initially (especially if this is your very first time having a go at it solo with no experts to give you a hand), but with the right (and light) tools and a pinch of patience, it becomes an adventure and an interesting DIY task that you won’t be able to say no to.

Ready for a dining room transformation? Bet on fabric wallpaper and wood paneling–they pack a visual punch, providing an inviting atmosphere for those epic family dinners. Plus, they are built to last; so, why wait? Your Insta followers won’t know what hit ’em.

More From Skillbuilder – Victorian Kitchen Charm

How To Fit Composite Decking Like A Pro

0

How To Fit Composite Decking Like A Pro with Dan Cox and Roger Bisby.

Dan’s Ultimate Roofing Square and Essential Hinge Jig.
🔗 https://www.essential-carpenter-tools.co.uk

Special thanks to Smarts Build Limited
https://www.checkatrade.com/trades/smartsbuildlimited922062

Harnessing the Power of Composite Decking: A Comprehensive Installation Guide

Composite decking is an excellent choice for homeowners seeking a durable, low-maintenance option that offers an aesthetically pleasing solution for outdoor living spaces. Composite materials resist fading, staining, scratching, and mould. Yet, to fully benefit from these qualities, a proper installation process is paramount. Here’s a step-by-step guide to fitting composite decking to ensure your outdoor space is built to last.

Planning

Before the installation process begins, planning is crucial. This includes calculating the amount of decking you’ll need, which should be based on the size of your deck and the size of the decking boards. Don’t forget to factor in a little extra for waste. Also, check local building codes for any requirements or restrictions that could impact your project.

Preparing the Area and Framework

The next step is to prepare the ground where your deck will be. This involves clearing the area of rocks, roots, or other debris and levelling the ground if necessary. Once the ground is ready, you can build the framework. Using treated lumber, create a sturdy base and ensure the joists are evenly spaced, generally 16 inches apart in the centre.

Fitting the Deck Boards

After the framework is set, start fitting the composite decking boards. Secure the first board to the framework using specially designed composite decking screws. These should be placed at the edge of the board, and drilled through the surface into the joist below. Continue placing boards, maintaining a consistent gap between them for drainage and expansion. This gap is usually about 3/16 of an inch.

Sealing the Boards

Once all the boards are fixed in place, the next step is to seal them. While composite decking is designed to be highly resistant to the elements, sealing it provides additional protection. Apply the sealant as per the manufacturer’s instructions.

Adding the Finishing Touches

Finally, add the finishing touches. This may include installing a railing, adding stairs, or fitting balustrades. You can also consider using fascia boards for a clean, finished look.

Composite decking is popular due to its longevity, aesthetic appeal, and low maintenance requirements. However, the installation must be carried out carefully to ensure these benefits are fully realized. By following these steps, you can have confidence in a beautiful, durable deck that will serve you well for many years.

Fitting composite decking is a project that can be tackled with good planning and the right materials. While this is a task that some homeowners may feel comfortable undertaking on their own, it’s always wise to consult with a professional to ensure the project is done correctly and safely. Properly installing composite decking can provide a beautiful, long-lasting solution for your outdoor space.

The Revolutionary New Way To Hang Your Boards – By Yourself!

0

Cladman by Sitebuddyz
🔗 https://sitebuddyz.com/products/cladman

The Cladman enables a single person to install a wide range of Fibre Cement Weather Boards and Traditional Feather Edged cladding boards with minimum effort.

The multiple award-winning and patented Cladman is the only board hanging tool that accommodates every major board size on the market, allows for adjustable overlapping, and incorporates rollers to protect boards and give the perfect finish.

– 2 Cladmen per set
– Built-in spirit level
– Robust, lightweight construction
– Made in the UK

Brick Effect Render – Render That Looks Like Brickwork

0

Brick effect render is a technique used in building construction and design that allows surfaces to mimic the aesthetic of traditional brickwork without using actual bricks. This is typically achieved by applying render, a type of plaster, onto a surface resembling the brick-and-mortar pattern.

The process often involves the application of a base coat of render, then carving out brick patterns before it fully dries, and then applying a different coloured render into the carved lines to imitate mortar. Once the render has dried, it provides a convincing illusion of a brick wall.

This technique is advantageous for several reasons. Firstly, it can be used to provide a brickwork aesthetic to structures that are not made from brick. Secondly, it can be a cost-effective alternative to actual brickwork, as it requires less materials and labour. Lastly, it can be applied to many surfaces, including those that wouldn’t typically be suitable for traditional brickwork.

While brick effect render can provide an attractive and versatile alternative to brickwork, it’s important to note that the level of realism achieved can vary greatly based on the skill of the person applying the render. Therefore, it is crucial to hire an experienced professional to ensure a high-quality finish.

PRODUCTS

Johnstone’s Trade Stormshield High-Performance Brick Effect Render
🔗 https://www.johnstonestrade.com/product/brick-effect-render

K Rend Brick Effect Render
🔗 https://www.rendit.co.uk/k-rend-brick-render-25kg-2

Securing Self-Storage: Top Security Measures Required at Any Self-Storage Facility

0

While you might think nothing is safer than keeping your positions in a contained self-storage facility, they present an attractive opportunity for organised crime groups – especially those ill-equipped regarding security measures.

However, self-storage facilities have a specific duty of care to adhere to as they’re tasked with protecting someone else’s valuables – meaning that every security avenue must be explored to minimise their exposure to theft.

But how do you deter would-be-criminals from your self-storage facility, you ask? In this article, we discuss several top security measures essential for any self-storage facility to provide peace of mind to its customers and maintain a secure environment.

From enforcing perimeter security with latched gates and implementing smart-security systems to employing around-the-clock security and practising fire/other safety measures – keep reading as we dive into how to keep your customer’s valuables safe.

Perimeter Security

The first step towards keeping your self-storage facility secure is reinforcing the perimeter to ensure nobody with unauthorised access can walk onto the premises.

If your headquarters is near a busy main road or a public footpath, you want to minimise the chance of people stumbling onto your premises.

The best way to ensure this doesn’t happen is by fencing off the perimeter of your business to deter unauthorised access.

When we see a solid fence or wall with limited access points, we automatically know that it’s off-limits as it acts as a visual deterrent, like surveillance cameras.

Furthermore, install electronic gates or barriers at the entrance, which require a personalised code, key card, or biometric system to gain access. However, any gates/barriers need regular maintenance once installed to function effectively.

Using fencing contractors like Golden Larch Contracting, you can purchase spare parts for your gates/barriers and take advantage of their instalment service.

Consider visiting their website to browse their complete range of commercial gates, see examples of their work, and discover how their products/services could help you increase the safety measures at your workplace today.

CCTV Surveillance

Video surveillance is a fundamental security measure in any business security strategy. Not only can CCTV help you monitor areas susceptible to suspicious activity, but they also act as a visual deterrent in the hopes of minimising potential attacks altogether.

For best results, thoroughly sweep your premises and identify the weaker areas. Once identified, strategically place high-resolution surveillance cameras with night vision capabilities in these areas to provide constant monitoring and record potential security breaches even in low-light conditions.

Cameras should cover all key areas, including entry gates, corridors, elevators, and loading docks. As an additional security feature, you could also display signs indicating the presence of surveillance cameras that deter potential criminals.

Once implemented, ensure that you regularly assess and upgrade your camera systems to avoid missing out on the latest tech features!

Alarm Systems And Sensors

Next on your security checklist should be installing alarm systems and sensors, which will work in. conjunction with your CCTV system to safeguard against unauthorised access or tampering.

For the utmost security, you should install these systems on individual units, as well as in common areas and storage facility offices and connect them to a central monitoring station that will notify your workforce or your outsourced around-the-clock security team (more on this later!) in the event of a breach.

As well as alarm systems and sensors, you can install other innovative security accessories such as door/window sensors, glass-break detectors, which can link to your hub and provide an additional layer of security.

For an extra layer of protection, you could also install panic buttons throughout the facility that can be used in emergencies or to summon assistance.

On-Site Security

Although security systems have come a long way over the last couple of years, but they can still experience technical issues or be interfered with, compromising your on-site security.

To prevent this, you could consider enlisting the services of outsourced around-the-clock security companies, which can monitor activities, respond to alarms, and provide a visible presence to deter potential criminals.

As well as outsourcing security companies, you can improve on-site security by implementing strict protocols and procedures for staff members during and after hiring.

This could include but may not be limited to background checks, security training, regular security audits. You should also monitor visitors to the premises and ensure that each new face is recorded, correctly identified, and monitored while inside the facility.

Fire Prevention and Safety Measures

While physical security is crucial, addressing fire prevention and safety within self-storage facilities is equally important. Install smoke detectors, fire alarms, and fire extinguishers throughout the premise and ensure they are well maintained by conducting regular inspections and maintenance.

Ensure your workforce is educated on fire safety protocols, including properly storing flammable materials and understand the risks/signs of a potential fire hazard. Devise a clear evacuation plan which staff understand and prominently display emergency contact information throughout the facility.

See more about security on Skill Builder

Is Plastering Over Artex A DIY Job?

0

Roger looks at plastering over Artex to see how effective it is.

The art of plastering over Artex can seem like a daunting task to the uninitiated. However, with the right tools and techniques, you can transform your dated Artex ceiling into a sleek and smooth masterpiece. This guide will walk you through the steps you need to take to achieve a successful plastering over Artex project.

Understanding Artex:

Artex is a surface coating used for interior decorating, primarily for ceilings, and was widely popular in homes built between the 1960s and 1980s. The material is known for its textured and patterned finish. However, modern tastes lean towards sleeker, smoother finishes, so many homeowners look for ways to cover their Artex ceilings.

Preparation:

Before you begin, it’s important to know that some older Artex can contain asbestos, a harmful material when its fibres are inhaled. If you suspect your Artex might contain asbestos, have it professionally tested and removed if necessary.

Next, gather the necessary tools. You will need a bucket trowel, a plasterer’s trowel, plaster, a step ladder, protective sheets, goggles, a dust mask, and possibly a PVA bonding agent.

Procedure:

Safety First: Lay down protective sheets over your floor and furniture. Wear protective gear, including goggles and a dust mask, to avoid inhaling dust or getting plaster in your eyes.

Cleaning: Clean your Artex ceiling. This step will involve removing any dirt, dust, or grease from the surface. Use a brush or vacuum to clear any loose material.

Prepping the Ceiling: Apply a PVA bonding agent if needed. This depends on how porous the Artex is. If it’s quite porous, applying a PVA mix can help the new plaster adhere better.

Mix the Plaster: Follow the manufacturer’s instructions to create the right consistency. It should be a creamy texture that’s not too runny nor too stiff.

Applying the Plaster: Start at one corner of the ceiling and work your way across. Apply a thin first coat of plaster using the plasterer’s trowel. It’s important to work quickly before the plaster begins to dry.

Smooth the Plaster: After you’ve applied the first coat, go over it again with your trowel to smooth out any lines or imperfections. You’re looking for a flat and even layer.

Second Coat: Once the first coat is dry, repeat the process with a second, thinner layer of plaster.

Final Smoothing: After the second coat, use the trowel again to smooth out the ceiling. This may take a little time and patience, but the result is worth it.

Conclusion:

Plastering over an Artex ceiling can be a rewarding DIY project, and with this step-by-step guide, it should now feel more achievable. Once your ceiling is dry and smooth, you can paint and decorate as desired, giving your room a fresh, updated look. The world of smooth ceilings awaits you!

Remember to Like, Comment, Share, and Subscribe for more great DIY content. Let’s get plastering and turn that old Artex pattern into a smooth, modern masterpiece!

How To Repair a Shed Roof ~ Simple DIY Job

0

Sam and Jen are back. This time, they’re showing us how to repair a shed roof, or in this case, it’s actually a beach hut, but it’s all the same.

CHECK OUT SAM & JEN’S PLAYLIST
🎬 https://youtube.com/playlist?list=PLvRh7uimDQfe7HR2XDO90ppTiztt1FPgM

Special thanks to Sam & Jen from SJ Ward Builders.
https://bit.ly/3eh17v0