Home Blog Page 66

How to Create a Scarf Joint like a Pro with Robin

HiKOKI Cordless Saw

Robin loves a scarf joint and in this video, he shows you how to create a scarf joint using his new Hikoki 36v cordless circular saw.

If you’ve got two lengths of timber that need to be joined together, it’s time to create a scarf joint. Calculate the height of the timber times three which is the length for the joint.

What we do is create a set of folding wedges. When we drive the folding wedges together it pushes one timber one way, it pushes the other in the opposite direction, and then we finish it with a mechanical fixing in the centre. The joint will hold without a mechanical fixing, but we like a belt and braces approach.

In fact, I often use them without mechanical fixing. There’s no glue involved. Quite often if it’s a hip rafter, for example, which is where I use them all the time, or a ridge.

Because of the length of the joint, you might have a jack rafter fixing right over it, sometimes in a couple of places, and that actually clamps it. It’s a beautiful job.

The other thing to say about the riving knife, if you’re cutting a lot of sheet material, make sure your sheet material is well supported, because as you’re going through, if it gives you a little bind, whereas the riving knife would hold that bind, this isn’t going to do that.

It’s likely to kick back, so you got to avoid that. Make sure your work’s well supported. The battery, again, 36 volts, this one’s fully charged, just come off charge. Take’s about 25 minutes, it’s really good and the high output batteries perform well.

It’s got your indicator on the back, which shows you how much life it’s got. This will run until it’s finished. There’s no dullness. It will run, run, run, and just go boom, finished.

Marking Up

Let’s mark up the simple scarf joint. We just need a couple of bits here. This is the length of timber I’m going to put the scarf joint on. We only have to mark it out once. Even though it’s two pairs, it’s two parts to it, we only have to mark it out once. Let’s just that bit of shake off there.

The joint principle is three times … the length of the joint is three times the height of the timber that you’re joining. I’m going to round this up, just simply, to make it a little bit easier. I’m going to hold it 180, so it’s 300 plus 240. It’s 540. That’s the length of the joint. That’s three times the height. I’ve just got another shoulder line there, over to the other side.

Creating a scarf joint

I’ve got a section of timber (above), which is exactly the same thickness that way. I take the outside to the outside, and I’m going to mark on the opposite side, here. Then what I’m going to use is my speed square to run a couple of shoulders in.

Getting the angles right

It’s a 90-degree shoulder and the same on the other end, coming back there 90 degrees, there. And then all we need to do is put one in the middle, the same principle.

We’re going to cut that out now. Just going to check this is square out of in and out of the box. Pretty nice. This is where the magic begins. This usually happens on a customer’s drive, or anywhere I can find the space.

As you know, timber isn’t an exact science. A natural product, it moves, it bends, it bows, and we got to go with that sometimes.

You’ve got a stack of timber, you pick out the straightest ones for the most important components, a little bit like this. What I need to do is add this whole length onto the end of there, so I need a bit of space for that. Find a nice flat spot on the drive.

I’m going to run it over here, there. We get our piece we’re joining on, make sure the best end of it is going to be joined with that joint. If there’s any cup in the timber, that’s when the timbers go like that. Try to marry the cups up, don’t have the opposites.

Wood grains

Sometimes, just by looking at the end grain, you can see that if you match the end grain the chances are the cup’s going to be in the right place. But this particular structural timber is perfect and I haven’t really had a problem with it.

I’m going to lay that on the ground, and we’re going to lay that over the top, here, brush it off. But the most important thing now is to figure out which is the top of your timber. So, if this is the top of my timber I’m going to give it a little bit of bow. So when the joint goes in, and it goes into compression, it goes straight. It can only go straight.

It doesn’t sink. I’m going to look down that now, make sure it’s nice and true and straight. You can do a string line as well, but I know, from experience, where it needs to be, to be straight, and that’s it.

Now, it’s a matter of marking the male to the female with a pencil, and you can’t get better than that. If you try to mark the joint out to two separate bits and put them together, chances are you’ll have a few gaps, or it won’t exactly fit.

Now, there’s one more bit we need to cut, which is here, and the same there. You see, I’m just roughing it in. That’s 18 millimetres, roughly. That’s for a pair of folding wedges. I’ll put that back up on here. And we just make sure we’re going to cut off the bit we want to cut off, to repeat the process.

I’m going to mark my extra shoulder and cut that as I do it. The joint’s nearly ready, just got to adjust this one. The last bit to make is a pair of folding wedges, and we can just take that off of another cut.

Create a Scarf Joint with strength

Okay, now. We’ll demonstrate how strong this joint is. There are our folding wedges, will go in there. What I like to do is attach one, so when I push the other one, it doesn’t move. All right. We’re just going to tack that in there now.

It’s heartbreaking to see that. When I started putting this joint together, I used that to mark it, which is the same thickness. The only reason I do that is so when I make my folding wedges, it’s the right thickness. And it’s just years, and years, of trying them, practice.

You just think of the quickest way. It’s just an offcut. It’s all it is. Now, we need to demonstrate the strength of this, so we need a couple of bits of timber supported, and we’ll walk across it once it’s wedged together.

Get more wedge, pull that one over. The principle of this joint, I’m just going to mark an arrow on it in two places. That’s what’s happening as we bang the wedges in, a gentle tap. You can see, it’s pulling up now to the shoulder.

A good outcome

What do you think about a joint like that, straight off a circular saw? I mean, it’s what you want. This joint isn’t designed … It’s not for a floor joist, so don’t span big areas and do it for floor joists. It’s ideal for a hip rafter, side rail for a ridge, so the ridge will stop it from pulling apart.

Hip rafter’s got lots of support by jack rafters, but I’m just going to demonstrate. I’m only 65 odd kilos. I’m going to have a little walk across this, just-

I’m just strolled across it, to show that the strength is there and it won’t buckle under pressure.

I made the scarf joint with the HiKOKI brushless 36-volt cordless saw and it performed well and coped with it. The timber was fantastic structural timber that’s been dried out for ages inside, and it cut with no problem.

Now, if you want to see some more tips and tricks, just keep checking back to the channel. Please subscribe to our channel and check back for more carpentry tutorials.

Further Reading

More carpentry tutorials with Robin Clevett.

See more HiKOKI products on Skill Builder.

Find out more about the HiKOKI 36v Circular Saw.

Damp in the Extension & Solo Building – ASB #16

Send us your pictures and videos: http://skill-builder.uk/send

Alex Porter is trying to fix a leaky tap and replace the cartridge.

Bandy has an outbuilding attached to the side of his house that suffers from damp and mould during the winter.

Bill Booth is building an extension and wants to reduce thermal bridging.

Neil Lennon is trying to overhaul his sanitary wear in his ensuite bathroom on a very tight budget (while managing Celtic).

007 is a self-taught builder who has watched our bathroom videos and is learning tricks of the trade and has decided to build a wet room for his mum using an Abacus Infinity Single Fall Shower Tray.

Tim Margereson is a sole trading builder in North Norfolk. He does entire jobs from footings to finishings except for electrics or heating all on his own and only works for about a dozen customers and keeps doing the rounds for them year after year. He invited us over for a cup of tea!

Get the Best From Your Recip Saw with HiKOKI

Roger takes us through the best practices of using a recip saw with the Hikoki CR36DA 36V Reciprocating Saw.

MORE FROM HIKOKI
______________________

Reciprocating saw with a brushless motor. Powered by multi-volt batteries for output similar to mains powered tools. Orbital cutting mechanism. 4-stage plus variable speed control. Toolless blade fitting and shoe adjustment. LED work light. Folding rafter hook. Supplied with carry case.

• 2 x 2.5Ah Li-Ion Batteries
• 4-Speed Variable
• Quick-Release Blade Change
• 32min Charge Time
• Electronic Brake
• All-Metal Gearing
• LED Work Light
• Soft-Grip Handle

Milwaukee M18 Cordless SDS-Max Breaking Hammer

Robin is checking out more cordless tools from Milwaukee and this time it’s the SDS-Max 8kg breaker and it’s a beast!

MORE INFO FROM MILWAUKEE

The M18 FHM is the most productive SDS-Max tool Milwaukee have produced, delivering AC style power with the flexibility of the cordless M18 platform.

Next generation POWERSTATE brushless motor: This is Milwaukee´s most powerful motor utilising higher grade magnets and 175% more copper vs previous motors.

Next generation REDLINK PLUS intelligence system delivers advanced digital overload protection for tool and battery and uniquely enhances the tool performance under load.

New REDLITHIUM-ION HIGH OUTPUT 12.0 Ah battery pack provides superior pack construction, electronics and fade-free performance to deliver the most work per charge than any other Milwaukee® battery pack.

Cordless SDS-Max with ONE-KEY

ONE-KEY tool tracking & security offers a cloud-based inventory management platform that supports both location tracking and theft prevention.

Trigger lock-on prevents users from having to hold trigger during long periods of chipping applications.

Large anti-vibration back handle supports two-handed drilling applications whilst minimising vibration exposure.

Service light indicator illuminates when tool requires servicing.

Anti-vibration side handle for lower vibration exposure.

Stud Work Like a Pro with Robin – Capel #10

Get your stud work framing in like a pro! Robin shows you how he cuts and installs his stud work frames quickly and accurately.

Did we mention he loves Stabila? He’s very happy with his new Stabila Telescopic Spirit Level.

How to Build a Stud Wall with Robin Clevett.

The Capel Build is coming along slowly but surely and we’ll be spending more time inside from now on and the next episode will show you Robin’s MVHR system from Lindab.

Buy the products in this video

🛒 Stabila 17708 Extendable Box Level

🛒 Festool HKC 55 Circular Saw

The Old Mould Problem Returns – ASB #15

Send us your pictures and videos: https://skill-builder.uk/send

Adrian Reynolds has black mold around his window reveals. He’s tried cleaning with bleach, used a dehumidifier and seeks pearls of wisdom to help get rid of it.

Chris Stephenson would like to install a designer ceiling extractor over an island but is worried about fiddling with joists.

Ryan Thorpe is a 21-year-old bricklayer from Lincolnshire who just left his gang because of money problems and now self-employed working big sites. He needs to find someone to work with.

Will Laurie just moved house and has a wetroom/toilet in the garage. There is a sanishower pump getting rid of the water, but the shower basin fills up faster than the water leaves.

Richard Matzak had problems with a digital RF thermostat (Salus RT300RF) and changed it to a Nest. The problem was the radio frequency using the same as a neighbour’s.

Zak Haque bought a house and is in the middle of refurbishing. He’s partitioned the existing bathroom in to two, and is looking for fitters but has not been happy with the approach most fitters want to take.

Robin’s Ashtead Extension Project Tour

Another tour with Robin. This time it’s a single-storey extension at a house in Ashtead Surrey.

NEW from Solid Gear – the Onyx Safety Shoes and Boots

Great value safety footwear with the unique BOA closure system for maximum comfort.

Nowadays, good safety footwear is part and parcel of a comfortable day’s work on-site – just like good working clothes and quality hand tools.

Combining maximum comfort and protection with a robust and durable design, Solid Gear’s Onyx is available as a shoe or a boot and ideal for different types of on-site work.

This EN-accredited footwear has a modern-looking style that integrates a seamless upper and Cordura reinforcements with a poured polyurethane midsole, a breathable footbed and strong rubber outsole for maximum grip on slippery and uneven surfaces. Metal-free protection comes from the fibreglass toecap and penetration board for extra personal safety.

What’s more, the unique BOA Closure System – used on many top-brand sports shoes – distributes the pressure of the fastened shoe evenly across your feet to ensure a glove-like fit all day for maximum comfortable protection.

To get more information on Solid Gear – the Next Generation of Safety Footwear – visit the website at www.solidgearfootwear.com alternatively, call the Hultafors Group UK Helpline on 01484 854788.

Capel #9 – Installing a Korniche Roof Lantern

Roger and Robin see if they can install three Korniche Roof Lanterns in one morning and get Robin home and dry! Perfect for lightening dark rooms.

See our detailed Korniche Roof Lantern installation video:

[youtube https://www.youtube.com/watch?v=usMK-VybGKU&w=560&h=315]

Check out Korniche Roof Lanterns, bi-folding doors and conservatories from Made for Trade:
https://www.madefortrade.co

More on roof lanterns from Skill Builder.

#10 ~ Keeping Track & Organisation

0

Robin & Roger are back with another podcast episode to help you in your everyday work life and we’re looking at getting organised and keeping track of materials, time and even ‘people’.

We’ve managed to get to 10 episodes without mentioning Brexit but we slipped in this episode so sorry about that, it’s only a little bit!

Transcript to follow.

How to Cut & Connect PVC Waste Pipe – Plumbing DIY

Do you want to know how to cut, join, slice and solvent weld PVC waste pipe?

Roger is back at Redhill Plumbing to give you a tutorial on how to cut plastic pipe and the tools you can use to get the job done.

Rothenberger Dual Slice
Rothenberger 19429 Dual 15/22 Pipeslice Pack
OX Tools PVC Pipe 16 Cutter
OX Pro PVC Pipe Cutter 16 - 42mm
Rothenberger Rocut 42
Rothenberger 52000 Rocut 0-42mm Plastic Pipe Shear
Rothenberger 19429 Dual 15/22 Pipeslice Pack
OX Pro PVC Pipe Cutter 16 - 42mm
Rothenberger 52000 Rocut 0-42mm Plastic Pipe Shear
Price not available
£28.31
£53.90
Rothenberger Dual Slice
Rothenberger 19429 Dual 15/22 Pipeslice Pack
Price not available
OX Tools PVC Pipe 16 Cutter
OX Pro PVC Pipe Cutter 16 - 42mm
£28.31
Rothenberger Rocut 42
Rothenberger 52000 Rocut 0-42mm Plastic Pipe Shear
£53.90

See more plumbing hacks and DIY with Roger on Skill Builder.

How to Install Interior Doors – Robin’s Step by Step

The final part of our internal door installation series, hanging an interior door. Robin Clevett hangs the door in his frame and shows you loads of his carpentry tricks and tips.

This video shows you how to install an interior door that is not prehung and quite a tricky DIY door install.

If you missed the first two parts you can see them here:

Part 1 – How to Fit Door Frame Lining – Fitting Tricks
Part 2 – Fitting Door Trims, Architraves & Skirting Boards

Door, handle and accessories from XL Joinery – https://www.xljoinery.co.uk

How to Install Interior Doors

XL Joinery has a huge range of modern styles in its range, but it hasn’t neglected the traditional classics such as this 4-panel softwood Shaker style door. Carpenter and joiner Robin Clevett gives us a few of his tips on how to hang a door.

Most people know that fire doors require three hinges but what about non-fire rated doors? When I was at college we were taught that most internal doors could be hung quite happily with two hinges.

The exceptions were where the finish was different on either side or where there would be a difference in humidity or temperature. That would be a bathroom door for sure and maybe a kitchen or utility room door.

3 Hinges

These doors require three hinges and I notice that it is becoming standard practice to fit three hinges. You might suspect that it is hinge manufacturers who are keen to increase their sales by 50% but the real reason is that three hinges helps prevent warping.

We live in an age of quick grown timber and it is therefore doubly important that you keep the door wrapped until you are ready to hang it and then when you do hang it that you don’t leave any bare timber. It might seem like overkill, but I always dab a bit of quick-drying primer or sealer behind the hinges as well as on planed areas.

If you have to shoot a door in, take the same amount from either side rather than just trimming up one side. These XL doors are capped with hardboard but are not hollow.  The hardboard shell means there will be no shrinkage on the panels of rails, but it also means you have that little wrap over on the edges.

I use an electric planer on the jams for greater accuracy but on the top and bottom rails I like to use my track saw to avoid tearing the end grain.

Cutting in Hinges

Back in the day I used to do all the hinges with a chisel when I was an apprentice but now I route them in freehand. It is easy enough to keep the router on the line if you mark the hinge out with a Stanley knife or marking gauge because you can stop short of the line.

The router gives you a perfectly flush hinge but sometimes you need to set them in ever so slightly deeper. I usually do a trial fit on flush and then, if I need to reset the router I am good to go with the rest of the do. There is nothing to bear a production line approach. The first door takes an hour or more and the last one takes 20 minutes.

One thing I have on my shopping list is a smaller router. If you are cutting in hinges freehand then a 1/4-inch router that is handheld is a better way to go. I am looking at a few cordless palm routers that are easy to use one-handed so watch out for my review on those.

The handles and three hinges came from XL indoor fitting packs, which is a really good way of selling all you need. The tubular latch is included and the 65mm backset puts the handle right in the centre of the stile.  You should also not generally fit the latch in line with the mid-rail because it can weaken the joint.

eSynic Air Wedge Pump
eSynic Upgraded Air Wedge 2Pack Door Pump Up Bags Rounded Corner Design Air Wedge Door Pump Up Bags Perfect Air Retention Inflatable Air Wedge Bearing 300lbs for Door Window Lifting
One Sight Air Pump Wedges
One Sight 2PCS Air Pump Wedge Up Bag Square Clamp Air Wedge Pump Hand Precise Alignment and Leveling for Home Use Door Window Installation Auto Repair Inflatable Shim Cushioned Powerful Hand Tools
Hedgehog Easy Air Wedge Pump
Pack of 2 Hedgehog Easy Air Wedge Pump Up Air Tool For Fitting Windows Doors Lifts Up To 140 Kilogram
eSynic Upgraded Air Wedge 2Pack Door Pump Up Bags Rounded Corner Design Air Wedge Door Pump Up Bags Perfect Air Retention Inflatable Air Wedge Bearing 300lbs for Door Window Lifting
One Sight 2PCS Air Pump Wedge Up Bag Square Clamp Air Wedge Pump Hand Precise Alignment and Leveling for Home Use Door Window Installation Auto Repair Inflatable Shim Cushioned Powerful Hand Tools
Pack of 2 Hedgehog Easy Air Wedge Pump Up Air Tool For Fitting Windows Doors Lifts Up To 140 Kilogram
£10.46
Price not available
£26.99
eSynic Air Wedge Pump
eSynic Upgraded Air Wedge 2Pack Door Pump Up Bags Rounded Corner Design Air Wedge Door Pump Up Bags Perfect Air Retention Inflatable Air Wedge Bearing 300lbs for Door Window Lifting
£10.46
One Sight Air Pump Wedges
One Sight 2PCS Air Pump Wedge Up Bag Square Clamp Air Wedge Pump Hand Precise Alignment and Leveling for Home Use Door Window Installation Auto Repair Inflatable Shim Cushioned Powerful Hand Tools
Price not available
Hedgehog Easy Air Wedge Pump
Pack of 2 Hedgehog Easy Air Wedge Pump Up Air Tool For Fitting Windows Doors Lifts Up To 140 Kilogram
£26.99

Air Wedges

One thing I could not do without these days is a pair of air wedges to pump the door up into position. The old-style door lifter was all well and good but a little pump on each bag means you can dock it in precisely.

To be honest I am so busy cutting in roofs for builders these days that I don’t do a lot of second fix work these days. There was a time when I would get set up and in a long day I could do a whole house but not now. Still, I enjoyed myself doing these XL doors and it is good to keep my hand in

The XL primed doors look good, but they need painting with a couple of coats as soon as they are fitted. Remember to apply the same number of coats to each side of the door.  I have seen people leave one side of a door stripped and the other painted and they wonder why they end up with a banana.

See more on doors with Skill Builder.

Fitting Door Trims, Architraves & Skirting Boards

Before you watch Fitting Door Trims, make sure you watch DID YOU SEE PART 1? https://youtu.be/6E9KWP_ooHI

Part 2 of our 3-part series on door fitting, framing, lining & skirting. Robin has moved on to the door trims, architraves and skirting baseboard.

As usual, he has his own methods for getting it all in neatly.

See more tutorials on carpentry and building on Skill Builder.

New Plaster Research Heralds the End of Lime

New plaster research heralds the end of lime

While conservation officers and others are keen to ensure the use of traditional lime-based plasters and renders on listed and heritage buildings; research into new technology by Safeguard Europe – the UK’s leading specialist in damp-proofing and waterproofing technology – suggests that better, more effective options are available.

The preference for lime plasters in conservation applications today is because of their perceived traditional material composition and, especially, breathability – allowing walls to attenuate moisture to the environment.

However, in the face of rising or penetrating damp, lime plasters can start to fail. This is especially the case where the dampness introduces salts into the plasterwork. Furthermore, new research shows that lime plasters are far from the most breathable of their kind; and modern hybrid ‘hi-lime’ or damp-resistant materials are far more effective.

In these tests, hi-lime plasters were shown to allow transmission of around 1.2kg/m2 of water vapour over a fourteen-day period, compared to 0.85 1.2kg/m2 for a traditional mix of 3:1 sand and lime. More interestingly, recently introduced proprietary damp-resistant and fast set plasters were also shown, over two weeks, to transmit 1.55 kg/m2 and 1.48kg/m2 of water vapour respectively.

Consequently, there is a need for internal plastering systems that are impervious to damp; while not creating the problems associated with a sand and cement system: condensation risk and vapour impermeability.

SE1909HP Safeguard Europe Heritage Plasters Research

New ‘second generation’ plastering systems have been introduced that are more resilient to dampness and salts than traditional plastering methods. These modern systems are capable of being applied to walls that are still damp and can resist high levels of moisture and salt ingress. The make-up of these plasters means they have large pores and a high pore volume. This allows salts to form within the plaster rather than on the surface; and the high pore volume results in thermal resistance, reducing the risk of condensation.

Other properties include a 0.3m2 compressive strength, ensuring that the plaster can easily be removed later without damaging underlying brickwork; high water vapour diffusion (breathability) and conformity for the EN998-1 CE Standard as ‘Renovation Mortars’.

While traditional plasters have been used on internal walls for thousands of years to create smooth, decorative surfaces – lime-based plasters were used in Jordan as long ago as 7500 BC, and clay and gypsum in ancient China and India – the orthodoxy around plastering in listed and conservation environments, save when special materials or skills are demanded; can now be effectively challenged: and in the best interest of heritage buildings too.

For further details of Safeguard’s advanced, high-performing hi-lime and damp-resistant plasters, visit www.safeguardeurope.com/products/dryzone-system

How to Fit Door Frame Lining – Fitting Tricks

Robin’s back with another carpentry tutorial. This is the first part of a series of three and it’s how to fit interior doors, part one is the door lining.

See more on door fitting on Skill Builder.

Flaky Paint & Treating Woodworm – ASB #14

Greg has a strange patch on his wall and wonders what is causing this on an outside wall that’s not long been replastered and painted.

Treating Woodworm

Treating Woodworm
Little woodworm lies on tree

Treating Woodworm is at the top of James Swinyard’s ‘to do’ list. He’s renovating a house and has stripped it out completely to rewire it and upgrade the heating and plumbing systems and has found traces of woodworm. Most seem okay but in the bathroom particularly the floorboards seem very brittle.

Jim Lea has french doors on a South-facing wall and wonders what paint system we’d recommend as he currently uses Dulux Weathershield exterior paint but it only lasts about a year and he’s getting fed up of painting them when it says on the tin its 10 years!

Peter Need is renovating his bathroom and has taken out the bath, basin, toilet and wants to replace these. The dilemma is he needs a hot and cold supply to everything. Should he take out all that piping and start again?

Gary Atkinson now has the confidence to refit his own ensuite bathroom and wants to top out the stud wall surrounding the frame for the toilet with a removable shelf, but cannot find it.

Don’t worry Gary, the Abacus Simple Shelf is here:
https://www.abacus-bathrooms.co.uk/#!/sanitaryware-furniture/furniture/shelves/Shelf-1800x320mm.html

The NEW ProtecWork Protective Clothing From Snickers Workwear

Fully accredited, advanced Protective Wear for heat and flame, electrostatic and chemical risk environments from the UK’s leading workwear innovator.

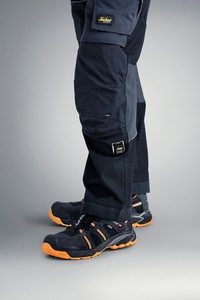
ProtecWork is a new collection of protective working clothes and accessories from Snickers Workwear, which has developed out of over 40 years leading the workwear industry – and through close consultation with users and employers in the railway and energy sectors around Europe.

The market-leading risk-protection properties of the clothing are integral components of the extensive range of Base-, Mid- and Top-Layer garments for men and women that combine well with the Snickers Workwear hallmarks of best-in-class durability, comfort, ergonomics and fit.

Fully accredited as appropriate to a variety of risk and weather conditions such as heat and flame, electrostatic, chemical and bad weather working environments, all the garments are manufactured from tailor-made fabrics designed to respond to the demands and risk factors of the conditions in which they’re worn.

So with over 60 different garments and accessories to choose from, you can make sure you get the right protection, visibility, flexibility, comfort and durability. Check out the new Snickers ProtecWork range to fit your workday and well-being on site.

For more information on the new ProtecWork products, visit www.snickersworkwear.co.uk alternatively, call the Snickers Workwear Helpline on 01484 854788.

Tenant Complaints Could Soar with Homes Act 2018

0

Tenant complaints could soar with Homes (Fitness for Human Habitation) Act 2018

www.safeguardeurope.com

The recently introduced Homes (Fitness for Human Habitation) Act 2018 – which came into force in March – potentially heralds a significant increase in tenant complaints against landlords whose properties fail to live up to ‘fitness’ standards according to new research from YouGov.

The findings of the YouGov poll, commissioned by damp-proofing experts Safeguard Europe, show that, in the light of the new legislation, 42% of renters are now more likely to complain about the condition of their homes.

The new 2018 Act supersedes the Landlord and Tenant Act 1985 so that tenants can take landlords to court if their homes are not fit to live in. Although this was theoretically possible previously, it only applied where rents were £52 a month or less (£80 or less in London). The survey shows that not only do 71% of renters pay between £250 and £750 per month in rent; but also over half of them (51%) said that they had lived in homes with a damp problem.

Damp and mould is the largest cause of tenant dissatisfaction with properties and experienced by 51% of renters: a figure rising to 55% in the private sector. Furthermore, 26% reported properties with little or no ventilation in areas of high humidity – a known factor in causing damp problems, especially those arising from condensation, in homes.

YouGov spoke to just over 1,200 tenants in private, local authority and housing association rented accommodation; and the survey showed that the problem cuts across employment, martial and parental status. When considering working status, those employed full time are most likely to encounter damp – 61% – compared to the retired, who are least likely at 31%.

Among families, there is a strong correlation between the number of children and the incidence of damp, with 65% of those with three or more children having issues – unsurprisingly, perhaps, as washing, cooking and cleaning are major vectors of condensation and more associated with larger households.

One demoralising finding is the lack of change in the numbers of groups suffering from damp in the past few years. In an earlier survey – looking at how damp problems damaged house prices – it was found that 52% of tenants had lived with damp; whereas the figure today is 51%, suggesting an ongoing reluctance on the part of landlords to invest in remediation.

Whether tenants will be prepared to complain to landlords under the new rights conferred by Homes (Fitness for Human Habitation) Act 2018 remains to be seen: especially while ‘Section 21 evictions’ are possible. These so-called ‘no fault’ evictions can take place at the end of tenancies, and this section of the Housing Act 1988 is claimed to enable revenge behaviours on the part of landlords confronted with tenants perceived as troublesome, even if only insisting upon accommodation being brought up to fit standards.

While there is a current proposal to amend the Act to scrap Section 21, the many tenants living in properties under Assured Shorthold Tenancies of six months see continuity of residency as important and those suffering with damp may be deterred from exercising their right to complain while the risk of eviction – rather than tenancy renewal – lingers.

Hudson Lambert, managing director of Safeguard Europe says of the findings: “Not only does the survey confirm our experience that damp is a massive problem in the tenanted sector; but also that little progress has been made in the past few years in bringing damp properties up to scratch”.

“Treating damp is not difficult, given the expertise and technologies existing today; and plenty of assistance is available to both landlords and tenants if they seek it. Plainly, the vast majority of landlords aren’t avoiding their responsibilities to provide decent accommodation; yet the mental and physical health impacts of damp, mould and condensation should not to be underestimated and there should be a greater degree of mindfulness about it”.

“We only hope that the next time such a survey is conducted, we see a significant reduction in the numbers of people whose lives are blighted by these problems”.

Safeguard Europe’s range of market-leading, proven damp-proofing solutions is supported by the company’s own highly qualified and experienced staff. The support and know-how they offer is extended to contractors, specifiers and property owners and includes technical advice, specification help, research and even in-house laboratory analysis of plaster and masonry.

For full details of the survey, visit safeguardeurope.com/news/edt1-idt2-home-fitness-for-human-habitation-act-yougov-poll

The Van Insurer Reveals Customers’ Top 10 Vans

0

Investing in a new van is a big decision to make. Between the different makes and models, varying specifications, questions about fuel consumption and insurance costs to consider, it’s hard to decide what’s best for you and your business.

Insurance comparison website The Van Insurer has crunched its quote data from the last 12 months to find the most popular vans amongst those looking for insurance cover.

The data also identified the favourite vans amongst electricians, builders, carpenters and gardeners, and it’s clear that some vans are more popular with certain tradespeople than others. 


Top 10 Vans of 2018

1.     Ford Transit

The Ford Transit pipped all the others to the post to gain the top spot in 2018, with a third of  quotes processed relating to the trusty Transit.

Boasting flexibility and adaptability, three load lengths and driveline configurations, to name but a few perks, it’s easy to see why many van drivers would consider this one a worthy winner.

In fact, it was the builder’s vehicle of choice, with the largest percentage of overall quote requests for the Transit coming from builders. Gardeners also favour the Transit, with this van proving to be the most popular with green-fingered drivers.

2.     Vauxhall Vivaro

The second most quoted-for van last year was the Vauxhall Vivaro.

Vauxhall prides itself on offering practicality and efficiency with this little mover. Boasting strong styling and serious payload capacity, it’s another van offering comfort and cutting-edge tech to support you while you’re out on the road.

3.     Ford Transit Connect

The Transit Connect was the second of Ford’s vans to make the top three rankings.

Toughness, durability and functionality are just three of the features synonymous with this van. According to Ford, it’s been given a sophisticated new look, comprehensively updated interior and more advanced technology than ever before, which seems to have paid off.

4.     Volkswagen Transporter

The total quotes processed for the Volkswagen Transporter placed it firmly in fourth place.

Volkswagen’s worked hard to ensure that this latest edition offers advanced engine technology that saves money and the environment. Coupled with the comfort and practicality you’d expect from the Transporter, clearly it’s another top choice.

5.     Mercedes-Benz Sprinter

The Mercedes Benz Sprinter came in fifth in our rankings. 

Mercedes believes it’s plugged a gap in the market with this latest Sprinter edition. Claiming to offer new levels of individuality, productivity and efficiency, all customisable to the van driver’s needs, it looks like their message really has got across.

Perhaps it’s no coincidence that the Sprinter proved to be the delivery driver’s top van choice for 2018. Over 10% of quote requests for this nippy motor came from delivery drivers and couriers. 

6.     Vauxhall Combo

The Vauxhall’s Combo van remains another firm favourite amongst customers, taking the sixth spot.

In addition to several award wins, Vauxhall likes to boast about the Combo’s practical design, paired with a sleek and sporty finish. For practicality and efficiency, it’s evidently a good choice.

7.     Citroen Berlingo

Following hot on the heels of the Combo, the Citroen Berlingo came a very close second to the Vauxhall favourite, with only slightly fewer quotes generated.

If you’re looking for versatility and a van that will take you from work to play, this is probably it. Space, comfort and modularity come as standard with this van, which explains why its spot in the top 10 is justified. 

Painters and decorators seem to share this view, as it was The Van Insurer’s most quoted-for van by those in the trade last year. 

8.     Renault Trafic

The Renault Trafic took eighth position in the countdown of van drivers requesting quotes.

Renault claims that the needs of the van driver have been put first with this edition, which offers numerous variants and impressive fuel efficiency. It’s an award winner too, making it another worthy top 10 entry.

9.     Volkswagen Caddy

Volkswagen’s second top 10 entry belonged to the Caddy.

It’s another van that offers impressive technology as standard, from adaptive cruise control and an in-built parking system to safety systems that give you peace of mind. It’s a great little mover that’s just inside the top 10.

Improved tech obviously has appeal for sparkies, as more than 6% of electricians requested quotes last year, making it the most popular van for that sector of the trade, according to the online insurance comparison website.

10.  Ford Transit Custom

The third Ford van to make the top 10 was the Transit Custom.

Ford claims the latest evolution maintains its toughness, functionality and reliability but now delivers an even wider range of innovation and smart technology. It’s clearly another Ford favourite that deserves its top 10 status.

The Ford Transit Custom is a firm favourite amongst carpenters, as nearly 6% requested insurance quotes last year, the highest from that demographic.

Jade Isabelle, Commercial Director at The Van Insurer, says: “Here at The Van Insurer, we are used to handling quotes for van drivers with various requirements and from all types of tradespeople, but it’s always interesting to see patterns emerging amongst our customers.

“There are so many van choices out there, but clearly some vans answer the needs of certain sectors of the trade more than others.

“Whether you need your van for work, play or somewhere in between, we like to remind all of our customers that we can help to find a quote that works for them.”

*The Top 10 list comprises the vans for which The Van Insurer received the most quote requests from January to December 2018. 

Hellberg Safety PPE and Snickers Workwear – Comfort and Safety Combined

The Hultafors Group Adds Hellberg Safety PPE products to its premium brand portfolio for professional tradesmen and women.

With over 50 years of experience in the PPE industry, the Hellberg Safety specialist equipment includes highly advanced hearing protection products, face protection and communication solutions for personal protection on site.

From face guards, helmets and passive hearing protection with up to 3 levels of protection from low to extreme noise, Hellberg also supply secure electronic hearing protectors to suit different work environments.

Peter Dumigan, managing director of the Hultafors Group UK says, “Hellberg PPE products complement the Snickers Workwear and Solid Gear Safety Footwear product portfolios so well – in particular, the newly launched Snickers Workwear ProtecWork Heat and Flame Protective Wear”.

“The Hultafors Group now provides the UK market with an even more extensive range of EN-accredited, top quality premium brand products, ideally suited to protect the personal wellbeing and safety of the discerning professional tradesman and woman”.

Getting information on the new Hellberg Safety product range is easy – call the Hultafors Group UK Helpline on 01484 854788 or checkout the website www.hellbergsafety.com