Home Blog Page 3

Moisture and Ventilation in Suspended Floors and Cavity Walls

0


Moisture problems in older properties are rarely caused by one simple issue. When water or dampness appears inside a building in Suspended Floors, the visible symptoms may only be the final result of a much larger problem involving drainage, ventilation, ground levels and the construction of the building itself.

This is particularly true with Suspended Floors, where the space beneath the floor can conceal moisture problems for years before they become obvious inside the property.

One of the most important principles is understanding the role of the damp proof course. A physical damp proof course creates a continuous barrier designed to prevent moisture travelling upwards through the structure. While chemical injection systems and dry rod alternatives can have a role in certain situations, they cannot automatically replace a physical barrier that is missing, damaged or incorrectly installed.

This is why diagnosing damp in Suspended Floors requires more than simply treating the visible symptoms. Applying a chemical product to a wall may not solve the problem if the real source of moisture is defective drainage or water collecting beneath the building.

French drains can also play an important role in managing groundwater, but only when they are designed and installed correctly. A French drain installed too shallowly may fail to intercept water effectively. It needs to be positioned at an appropriate depth, installed with sufficient fall and protected with a suitable membrane or geotextile system.

If these details are ignored, the drain may quickly become blocked with soil and sediment. Instead of removing water from around the foundations, it can become another source of moisture. This can create serious problems for Suspended Floors, particularly where the subfloor space is poorly ventilated.

Suspended Floors Need Adequate Ventilation

Ventilation is one of the most important factors in controlling moisture beneath Suspended Floors. Air bricks allow air to move through the subfloor void, helping to remove moisture and reduce the risk of condensation and timber decay.

Unfortunately, air bricks are sometimes blocked, covered or removed during landscaping and building work. This can restrict airflow and allow moisture levels beneath the floor to rise.

Blocking air bricks is not generally a solution to damp. In many cases, it can make the problem worse.

Surface water management is equally important. Rainwater from roofs, driveways and paved areas must be directed away from the building wherever possible. A blocked gully, leaking downpipe or poorly designed drainage channel can saturate the ground around the foundations.

That moisture can then migrate into the structure and create ongoing problems beneath Suspended Floors.

A proper investigation should therefore consider the entire building and its surroundings. Inspect the drainage, check the ground levels, examine the air bricks and investigate any alterations that may have changed the way water moves around the property.

The key lesson is that damp should not be diagnosed from one symptom alone. A damp wall does not necessarily mean the wall itself is the source of the problem.

The same applies to Suspended Floors. Moisture beneath a floor may be caused by poor ventilation, leaking drainage, groundwater, surface water or a combination of several issues.

The most reliable approach is to investigate the cause before choosing a treatment. Physical damp proof courses, correctly designed drainage and adequate subfloor ventilation all have important roles to play.

Understanding how these systems work together is essential for protecting Suspended Floors and preventing moisture problems from returning.


Ventilation is one of the most important factors in controlling moisture beneath Suspended Floors. Air bricks allow air to move through the subfloor void, helping to remove moisture and reduce the risk of condensation and timber decay.

UK Government guidance on moisture resistance and ventilation in buildings also highlights the importance of properly ventilating spaces beneath suspended timber floors. Approved Document C: Site preparation and resistance to contaminants and moisture


Suspended Floors


_______________________


Got a question of your own? Send it in — Ask Skill Builder is a free service!

📪 ASK SKILL BUILDER
https://skill-builder.uk/send

We have over 1,300 episodes. Join 740,000 subscribers and help us hit that 1 million milestone!


Is Spray Foam Insulation Actually Worth It?

0

Spray foam insulation has become one of the most controversial ways to improve the energy efficiency of a home. Marketed as a fast and effective way to insulate lofts and roofs, spray foam can reduce heat loss, improve airtightness and help create a warmer home.

However, it is not a simple solution that is suitable for every property.

The type of spray foam used, the condition of the roof, the way it is installed and the existing ventilation can all affect whether the system performs successfully. In some cases, poorly specified or incorrectly installed spray foam insulation can create serious problems for homeowners.

This guide explains how spray foam works, the difference between open-cell and closed-cell foam, the potential risks to roof structures and why some mortgage lenders may be reluctant to lend on properties where spray foam has been installed.

What Is Spray Foam Insulation?

Spray foam insulation is a liquid material that is sprayed onto a surface before expanding and curing into a layer of insulation. It is commonly used in lofts and roof spaces, where it can be applied to the underside of the roof covering or between and around roof rafters.

Unlike traditional insulation materials such as mineral wool, fibreglass or rigid insulation boards, spray foam expands after application. This allows it to fill gaps and irregular spaces, potentially creating a continuous layer of insulation.

That ability to expand is one of the reasons spray foam became popular. Older roofs can contain awkward corners, gaps and irregular spaces that can be difficult to insulate using conventional products.

However, the same characteristic that makes spray foam insulation useful can also create problems if the material is applied without proper assessment of the roof construction.

Open-Cell vs Closed-Cell Spray Foam

There are two main types of spray foam insulation used in buildings: open-cell and closed-cell foam.

Open-cell foam has a more flexible structure and contains interconnected air pockets. It is generally softer and less dense than closed-cell foam. Because it expands significantly, it can fill larger gaps and irregular spaces.

Closed-cell foam is denser and more rigid. Its cells are largely sealed, giving it different thermal and moisture characteristics. It can provide a high level of insulation in a relatively thin layer and may also add some structural rigidity to the surface to which it is applied.

However, neither type of spray foam insulation should automatically be considered the right choice for every roof.

The correct specification depends on the construction of the building, the condition of the roof, the level of ventilation and how moisture is expected to move through the structure.

This is particularly important in older UK homes, where roofs may have been designed to breathe differently from modern buildings. Changing the way a roof is insulated can therefore alter the movement of air and moisture within the roof space.

Insulation Must Work With the Roof, Not Against It

A roof is not simply a barrier designed to keep rain out. It is part of a wider building system in which moisture, air movement and temperature all interact.

Traditional roofs may rely on ventilation to remove moisture from the roof space. If spray foam insulation is installed in a way that blocks existing ventilation routes, the conditions within the roof structure can change.

This is one of the reasons a proper assessment is important before any spray foam insulation is applied.

Insulation should not be considered in isolation. The condition of the roof covering, the underlay, the rafters, the eaves and the existing ventilation all need to be considered together.

A roof that already has water ingress, condensation or timber decay should not simply be covered with insulation and left untreated. Any existing problems need to be understood before the insulation system is installed.

Can Spray Foam Insulation Damage a Roof?

The presence of spray foam insulation does not automatically mean that a roof has been damaged.

However, concerns have been raised about situations where spray foam has been installed over roof timbers or roof coverings without sufficient inspection or consideration of the existing construction.

If moisture enters the roof structure, spray foam can potentially make inspection more difficult. Areas of timber may become hidden from view, making it harder to identify problems such as rot, decay or insect attack.

In some situations, concerns have also been raised about the interaction between foam, roof coverings and timber. The precise risk depends on the product, the installation method and the condition of the roof.

The key point is that spray foam insulation can make future inspection and maintenance more complicated. A roof may still be perfectly sound, but assessing its condition can become more difficult once parts of the structure are covered.

This is particularly important when buying or selling a property. A surveyor may need to establish the condition of the roof and the materials used before being able to provide a clear assessment.

Why Do Some Mortgage Lenders Refuse Homes With Spray Foam?

One of the biggest concerns for homeowners is the impact spray foam insulation can have on obtaining a mortgage.

Some mortgage lenders have historically been reluctant to lend on properties where spray foam has been installed. This does not necessarily mean that every property containing spray foam is unmortgageable.

Instead, lenders may require additional information before deciding whether the property represents an acceptable security.

This can include details about the product used, the installation method, the condition of the roof and the findings of an independent survey.

The difficulty is that spray foam insulation is often hidden once installed. If the homeowner cannot provide documentation showing what product was used and how it was installed, obtaining an assessment may become more complicated.

For a homeowner looking to sell, this can create delays and additional costs.

A buyer may be concerned that their mortgage lender will not accept the property. The buyer may then request further surveys or ask the seller to provide evidence that the installation was carried out correctly.

In some cases, the issue can become a negotiation point during the sale.

This is why homeowners should keep records of any spray foam insulation installation, including product information, installer details and any relevant assessments or guarantees.

Is Spray Foam Insulation Right for Your Home?

There is no simple yes-or-no answer.

Spray foam insulation can provide useful thermal performance benefits when the correct product is specified and installed correctly in a suitable building.

However, it is not a universal solution for every loft or roof.

Before installing spray foam insulation, homeowners should consider:

  • The age and construction of the property
  • The condition of the roof timbers
  • Existing ventilation
  • The type of roof covering and underlay
  • The type of spray foam being proposed
  • How the installation will affect future inspections
  • Whether the work could affect future mortgage or resale plans

A proper assessment is particularly important where there are already signs of dampness, condensation or roof defects.

The temptation with any insulation system is to focus on the headline benefit: a warmer home and reduced heat loss. But the performance of insulation depends on how it interacts with the rest of the building.

The Bottom Line for UK Homeowners

Spray foam insulation is not automatically good or bad.

Its performance depends heavily on the property, the roof construction, the product selected and the quality of the installation.

The biggest mistake is treating spray foam as a quick fix for every cold loft or poorly insulated roof.

Insulation needs to be part of a wider strategy that considers ventilation, moisture movement, roof condition and the long-term maintenance of the building.

For homeowners considering spray foam insulation, the best approach is to understand the roof first and choose the insulation system second.

And if spray foam is already installed, do not automatically assume that the roof is defective or that the property cannot be mortgaged. Instead, gather as much information as possible about the product and installation, arrange an appropriate assessment where necessary and establish the actual condition of the roof.

The right insulation can improve the energy performance of a home. But the wrong insulation system, installed in the wrong place or without understanding the building, can create problems that are far more expensive to resolve later.

Insulation

🔑 Key Takeaways

• Professionally applied spray foam is not the same as the DIY stuff from a can

• Open cell and closed cell foams behave very differently — the wrong choice for your roof type can cause serious moisture problems

• Surveyors can’t see behind foam without an invasive inspection, which is why mortgage lenders get nervous

• Ventilation is non-negotiable — spray foam alone is never the complete solution

• If you have it done, get the guarantee underwritten by an insurance company, not just the installer

• DIY spray foam kits are high risk unless you really know what you’re doing

• If you’re planning to sell, think very carefully before going ahead

📋 Before You Commit

Get your roof properly surveyed, document everything, and make sure you understand what membrane — if any — is currently in your roof space. The foam itself isn’t the enemy. Poor installation and the wrong product for the wrong roof is.

📬 Got experience with spray foam? Drop it in the comments — good or bad, it all helps someone else make a better decision.

More from Skillbuilder – https://skill-builder.uk/spray-foam-insulation-the-ugly-truth

Skillbuilder reccomends – https://countrywideinsulation.co.uk/services/spray-foam-removal?oppref=gAAAAABqZxXjx3mJmEW_MiUVfm1GJxqeoZ6K_fewlRYlzspjfcawBfIUcxraQF42oHhKmy33FGLwWzAABbbBY4-kB8zoxDxUYwwqrJhycpgNTJMxbUSmc2ww&olref=gAAAAABqZxXjOPSZPwLHT7jwpUAMuGVwwkHCbZOu_wzO5xPfXyVZ9BWF4z9UfZEoaF4iQmeVXh3_RqaCHSjiZN4CkmYwh7zdpTsFQO7xc_5fmQYoIsLJKZb7Hf_N2zrXBuVG2H4xRPKME7MT5x0Xx0x-MAByhBZVhww

#SprayFoamInsulation #LoftInsulation #UKProperty

Artex Ceilings: The 1 Mistake Everyone Makes

0

Artex ceilings often get treated as a cosmetic problem.

The texture looks dated. The pattern is unwanted. The surface may have been painted several times and now looks tired, uneven or difficult to decorate.

So the obvious solution seems simple: cover it up.

Perhaps apply a layer of plaster. Perhaps skim over the top. Perhaps scrape the texture away and start again.

But with older properties, the surface you can see is not always the real problem.

In many cases, Artex ceilings are simply the visible finish over a much older construction.

Underneath that textured coating could be traditional lath and plaster, old plasterboard, previous repairs or a ceiling that has already experienced years of movement.

That means the most important question is not always:

“How do I get rid of the Artex?”

It may be:

“What condition is the ceiling actually in underneath?”

The Problem With Treating the Surface

A textured coating can hide a lot.

Small cracks may disappear into the pattern. Previous repairs can become difficult to identify.

Areas of movement may not be obvious until the surface is painted or a new layer of plaster is applied to the Artex Ceilings

This is one of the reasons that dealing with Artex ceilings requires more thought than simply choosing a new finish.

If the existing ceiling is stable and well bonded, covering it may be a perfectly reasonable approach.

But if the existing plaster is loose, cracked or moving, adding another finish over the top does not necessarily solve the problem. It may simply add weight and moisture to a surface that is already struggling.

The result can be a ceiling that looks perfect for a short period before cracks begin to reappear.

Sometimes the new finish can even make the original problem more difficult to diagnose.

Artex Ceilings and Old Lath and Plaster

Many older UK properties contain traditional lath and plaster ceilings.

These ceilings were constructed using narrow strips of timber, known as laths, fixed to the underside of the joists.

Plaster was then pushed between the gaps in the laths, creating small keys that helped hold the plaster in place.

When new, this was a highly effective construction method.

But old lath and plaster can deteriorate over time.

The timber laths can move. The plaster keys can break. The ceiling can sag. Previous alterations can weaken sections of the construction.

In some cases, a textured finish such as Artex was later applied over the original ceiling to improve its appearance or cover minor imperfections.

This can create a layered construction in which the visible finish is only one part of the overall ceiling.

The textured coating itself may be perfectly sound, while the plaster underneath is failing.

Alternatively, the old plaster may be stable, but the surface may not be suitable for the weight or moisture associated with a new plaster skim.

Understanding what is beneath the Artex is therefore an important part of deciding how to proceed.

Why Adding Moisture Can Make Things Worse

One of the most common approaches to covering Artex ceilings is to apply a plaster skim.

This can produce a smooth, modern finish, but it is not automatically the right solution for every ceiling.

Plaster products contain water. When applied to an old surface, that moisture can be absorbed into the existing materials.

On a sound, stable substrate, this may not cause any significant problem.

But if the existing plaster is already weak, poorly bonded or vulnerable to movement, introducing additional moisture can create complications.

The old surface may soften.

Weak areas may lose further adhesion.

Different materials may dry and shrink at different rates.

And as the new finish dries, movement in the original ceiling can transfer through the new skim.

The result can be cracking, hollow areas or sections of plaster that eventually detach.

This does not mean that plastering over Artex ceilings is always wrong.

It means the condition of the existing ceiling needs to be considered first.

A new finish is only as reliable as the surface supporting it.

Is Overboarding a Better Option?

In some situations, overboarding can provide a more reliable solution.

Rather than relying on an old, uncertain surface to support a new plaster finish, new plasterboard is fixed to the structure, creating a fresh substrate.

The existing ceiling remains in place, but the new board provides a stable surface for the final finish.

This can be particularly useful where the original ceiling is uneven, cracked or difficult to assess.

However, overboarding is not something that should simply be carried out without thought.

The fixing method matters.

The position of the joists or other structural supports needs to be identified. The new boards need to be properly supported and securely fixed.

There are also practical considerations.

Adding a new layer to the Artex ceiling can affect ceiling height. Electrical fittings, light fittings, coving and other details may need to be adjusted.

In older buildings, the construction above the ceiling may also need to be considered before drilling or fixing.

So while overboarding can often provide a more dependable result than attempting to rescue a failing surface, it still needs to be carried out properly.

The objective is not simply to cover the problem.

The objective is to create a sound ceiling system.

Scraping Artex Off Is Not Always the Answer

Another option is to remove the textured coating entirely.

This may seem like the most direct solution, particularly when the homeowner wants to restore the ceiling to a smooth finish.

But scraping Artex from an old ceiling can create its own problems.

The texture may be firmly bonded to the plaster underneath. Removing it aggressively can damage the original surface.

You may end up removing part of the ceiling rather than simply removing the decorative coating.

There is also an important safety issue.

Some older textured coatings may contain asbestos.

The presence of Artex Ceilings does not automatically mean asbestos is present, and the age and composition of a textured coating cannot be reliably determined simply by looking at it.

However, if there is any doubt, the material should be assessed before it is disturbed.

Sanding, scraping, drilling or otherwise breaking into an older textured coating can create unnecessary risk if asbestos-containing material is present.

That is why testing and professional advice may be appropriate before carrying out work on older Artex ceilings.

The Finish Is Not the Foundation

This is the point that often gets missed.

People naturally focus on the finish they can see.

They want a smooth ceiling.

They want the pattern gone.

They want the room to look modern.

But the quality of the final finish depends heavily on what is underneath it.

A perfectly smooth skim over a moving substrate is not a successful repair.

A beautifully decorated ceiling that begins cracking a few months later has not solved the underlying problem.

The strongest approach is to assess the condition of the existing ceiling before deciding how to finish it.

Is the surface stable?

Is there movement?

Are there cracks?

Are sections hollow or loose?

Is the existing plaster properly bonded?

What is the ceiling constructed from?

And could the existing textured coating contain asbestos?

These questions are more important than simply deciding which product to apply next.

When Should You Get Professional Advice?

Some problems are relatively straightforward.

A stable ceiling with a sound existing surface may be suitable for a new finish, depending on the materials and preparation required.

Other situations are less clear.

If the ceiling is sagging, cracking significantly or showing signs of movement, it should be investigated rather than simply covered.

Likewise, if there is evidence of water damage, the source of the moisture needs to be resolved before any new finish is applied.

A ceiling that has been damaged by a roof leak or plumbing leak may look dry on the surface while the materials underneath remain weakened.

Applying a new finish before the problem has been properly dried and repaired can simply hide the damage.

Older properties can also contain a mixture of construction methods and materials. A single ceiling may have been repaired or altered several times over its life.

That makes careful assessment particularly important.

Artex Ceilings

The Best Way to Deal With Artex Ceilings

There is no single solution for every property.

Some Artex ceilings can be skimmed.

Some may be better overboarded.

Some may need sections of the original ceiling repaired first.

And in other cases, the existing ceiling may need more extensive work.

The correct solution depends on the condition of the ceiling and the construction beneath the surface.

The key lesson is simple:

Do not confuse a cosmetic problem with a structural one.

If you’re dealing with Artex ceilings yourself, take a moment to check what you are actually fixing.

A textured finish may be ugly, outdated or difficult to decorate, but that does not necessarily mean the entire ceiling needs to be removed.

At the same time, covering the problem without understanding what lies underneath can create more problems later.

A solid, stable base matters far more than the finish on top.

In many cases, creating a new, properly supported surface through overboarding may provide a more reliable result than repeatedly trying to rescue a failing old ceiling.

And if the property is older and there is any doubt about the composition of the existing textured coating, get it checked before disturbing the surface.

Because when it comes to Artex ceilings, the most important part of the job may be the part you cannot see.

Got a question of your own? Send it in — Ask Skill Builder is a free service!

📪 ASK SKILL BUILDER
https://skill-builder.uk/send

We have over 1,300 episodes. Join 738,000 subscribers and help us hit that 1 million milestone!

Recomended – https://www.hse.gov.uk/asbestos/location-materials.htm?ContensisTextOnly=true&utm_source=chatgpt.com

_______________________

🔑 KEY TAKEAWAYS

• If Artex is on lath and plaster, overboarding is usually the safest option

• Skimming over Artex can cause sagging due to moisture loosening the bond

• Painted textured coatings behave differently and can sometimes be skimmed

• Always check for potential asbestos in older Artex before disturbing it

• Overboarding creates a stable, modern surface that’s easier to plaster

_______________________

Artex Ceilings

#DIY #artex #overboarding

Outside Tap. Don’t Make These Mistakes

0

Outside Tap Install – Done Right

Fitting an Outside Tap looks simple, but it’s one of those jobs where small mistakes lead to leaks, frost damage or a call-back.

Get the drilling, alignment and sealing right, and it’s a solid, long-lasting installation.

Get it wrong, and you can end up with water running down the wall, a leaking connection inside the property or a pipe that bursts during the first hard frost.

An Outside Tap is often treated as a quick job. Drill through the wall, connect the pipework, fit the tap and turn the water on.

But the details matter.

The location of the Outside Tap, the route of the pipework, the quality of the connection and the protection against freezing can all affect how well the installation performs over time.

Choose the Location Carefully

The first decision is where to install the Outside Tap.

It needs to be convenient to use, but convenience is not the only consideration.

Think about where the water will actually be needed. A tap near the front of the property may be useful for washing vehicles, while an Outside Tap at the rear may be more practical for gardens, patios or cleaning equipment.

The wall itself also matters.

Before drilling, check what is on the other side. You need to know where internal pipes, cables, radiators, cupboards and other obstructions may be located.

A small hole through the wall can become a much bigger problem if the drill hits something that should not be there.

The position should also allow the pipework to be installed with sensible falls and minimal unnecessary bends.

Every additional joint is another potential point of failure.

Drill the Wall Properly

The hole through the wall is one of the most important parts of the Outside Tap installation.

The diameter needs to be large enough to accommodate the pipe or fitting without forcing components into position.

The angle also matters.

Where possible, the penetration should be arranged so that water cannot easily track back into the building. The external side should not create a route for rainwater to run directly into the wall or internal structure.

The surrounding masonry should also be considered.

Drilling through brickwork is generally preferable to damaging vulnerable areas such as mortar joints, depending on the specific construction and location.

Care needs to be taken around the edges of the hole. A rough or oversized opening can make sealing more difficult and leave gaps around the pipework.

A neat Outside Tap installation starts with a neat penetration.


Think About the Pipe Route

The pipework connecting the Outside Tap to the internal water supply should be kept as short and straightforward as possible.

Avoid unnecessary loops and bends.

A simple route is easier to install, easier to inspect and generally has fewer potential failure points.

The pipe also needs to be adequately supported.

Poorly supported pipework can move when the Outside Tap is used or when water pressure changes. Over time, that movement can place stress on joints and fittings.

Where the pipe passes through the wall, it should be protected and sealed appropriately.

The connection between the internal plumbing and the external fitting should not be left relying on a blob of sealant to solve every problem.

Sealant can help weatherproof a penetration, but it should not be used as a substitute for proper mechanical support or a correctly made connection.

Outside Tap Installation and Frost Protection

One of the biggest risks associated with an Outside Tap is freezing weather.

Water expands when it freezes.

If water becomes trapped in an exposed section of pipework, the resulting pressure can damage pipes, valves and fittings.

The damage may not become obvious until the ice thaws and water begins escaping.

This is why frost protection needs to be considered during Outside Tap Installation rather than treated as an afterthought.

The external section of pipework should be kept as short as reasonably possible.

Where appropriate, the internal supply should include a way of isolating the Outside Tap. This allows the supply to be shut off during periods of freezing weather.

A drain-down arrangement can also be useful, allowing water to be removed from the exposed section of pipework.

The exact arrangement will depend on the plumbing system and the type of fitting being installed.

The key principle is simple: do not leave unnecessary water trapped in vulnerable exposed pipework.

Choose the Right Fittings

Not all external taps and fittings are the same.

The Outside Tap needs to be suitable for outdoor use and compatible with the pipework and connection method being used.

The fitting should also be installed securely.

An Outside Tap that moves every time a hose is connected is putting stress on the pipework behind it.

This movement can eventually loosen connections or damage the surrounding wall.

A solid fixing is therefore just as important as a watertight connection.

It is also worth considering the type of hose connection and any accessories that may be used.

If the Outside Tap is likely to be used frequently, the installation needs to be able to withstand repeated connection and disconnection without transferring excessive force to the pipework.

Outside Tap

Sealing Around the Wall Penetration

The point where pipework passes through the wall is vulnerable to water ingress.

Rain can run down the wall and collect around the penetration.

If the opening is not properly sealed, water can potentially enter the wall construction.

The correct sealing method depends on the construction and the materials involved.

The area should be clean and dry before applying any sealant.

The seal should be continuous and properly bonded to the surrounding surfaces.

But again, sealant should not be viewed as the only line of defence.

The Outside Tap should be installed so that water is naturally directed away from the building rather than relying entirely on a bead of sealant to stop water entering.

Good detailing is better than excessive sealant.

Check the Internal Connection

The Outside Tap may look perfect, but the internal connection is just as important.

Once the installation is complete, the pipework should be checked carefully for leaks.

Do not simply turn the water on and walk away.

Inspect the joints.

Check around the wall penetration.

Look for small leaks that may only appear under pressure.

If the pipework is concealed, the installation needs to be checked before it is covered up.

A tiny leak behind a wall or inside a cavity can create a much bigger problem over time.

This is particularly important because water damage may not become visible immediately.

The Outside Tap Should Be Easy to Maintain

A good Outside Tap installation should not only work when it is first fitted.

It should also be easy to isolate, inspect and maintain in the future.

The location of the isolation valve matters.

If it is hidden behind a fixed panel or buried somewhere inaccessible, shutting off the supply during an emergency becomes unnecessarily difficult.

Think about the next person who may need to work on the system.

Clear access can save time and prevent damage.

It also makes winter preparation easier.

An Outside Tap that can be quickly isolated and drained is far more practical than one that requires dismantling part of the building to reach the valve.

Common Installation Mistakes

Some of the most common problems with an Outside Tap installation are surprisingly simple.

The tap is fitted too close to an obstruction.

The wall penetration is oversized.

The pipework is unsupported.

The external section is left vulnerable to freezing.

The tap is allowed to move.

The internal connection is hidden without being properly tested.

Or the installer relies on sealant to compensate for poor detailing.

These mistakes may not cause an immediate failure.

That is what makes them dangerous.

The installation can appear perfectly fine when completed, only for problems to appear months or years later.

Test Everything Before You Finish

Before the Outside Tap job is considered complete, the system should be tested properly.

Open and close the tap.

Check the connection under pressure.

Inspect the internal pipework.

Look around the wall penetration.

Make sure the isolation arrangement works as intended.

If the system is designed to be drained down, confirm that water can actually be removed from the exposed section.

A few minutes of careful checking can prevent a much longer and more expensive repair later.

The Best Outside Tap Installations Are the Ones You Don’t Notice

A properly installed Outside Tap should not create problems.

It should be secure.

It should be easy to use.

It should be protected from foreseeable damage.

The pipework should be properly supported, the wall penetration should be neatly detailed and the internal connection should be accessible for inspection and maintenance.

The best Outside Tap installations are often the least dramatic.

No leaks.

No movement.

No water damage.

No emergency call-back after the first frost.

That is the difference between simply fitting an Outside Tap and installing one properly.

The job may be small, but the principles are the same as any other plumbing installation.

Plan the route.

Understand the building.

Make the connections properly.

Protect vulnerable components.

Test the work before leaving.

Because when it comes to an Outside Tap, getting the small details right is what makes the installation last.

___________________________

SHOPPING LIST

Outdoor Garden Tap Hose Union Bib Tap 1/2 inch BSP
https://amzn.to/4t1P9Gw

Loctite 55 Pipe Thread Sealing Cord 160 Metres
https://amzn.to/3OI2Hsv

Plumbers PTFE Thread Seal Tape
https://amzn.to/4ts1Smx

Loctite 577 Adhesive for Thread Sealing
https://amzn.to/4sTGF45

___________________________

🔑 KEY TAKEAWAYS

• Drill from the outside to avoid visible breakout and keep the finish clean

• Always sleeve the pipe through the wall, it’s a regulation and protects the pipe

• Keep external pipework to a minimum to reduce frost risk

• Set the tap to its natural tight position first, then mark fixing holes to keep it upright

• Avoid sealing the backplate fully, better to see leaks outside than hidden inside

• Use a non-return valve, it’s required to prevent backflow contamination

• PTFE works but can slip and doesn’t like adjustment

• Loctite 577 gives a strong seal but slows you down due to curing time

• Thread (string) is the most forgiving, seals well and allows adjustment

• Don’t overthink pipe angle for drainage, it rarely makes a real difference

• Internal connections vary, choose push-fit, compression, or solder depending on the job

___________________________

More from Skillbuilder – https://skill-builder.uk/how-to-fix-a-tap-easy-diy-job

#plumbing #DIYtips #outdoortap #howto #skillbuilder

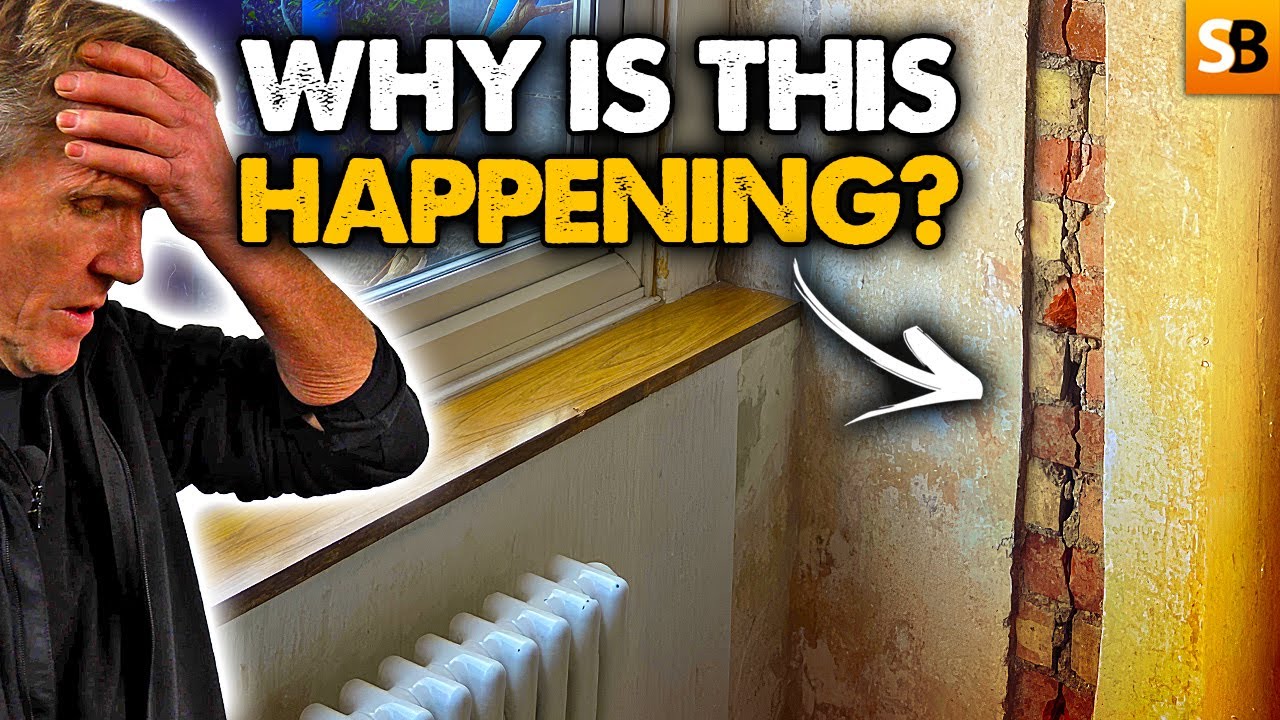
Cracked Extension Wall? Here’s What It’s Really Telling You

0

Roger’s Back: Should You Worry About a Cracked Extension Wall?

Roger’s back with another viewer question, and this one’s a cracker.

Mark uncovered a crack in his extension wall after stripping back the plasterboard during some renovation work. The surprising part? The surveyor had inspected the property but had never even seen the crack because it was completely hidden.

If you’ve been losing sleep over a cracked extension, this one’s for you. Roger breaks down what’s actually going on, why this particular crack is almost certainly nothing serious, and what a few simple brackets and a tube of sealant can do.

Finding a cracked extension can immediately make a homeowner worry about subsidence, foundation problems or serious structural movement. But before assuming the worst, it’s important to understand that extensions can behave differently from the original building.

A crack doesn’t automatically mean the extension is failing, and a cracked extension isn’t necessarily a sign that expensive structural work is required.

In fact, one of the biggest mistakes homeowners can make when they discover a cracked extension is to focus entirely on the crack itself rather than looking at the building around it.

The location, shape, size and direction of the crack can all provide clues about what is happening.

When a Cracked Extension Appears During Renovation

When plasterboard, wallpaper or other finishes are removed, it’s not unusual to uncover things that have been hidden for years.

Renovation work can reveal old wiring, previous repairs, changes in construction and, sometimes, cracks that nobody knew existed.

This can make a cracked extension particularly alarming. You might have lived in the property for years without knowing the crack was there, only to discover it when you finally start opening up the walls.

However, discovering a cracked extension doesn’t automatically mean that something catastrophic has happened.

The age of a crack is less important than understanding its cause and whether it is changing.

A small crack that has remained stable for years can be very different from a rapidly expanding crack that has appeared recently.

If you discover a cracked extension during renovation, it is therefore worth taking a moment to inspect the area properly before carrying out any repairs.

The location is extremely important.

In Mark’s case, the crack was found where the extension met the original building. This is a common area for movement because the two parts of the property were constructed at different times and may have different foundations, materials and structural characteristics.

An older property and a newer extension may respond differently to changes in temperature, moisture and settlement. That movement can sometimes show itself as a crack without meaning the structure is unsafe.

So, if you’ve discovered a cracked extension during renovation, don’t immediately assume the entire building is moving.

A cracked extension can sometimes simply be showing where two different parts of a building meet and respond differently to environmental changes.

Why Do Extensions Crack?

Extensions are effectively new structures attached to existing buildings.

Even when an extension has been designed and constructed correctly, there can be slight differences between the original structure and the new construction.

The foundations may be different. The materials may be different. The buildings may have been constructed decades apart.

These differences can become visible at the junction between the two structures.

Temperature changes can cause materials to expand and contract. Moisture can affect masonry and timber. Plasterboard and plaster finishes can also develop minor cracks as materials move or dry.

This is why finding a cracked extension doesn’t immediately tell you what the problem is.

You need to look at the pattern.

Is the crack horizontal or vertical? Is it stepped? Is it very wide? Does it run through the masonry itself, or is it mainly visible through the plaster or finishing materials?

Those details can help establish whether you’re looking at normal movement, a cosmetic defect or something requiring further investigation.

For homeowners dealing with a cracked extension, understanding these differences is important before deciding whether a repair is necessary.

A cracked extension at a junction between two structures can behave very differently from cracking that is appearing randomly across an entire elevation.

This is why context matters.

The construction history of the property can also be useful. Knowing when the extension was built, what materials were used and how it connects to the original house can help explain why a cracked extension has developed.

Why Didn’t the Surveyor Spot It?

This is one of the obvious questions when a homeowner discovers a cracked extension after buying a property.

The simple answer is that a surveyor can only report on areas that are visible and accessible within the scope of the inspection.

If the crack was completely hidden behind plasterboard, it may not have been possible for the surveyor to identify it.

A property survey isn’t normally an instruction to remove walls, plasterboard or other finishes to investigate concealed areas.

RICS explains that the scope of inspection varies depending on the level of home survey, with different levels providing different degrees of inspection. RICS Home Surveys guidance

This is why renovation work can sometimes uncover defects that weren’t mentioned in an earlier survey.

It doesn’t automatically mean the survey was carried out incorrectly.

If something was concealed, there may simply have been no practical way of seeing it at the time.

So, if a cracked extension only becomes visible after removing plasterboard, the timing of the discovery does not necessarily mean the crack is new.

The cracked extension may have been there for years without anyone knowing.

This is a useful point for anyone buying an older property. A survey is valuable, but it cannot always reveal what is hidden behind finishes. A cracked extension concealed behind plasterboard is a good example of something that may only become apparent once renovation begins.

What Does the Crack Look Like?

If you’ve discovered a cracked extension, don’t just take a photograph and immediately assume the worst.

Start by looking closely at the crack.

A narrow, relatively straight crack at the junction between an extension and an existing property can have a completely different cause from significant stepped cracking through brickwork.

The width of the crack is also worth considering, as is whether it appears to be changing.

You should also look at the surrounding area.

Are doors or windows suddenly sticking?

Is masonry bulging?

Are there several cracks appearing in different parts of the building?

Is there visible separation between the extension and the original structure?

These additional signs can provide much more useful information than one isolated crack.

If you’re dealing with a cracked extension, taking photographs and monitoring changes can also help establish whether the situation is stable or developing.

It can be useful to record the location and appearance of the cracked extension so that you can compare it later.

That doesn’t replace professional assessment where one is needed, but it can help you understand whether anything is changing.

A cracked extension should be considered alongside the rest of the building rather than viewed in isolation.

When Should You Be Concerned?

There are some situations where cracking deserves further investigation.

Rapidly widening cracks should not simply be filled and forgotten. Significant stepped cracking through external brickwork can also be a warning sign, particularly if it is accompanied by other evidence of movement.

Bulging masonry, noticeable separation between structural elements and doors or windows suddenly becoming difficult to open can also justify getting professional advice.

The same applies if a crack continues to grow or new cracks start appearing nearby.

If your cracked extension is showing several of these symptoms at the same time, it is sensible to stop and investigate rather than simply covering everything up.

However, minor cosmetic cracking caused by normal movement is incredibly common.

Buildings aren’t completely rigid objects. Different materials expand and contract, foundations settle slightly and extensions can move independently from older structures.

The key is understanding the difference between normal movement and significant structural movement.

If you’re uncertain about a cracked extension, get the problem assessed by an appropriately qualified professional rather than trying to diagnose a serious structural issue from photographs alone.

This is especially important if the cracked extension is accompanied by cracks elsewhere in the property or obvious changes to the structure.

What Was Happening in Mark’s Extension?

In Mark’s case, Roger’s advice was refreshingly straightforward.

Rather than immediately recommending expensive structural work, the junction could be reinforced with a few brackets before the wall was boarded back over.

Slotted L-shaped galvanised brackets can provide restraint while still allowing a degree of movement.

That is important.

You don’t necessarily want to lock two structures together so rigidly that any future movement simply transfers into the plasterboard or masonry.

The slots allow the fixing to accommodate some movement, working on a similar principle to a slip tie.

It is a relatively simple detail, but it demonstrates why understanding the cause of a cracked extension is so important.

The right repair isn’t necessarily about stopping every tiny bit of movement.

Sometimes it’s about allowing controlled movement without allowing it to cause damage.

For this particular cracked extension, the solution wasn’t about forcing the two parts of the building to behave as though they had been constructed at exactly the same time.

Instead, the repair recognised that some movement may continue and provided a way of managing it.

That is a useful lesson when dealing with a cracked extension. The objective isn’t always to eliminate movement completely. Sometimes the better approach is to accommodate normal movement while preventing it from damaging finishes or allowing water into the building.

The Existing Timber Was Doing a Job

One of the interesting details in this particular repair is that the existing timber had been quietly doing some stabilising work.

This is something that can easily be overlooked during renovation.

You might remove a piece of timber or another element because it appears unnecessary, without realising that it has been contributing to the stability of the junction.

Before simply boarding everything back over, it’s worth understanding what the existing construction is doing.

If something is removed, its function may need to be replaced.

For a cracked extension, this is particularly important because the junction between the old and new structures needs to be considered as a complete detail rather than just looking at the visible crack.

In this case, suitable brackets can help provide the necessary restraint before the wall is closed up again.

It’s a good lesson for anyone carrying out renovation work: don’t assume that an old piece of construction is doing nothing just because you can’t immediately see its purpose.

When repairing a cracked extension, you should always consider whether existing components are contributing to the way the structure behaves.

Removing those components without understanding their purpose could potentially make a cracked extension worse rather than better.

Don’t Forget the Outside of the Extension

When dealing with a cracked extension, it’s important not to focus entirely on what you can see inside.

The external junction can tell you a lot too.

A movement joint between an extension and an existing building can be perfectly normal. In fact, allowing for movement can be an intentional part of the construction.

The problem comes when the joint deteriorates.

If an external mastic or sealant joint has started pulling away, it may need to be renewed with an appropriate polymer sealant.

This can help maintain weather resistance while allowing the movement that the joint was designed to accommodate.

Movement joints can also be positioned behind downpipes or tucked into corners where possible, making them less visually obvious while still allowing the structure to move as intended.

This is another reason why inspecting both sides of a cracked extension can be useful.

What appears to be a serious crack internally may sometimes relate to a perfectly normal movement joint externally.

If you have a cracked extension, don’t just look at the plasterboard and assume that’s where the problem begins.

Look at the external masonry, joints, corners and connections too.

External inspection is particularly important because defects in sealant and movement joints can allow water to enter the structure. A cracked extension doesn’t always have a structural cause; sometimes maintenance issues can contribute to visible cracking or deterioration.

Don’t Panic When You Find a Cracked Extension

Discovering a cracked extension during renovation can instantly make you think you’ve uncovered a massive structural problem.

But appearances can be deceptive.

A crack at the junction between an old building and a newer extension may simply reflect the fact that the two structures behave slightly differently.

That doesn’t mean every cracked extension should be ignored.

It means the cause needs to be understood before deciding on the repair.

In Mark’s case, what initially looked worrying turned out to have a relatively straightforward explanation and solution.

A few brackets, the right sealant and an understanding of how the junction was behaving could be enough to resolve the issue.

The important thing is not to confuse a visible crack with an automatic diagnosis.

A cracked extension is a symptom, not necessarily the cause of the problem.

What Can You Learn From This?

The biggest takeaway is simple: don’t panic when you uncover a crack.

Take a step back and investigate.

Look at where the crack is located. Consider how the extension was constructed and how it joins the original property.

Check whether the crack appears stable or whether it is changing.

Look for other signs of movement.

And don’t automatically assume that every cracked extension needs expensive structural work.

At the same time, don’t ignore serious warning signs simply because you’ve heard that cracks are common.

If you’re dealing with a cracked extension that is developing rapidly, accompanied by other movement or causing noticeable changes elsewhere in the property, professional advice is the sensible next step.

The important thing is to approach a cracked extension logically rather than emotionally.

Find out what you’re actually looking at before deciding how serious it is.

For anyone researching a cracked extension, the main lesson is that there is no single explanation for every crack. Different construction methods, materials, foundations and building ages can all influence how an extension behaves.

The Bottom Line

A crack in your wall can look far more frightening than it actually is.

A cracked extension can be particularly worrying because homeowners often associate cracking with subsidence or foundation problems. But extensions can experience minor movement where they meet older structures, and this can sometimes result in cracks that are relatively straightforward to deal with.

The important thing is to understand why the crack has appeared before deciding what to do about it.

In this case, the solution involved a few simple brackets and appropriate sealant rather than immediately resorting to major structural work.

It’s another useful reminder that buildings are more complicated than they first appear — and sometimes the simplest explanation is the right one.

If you’ve discovered a cracked extension in your own home, don’t immediately assume that you’re facing a huge repair bill. Look at the location, the pattern and the wider condition of the building first.

And if the evidence suggests something more serious, get the right professional involved.

A cracked extension may be nothing more than minor movement at a junction, but understanding the difference between cosmetic cracking and genuine structural movement is essential.

If you’re currently dealing with a cracked extension, Roger’s advice is a useful reminder that the first step should be understanding what you’re looking at rather than immediately reaching for the most expensive solution.

A cracked extension can look dramatic, particularly when you’ve only just uncovered it, but the appearance of a crack doesn’t provide enough information to determine its cause.

The best approach is to inspect the surrounding construction, understand the junction and consider whether there are any other signs of movement.

Have you ever uncovered a cracked extension or mystery crack during a renovation? Send your questions in for Roger and you could see them tackled in a future episode.

Got a question of your own? Send it in — Ask Skill Builder is a free service!

📪 ASK SKILL BUILDER

Send your question to Skill Builder

We have over 1,300 episodes. Join the Skill Builder community and help us hit that 1 million milestone!
Key Takeaways

  • Surveys can only report what’s visible and accessible within the agreed scope, so hidden defects can be uncovered during renovation.
  • A cracked extension isn’t automatically evidence of a serious structural problem.
  • Cracks at the junction between an extension and an older building can result from minor movement between the two structures.
  • An even crack from top to bottom can sometimes point towards shrinkage or minor movement rather than major structural failure.
  • Slotted L-shaped galvanised brackets can provide restraint while allowing some future movement.
  • The existing timber may have been providing useful stabilising support, so its function should be considered before removing or covering it.
  • An external movement joint can be completely normal and may need maintaining rather than removing.
  • Deteriorated external sealant can potentially be renewed with an appropriate polymer sealant.
  • Rapidly widening cracks, significant stepped cracking, bulging masonry and other signs of movement should be investigated.
  • A cracked extension should always be assessed in context rather than judged purely by appearance.
  • A crack is rarely enough information on its own — location, pattern, size and surrounding evidence all matter.
  • Houses move, materials expand and contract, and extensions can behave differently from the original building.
  • The best repair starts with understanding the cause rather than simply filling the crack.
  • If you find a cracked extension, investigate the location and surrounding construction before assuming the worst.
  • A cracked extension can sometimes be repaired with relatively straightforward measures when the cause is understood.
  • Don’t cover up a cracked extension without first understanding why the crack has appeared.
  • If a cracked extension is getting worse or showing other signs of movement, seek professional advice.
  • A cracked extension can result from movement between different parts of a building, particularly at junctions.
  • Understanding the construction history can help explain why a cracked extension has appeared.
  • Always consider both the internal and external sides when investigating a cracked extension.
  • Don’t assume that every cracked extension requires major structural work.
  • If you’re unsure about a cracked extension, get appropriate professional advice.

#SkillBuilder #CrackedExtension #WallCrack #ExtensionRepair #DIYBuilding #RogerBisby

_______________________

#SkillBuilder #WallCrack #ExtensionRepair #DIYBuilding #RogerBisby

Heating Changed. Nobody Noticed.

0

Heating Systems You’ve Probably Never Seen in the UK

Gas boilers dominate how we heat our homes in the UK, but they’re far from the only option.

Across Europe, engineers, energy companies and local authorities are already using heating systems that most people in Britain have never encountered. Some are designed to reduce reliance on natural gas. Others make use of waste heat, underground resources or existing infrastructure that is already sitting beneath our feet.

From hydrogen trials and district heating networks to biomethane injection, mine water heating and underground heat storage, these technologies are quietly operating in the background.

Some reuse parts of the infrastructure we already have. Some require completely different networks. Others take heat generated during the summer and store it underground until it is needed months later in winter.

And while some of these technologies are still being tested or developed, others are already operating at a significant scale.

This video isn’t about telling you what you should install at home. It’s about looking at what is already happening elsewhere, often out of sight, and understanding what these technologies could mean for the future of heating.

The important thing to remember is that there probably won’t be one single technology that heats every building in the future. Different homes, towns and cities have different requirements, which means the heating system of the future could be much more varied than the one we’ve become used to.

Hydrogen Heating

Hydrogen is often discussed as a potential replacement for natural gas, particularly because it can potentially be transported through pipelines and burned to produce heat.

But there’s an important point that often gets missed: hydrogen isn’t an energy source in the same way that natural gas is. It is an energy carrier.

Hydrogen has to be produced, and the way it is produced has a major impact on its environmental benefits.

Some hydrogen is made using natural gas, while other forms use electricity to split water into hydrogen and oxygen. The electricity used in that process can come from renewable sources, potentially producing low-carbon hydrogen.

That means simply saying “hydrogen heating” doesn’t tell us the whole story. We also need to ask where the hydrogen came from, how much energy was required to produce it and what infrastructure is needed to transport it.

The UK has spent years investigating hydrogen for heating, including trials looking at whether existing gas infrastructure could be converted. However, the latest government position is that hydrogen is not yet proven as a widespread home-heating solution, while heat pumps and heat networks are identified as the primary means of decarbonising heating.

That makes the subject particularly interesting.

The question isn’t simply whether a boiler can burn hydrogen. Engineers also need to consider appliances, meters, pipework, safety procedures, storage, production and the experience of the people actually using the system.

The government’s hydrogen heating overview provides more detail on the UK’s current trials and research.

District Heating Networks

District heating works very differently from the individual boiler model most UK households know.

Instead of every property generating its own heat, a central source produces heat that is distributed through a network of insulated pipes.

That heat might come from a large heat pump, energy-from-waste facility, industrial process, combined heat and power plant or another local source.

The advantage is that one large system can potentially make use of heat sources that would be impractical for an individual house.

Imagine a factory producing waste heat that would normally disappear into the atmosphere. Instead of throwing that heat away, a nearby heat network could capture it and distribute it to homes, offices, schools or other buildings.

The same principle can work with large heat pumps and other centralised sources.

District heating is already common in parts of Europe, particularly in cities and densely populated areas. In these locations, connecting hundreds or thousands of properties to one network can make more sense than installing and maintaining an individual heating system in every building.

The technology is becoming increasingly important in the UK too. Government information describes heat networks as systems that use insulated underground pipes to distribute heat from centralised sources to homes, businesses and public buildings.

For residents, the technology can be almost invisible.

There may be no traditional boiler because the heat arrives at the property through the network. Instead, a building might have a heat interface unit that transfers heat from the network into the property’s heating and hot-water system.

That changes the way people think about heating.

Rather than asking, “What boiler have I got?”, the question becomes, “What network am I connected to?”

Heat Networks Could Change the Street Outside Your House

This is one of the biggest differences between conventional heating and networked heating.

If you replace a gas boiler with another individual appliance, the change mostly happens inside your property.

A heat network is different because the infrastructure has to exist outside the property too.

Roads may need to be opened. Pipes have to be installed. Energy centres need to be built. Heat sources have to be connected and maintained.

It is therefore as much an infrastructure project as it is a heating project.

That also explains why heat networks can be particularly attractive in densely populated areas. If hundreds of properties are close together, the cost and complexity of the network can be spread across many customers.

The UK is now developing regulation around heat networks too. Since January 2026, Ofgem has taken on the role of regulator for heat networks in Great Britain, including requirements designed to improve consumer protection and reliability.

So while the pipes may be underground and out of sight, the industry supporting them is becoming increasingly visible.

Biomethane and the Gas Grid

Another technology that’s particularly interesting because it can make use of existing infrastructure is biomethane.

Biomethane is produced by processing biogas, which can come from sources such as sewage, agricultural waste and food waste.

Once suitably processed, biomethane can have properties similar to natural gas and can be injected into the gas network.

That means existing pipes and gas appliances can potentially form part of the system rather than requiring an entirely new distribution network.

This is one of the reasons alternative gases are interesting from an infrastructure perspective.

The UK already has an enormous gas network. Replacing that entire network would obviously be a huge undertaking, so technologies that can make use of existing infrastructure naturally attract attention.

But there is an important limitation.

The supply of genuinely sustainable biomethane isn’t unlimited.

There are only so many suitable waste streams available, and there are competing demands for some of those resources. That means biomethane could have an important role to play without necessarily being capable of replacing every cubic metre of natural gas currently used for heating.

It is another example of why the future energy system is likely to involve several technologies rather than one universal replacement.

Storing Heat Underground

Perhaps one of the most fascinating ideas is heat storage.

Most people think of energy storage in terms of batteries, but energy doesn’t always need to be stored as electricity.

Heat itself can be stored.

In some European systems, excess heat generated during warmer months is stored underground and recovered when demand rises during winter.

Large underground stores can contain huge quantities of heated water or use the ground itself as a thermal reservoir.

The principle is surprisingly simple: capture heat when it is available, store it and retrieve it later.

The difficult part is engineering the system so that heat can be stored efficiently and recovered when needed.

That could be particularly useful when heat is generated from sources that don’t necessarily match the time when people actually need it.

Solar energy, industrial waste heat and other sources can produce energy at times when demand for heating is relatively low.

Instead of allowing that heat to go to waste, storage provides somewhere for it to go.

Think of it as a giant thermal battery.

A conventional battery might store electricity for a few hours. A thermal store can potentially hold heat for much longer periods, depending on the technology and scale involved.

That opens up some fascinating possibilities for seasonal heating.

Seasonal Heat Storage

One of the biggest problems with renewable energy is that supply and demand don’t always line up.

The sun produces plenty of energy during the summer, but that’s not when most UK homes need space heating.

Winter brings the opposite problem. Heating demand rises dramatically just as solar generation is at its weakest.

If heat generated during summer can be stored efficiently, however, some of that mismatch can be reduced.

This is where seasonal thermal energy storage becomes particularly interesting.

Instead of trying to produce all the heat exactly when it is needed, a system can produce heat during periods of high availability and store it for later.

The idea sounds futuristic, but the basic principle is actually very straightforward.

The challenge is scale.

Storing enough heat to make a meaningful difference to a neighbourhood or city requires enormous thermal stores and careful engineering.

It also requires the right geology, land availability and infrastructure.

But if those conditions are present, underground storage can turn the ground beneath a city or development into part of its heating system.

Mine Water Heating

Then there are systems that make use of something that already exists beneath many former industrial areas: flooded mine workings.

Abandoned mines can contain large quantities of naturally warmed water.

That water can be pumped to the surface and passed through a heat pump system. The heat pump raises the temperature to a useful level before the heat is distributed to buildings.

The concept is particularly interesting in former mining regions because the underground infrastructure already exists.

What was once considered a legacy of the mining industry can potentially become part of a modern low-carbon heating network.

Instead of treating flooded mine workings purely as a problem, they can potentially become a source of useful thermal energy.

And this isn’t simply about finding a new heat source.

It is about looking differently at infrastructure that already exists.

Old mines, industrial sites, sewage systems, data centres and factories can all contain sources of heat that would otherwise be wasted.

Heat From Sewage and Wastewater

It sounds strange, but wastewater can also contain useful heat.

Every time warm water disappears down a shower, sink or industrial drain, it carries thermal energy with it.

Sewer heat recovery systems can capture some of that energy and use heat pumps to raise the temperature to a useful level.

Again, the idea works best where there is enough demand nearby.

There’s little point recovering heat from a sewer if there are no buildings close enough to use it.

But in a dense urban environment, thousands of people are constantly producing wastewater. That makes the combined heat resource much more significant.

This is a good example of how future heating systems could become much more integrated with the wider infrastructure of a city.

Instead of treating water, waste, electricity and heating as completely separate systems, engineers can look for opportunities where one system’s waste becomes another system’s resource.

Industrial Waste Heat

Industry can also produce enormous quantities of unwanted heat.

Factories, manufacturing processes, power generation and other industrial activities can all create heat as a by-product.

Historically, much of that heat has simply been released into the atmosphere or removed using cooling systems.

A heat network changes the equation.

If a factory is located close enough to homes or businesses, the waste heat could potentially be captured and distributed.

This is particularly interesting because the heat doesn’t necessarily need to be generated from scratch.

The energy has already been used for another purpose.

The challenge is making sure the temperatures, quantities and operating times match the requirements of the network.

A factory might produce large quantities of heat during working hours but far less at night. A heat network, meanwhile, may have a different demand profile.

Thermal storage can potentially help bridge that gap.

Why Location Matters

One of the biggest lessons from all these technologies is that heating isn’t just about the appliance.

It’s about geography.

A heat pump might be an excellent solution for one building but less straightforward for another. A district heating network could work brilliantly in a dense city but make little sense for scattered rural properties.

Mine water heating requires suitable former mine workings.

Sewer heat recovery needs a suitable wastewater source and nearby customers.

Industrial waste heat needs an industry that produces usable heat close enough to the buildings that need it.

Hydrogen requires production, storage and distribution infrastructure.

Biomethane depends on available feedstocks.

In other words, the heating system of the future may be determined partly by what’s already around us.

The Future Could Be a Mixture of Technologies

This is perhaps the most important point.

The future of heating doesn’t necessarily have to mean one technology replacing another.

Instead, we could end up with a mixture of different systems working in different places.

A house in a rural area might use one technology. A city apartment could be connected to district heating. A former mining community might use mine water. Industrial waste heat could be captured and distributed locally, while excess renewable energy could be converted into heat and stored for later.

Even within a single city, there could be several different approaches operating side by side.

That might sound complicated, but our existing energy system is already complicated. We simply don’t see most of it.

When you turn on a gas boiler today, you’re interacting with the final stage of a huge system involving production, processing, pipelines, storage, regulation and distribution.

Future heating systems could work in much the same way, except that the infrastructure behind the thermostat could be completely different.

What Does This Mean for Homeowners?

For homeowners, much of this may remain invisible.

That’s because the biggest changes in heating could happen outside the property itself.

The pipes underneath the streets, the energy centres on industrial estates and the infrastructure buried underground could ultimately have just as much influence on how we heat our homes as the appliance sitting in the utility cupboard.

That is an important distinction.

When people talk about the future of heating, the conversation often focuses on boilers, heat pumps and radiators.

But the bigger question may be what happens outside the front door.

How do we move heat around?

Where does that heat come from?

Can we store it?

Can we recover heat that would otherwise be wasted?

And can we build systems that work with the infrastructure already around us?

Those questions could shape heating just as much as the technology inside the home.

A Heating Revolution You Can’t See

The most interesting part is perhaps that the heating revolution isn’t necessarily happening inside the home.

In many cases, it is happening underneath our streets, inside energy centres, around industrial sites and deep underground.

A future homeowner might turn on their heating without knowing whether the heat came from a large heat pump, waste heat from a factory, a mine hundreds of metres below ground or a thermal store filled months earlier.

The technology could be almost completely invisible.

And that’s what makes these systems so fascinating.

The next generation of heating isn’t necessarily going to look like a futuristic machine sitting in every living room.

It could look like a pipe buried beneath a road.

A large tank hidden underground.

A heat exchanger inside a plant room.

A network connecting thousands of properties.

Or a flooded mine that has quietly become a source of energy.

The heating system itself might be invisible, but the infrastructure behind it could fundamentally change the way Britain heats its buildings.

🔑 KEY TAKEAWAYS

Hydrogen isn’t a fuel source; it has to be produced, often using natural gas or electricity.

District heating moves heat around at scale, rather than requiring every home to generate its own heat.

Biomethane can be injected into the existing gas grid and used in ways similar to natural gas.

Some systems store heat during summer and recover it months later when winter heating demand increases.

Mine water and underground systems can provide long-term heat sources and storage, particularly in suitable locations.

Waste heat can become a valuable resource, rather than simply being released into the environment.

Sewer and wastewater heat recovery can make use of energy that would otherwise be lost.

The most suitable heating technology can depend heavily on location, infrastructure and local heat sources.

Many of these technologies are already working, even though most people never see the infrastructure behind them.

Want to explore more heating technology?

For another Skillbuilder look at practical heating advice, take a look at 7 Heating Tips That Make a Real Difference in Very Cold Weather:

7 Heating Tips That Make a Real Difference in Very Cold Weather — Skillbuilder

For official information on the UK’s current position on hydrogen heating, you can also read the government’s Hydrogen Heating Overview.

The future of heating is unlikely to be as simple as swapping one boiler for another.

It could be about connecting buildings to networks, recovering heat that is currently wasted, storing energy underground and making better use of resources that are already around us.

And the strangest part?

A lot of that future is already here.

CREDITS:

@BaxiBoilersUK

@FalconFoodserviceEquipment

@HelloHydrogen

@RadiusSystemsLtd

@SGNvideo

___________________________

#heating #districtheating #hydrogen #biomethane #renewableenergy #skillbuilder

1 Simple DIY Cure For This Damp Wall

0

Dryrod Damp Proofing Rods 👇
https://go.skill-builder.uk/dryrods

_______________________

This Looked Like Rising Damp – But the Real Cause Was Much Simpler

This looked like rising damp at first glance, but the real cause was something far more common and far easier to fix.

Misdiagnosing damp is one of the biggest ways homeowners waste money, particularly when unnecessary damp proofing gets installed before anyone has properly investigated where the moisture is actually coming from.

In this case, the signs seemed convincing. There was a localised patch of damp, it was affecting an internal wall, and the damage appeared higher up than you might normally expect with straightforward rising damp.

But there was one crucial clue.

The real problem was coming from the other side of the wall entirely.

Don’t Assume Every Damp Patch Is Rising Damp

Rising damp is one of those diagnoses that homeowners often hear as soon as they mention a damp patch near the bottom of a wall.

But moisture can enter a building in many different ways.

Leaks from plumbing, failed sealant, defective showers, overflowing gutters, leaking roofs, condensation and water penetrating from outside can all create symptoms that look surprisingly similar.

That’s why looking at the pattern of the damp is so important.

A large, continuous area of moisture along the lower section of a wall might lead you towards one set of possible causes. A small, isolated patch could point somewhere completely different.

In this case, the localised nature of the problem was an important clue.

Rather than immediately assuming the moisture was travelling upwards through the wall from the ground, it made more sense to investigate what was happening around the affected area.

Always Check the Other Side of the Wall

This is one of the simplest checks you can make when investigating damp.

If you’ve got a damp patch on one side of a wall, look at what’s directly behind it on the other side.

Is there a bathroom?

A shower?

A sink?

A bath?

A washing machine?

Pipework?

An external gutter or downpipe?

Sometimes the answer is staring you directly in the face.

In this case, the other side of the wall contained a shower area.

That immediately changed the investigation.

Instead of treating the wall as though moisture was mysteriously rising from the ground, attention turned towards the shower and the areas where water could potentially escape.

Failed Silicone Can Cause Serious Damp Problems

One of the most overlooked sources of water ingress in bathrooms is failed silicone sealant.

Silicone around a shower isn’t simply there to make the installation look neat. It forms an important part of the water-resistant detailing around joints where different surfaces meet.

When that seal fails, cracks, separates or pulls away from the surface, water can find a route into places where it shouldn’t be.

And because showers are exposed to large quantities of water on a regular basis, a relatively small defect can cause a surprisingly large amount of damage over time.

Water doesn’t always travel directly downwards.

It can move through gaps, behind finishes and along the surfaces of building materials before eventually appearing somewhere completely different.

That is why the visible damp patch isn’t necessarily located directly next to the original leak.

Water Doesn’t Always Appear Where It Enters

This is one of the most important things to understand when diagnosing damp.

The location of the visible damage isn’t necessarily the location of the source.

Water can travel along the back of plasterboard, through joints, around pipes and across masonry before gravity eventually causes it to emerge.

That means simply repairing the area where you can see mould, staining or damaged plaster may not solve the problem.

You need to find the route the water is taking.

In this case, the shower was the key.

Once the source was identified, the repair became much more straightforward.

There was no need to start drilling the wall for a chemical damp proof course. There was no reason to assume that the building had suddenly developed a fundamental rising damp problem.

The priority was simply to stop the water getting where it shouldn’t.

Why Dry Rods Won’t Fix a Shower Leak

Products such as damp proofing systems and chemical damp proof courses have their place when they’re correctly specified for the right problem.

But they aren’t a universal solution for moisture.

If water is entering a wall because a shower is leaking, installing a damp proof course won’t stop that shower from leaking.

You could install the most expensive damp treatment available, but if water is still getting behind the bathroom finishes every time someone has a shower, the underlying problem remains.

That’s why diagnosis has to come before treatment.

If you’re unsure about the cause, the Property Care Association is a useful source of information about dampness and building preservation.

The same applies to dry rods.

If the moisture isn’t coming from the ground, a system designed to interrupt moisture rising through masonry isn’t going to solve the actual problem.

The Importance of Drying Out

Once the leak has been repaired, another mistake homeowners often make is expecting everything to dry immediately.

It won’t.

A wall that has absorbed moisture can take considerable time to dry, depending on its construction, thickness, ventilation, temperature and the amount of water involved.

Even after the source has been stopped, the wall can continue releasing moisture for weeks or potentially longer.

This is why rushing straight into replastering and decorating can create another problem.

If the wall hasn’t dried sufficiently, you could trap moisture behind new finishes.

Fresh paint might blister. Plaster could deteriorate. Mould could return. Staining may come back.

You can end up thinking the repair has failed when the reality is that the building simply wasn’t given enough time to dry.

Don’t Just Paint Over the Stain

It’s tempting to clean the affected area, apply some fresh paint and declare the job finished.

But decorating is the final stage, not the diagnosis.

If there’s an active source of moisture, paint is not going to stop it.

You need to identify where the water is coming from, repair the defect and then allow the affected materials to dry.

Only once you’re confident the source has been dealt with should you think about restoring the damaged finishes.

This approach might feel slower, but it can save a huge amount of money compared with repeatedly repairing the same area.

What Can Homeowners Look For?

If you’ve discovered a suspicious damp patch, start with observation.

Look at exactly where the damage is occurring.

Is it confined to a small area?

Does it correspond with a bathroom or kitchen on the other side?

Is there plumbing nearby?

Does the problem appear worse after someone has used the shower?

Is there a pipe or radiator close to the affected area?

Does the wall feel damp only in one particular location?

These clues can help narrow down the possibilities.

You don’t necessarily need specialist equipment to begin an investigation. Sometimes simply understanding the layout of the building can provide the biggest clue.

Draw a mental line through the affected area and see what sits behind it.

That simple step could save you from paying for unnecessary work.

Damp Diagnosis Should Be Detective Work

The best damp investigations often resemble detective work.

You start with the symptom and work backwards.

Where is the moisture?

When does it appear?

How much of the wall is affected?

What materials are involved?

What’s on the other side?

What plumbing or drainage is nearby?

Could water be entering from above?

Could it be coming through from outside?

Only after answering those questions should you start thinking about treatments.

This is particularly important with older buildings because they can have complicated construction.

A wall may contain different materials, previous repairs, old plaster, modern finishes and concealed services.

Treating the visible symptom without understanding the construction can easily create more problems.

Why Localised Damp Is Such an Important Clue

One of the biggest lessons from this case is the importance of the word localised.

If one small section of a wall is affected while the surrounding areas are relatively normal, it’s worth asking why.

Water entering through a specific defect will often create a specific pattern.

That doesn’t automatically rule out rising damp, but it should encourage you to investigate alternative causes before committing to expensive remedial work.

A leak behind a shower can produce a very different moisture pattern from groundwater moving through the lower sections of a building.

The more you understand the pattern, the easier it becomes to work out what you’re actually looking at.

Fix the Source, Not the Symptom

This is probably the biggest takeaway.

If a shower is leaking, fix the shower.

If a pipe is leaking, fix the pipe.

If rainwater is getting through defective external detailing, fix the external detailing.

If water is entering through a failed joint, repair the joint.

It sounds obvious, but damp problems are often treated backwards.

The visible stain gets the attention because that’s what the homeowner can see.

The source can remain hidden behind a wall, underneath a floor or inside a ceiling.

That’s where the real investigation needs to happen.

Don’t Let Damp Become an Expensive Guess

Damp can be frightening because the potential repair bills can sound enormous.

Once words such as “rising damp”, “damp proof course” and “structural damage” enter the conversation, homeowners can quickly start imagining major building work.

But sometimes the solution is much simpler.

A failed seal.

A leaking pipe.

A blocked gutter.

A defective flashing detail.

A cracked tile.

A shower that’s allowing water behind its enclosure.

These aren’t necessarily complicated problems, but they can cause surprisingly serious-looking symptoms if they’re allowed to continue.

That’s why getting the diagnosis right is so important.

What Happens After the Repair?

Once the source has been fixed, resist the temptation to immediately restore everything.

Give the building time.

Ventilate the room where appropriate and allow air movement around the affected area.

If materials have become saturated, drying can take time.

The speed will depend on the construction, environmental conditions and how much moisture entered the wall in the first place.

If you’re unsure whether the wall is sufficiently dry, professional moisture assessment can help.

The important thing is not to mistake residual moisture for an ongoing leak.

A wall can remain damp for some time after the source has been repaired.

That’s very different from a wall that continues to receive fresh water.

The Bottom Line

This case is a great reminder that damp diagnosis isn’t about finding the first explanation that seems to fit.

It is about investigating the evidence.

The damp looked like rising damp.

The location made it seem plausible.

But the real cause was much simpler: water was getting in from the other side of the wall because of a problem around the shower.

Once the source was identified, the solution became far more straightforward.

That’s why the golden rule with damp is simple:

Find the water first. Treat the wall second.

Don’t start drilling, injecting or replastering until you understand what’s causing the moisture.

And remember that a wall doesn’t necessarily tell you where the water came from. The visible stain may simply be the final point in a much longer journey.

🔑 KEY TAKEAWAYS

• Localised damp is often a clue that you need to investigate causes other than rising damp.

• Always check what’s on the other side of the affected wall.

• Failed silicone around showers is a very common way for water to escape into surrounding construction.

• Water can travel away from the original leak before becoming visible.

• Dry rods and damp proofing won’t fix an active plumbing or shower leak.

• Don’t paint over damp staining until you’ve established that the source has been fixed.

• Allow the wall plenty of time to dry before carrying out cosmetic repairs.

• If you’re unsure about the cause, get the problem properly investigated before spending money on remedial work.

If you’ve got a similar issue, fix the source first, then be patient before redecorating. The most expensive damp problems aren’t always the most complicated ones — sometimes they’re simply problems that were diagnosed incorrectly in the first place.

🔑 KEY TAKEAWAYS

• Localised damp is often a clue that you need to investigate causes other than rising damp.

• Always check what’s on the other side of the affected wall.

• Failed silicone around showers is a very common way for water to escape into surrounding construction.

• Water can travel away from the original leak before becoming visible.

• Dry rods and damp proofing won’t fix an active plumbing or shower leak.

• Don’t paint over damp staining until you’ve established that the source has been fixed.

• Allow the wall plenty of time to dry before carrying out cosmetic repairs.

• If you’re unsure about the cause, get the problem properly investigated before spending money on remedial work.

If you’ve got a similar issue, fix the source first, then be patient before redecorating. The most expensive damp problems aren’t always the most complicated ones — sometimes they’re simply problems that were diagnosed incorrectly in the first place.

_______________________

#RisingDamp #DampProblems #HomeMaintenance #PropertyAdvice #DIYUK #BuildingAdvice #PlumbingTips #BathroomLeak #HomeRepairs #SkillBuilder

Why So Many Extension Jobs Go Wrong at the Start

0

Plan It UK
Transform Your Home Today 👇 Get a Free Quote
https://go.skill-builder.uk/planit

_______________________

How Better Planning Can Make an Extension Easier to Build

Extensions and loft conversions often go wrong before the build has even started.

For homeowners, the problems might not become obvious until a builder arrives on site and starts opening things up. For builders, however, the warning signs can appear much earlier — sometimes the moment they receive a set of drawings and are asked to put a price together for a project.

Missing information, unclear structural details, unknown ground conditions, unconfirmed planning requirements and assumptions about what can be built can all create uncertainty.

And uncertainty has a habit of becoming expensive.

Frazer Day from Plan It UK looks at how better planning, clearer drawings and more upfront investigation can save builders time, reduce uncertainty and make life easier for everyone involved in a home improvement project.

The basic principle is straightforward: do more of the thinking before the build starts.

That doesn’t necessarily mean making the process slower, more expensive or more complicated. In many cases, it means bringing forward decisions that would otherwise be made on site, when they are more disruptive and potentially more expensive.

For a homeowner, an extension can look relatively simple. They might imagine knocking through the back wall, adding a few metres of floor space, installing some large doors and creating a new kitchen or living area.

For the builder, the reality can be very different.

Behind that simple-looking extension are questions about foundations, drainage, structural openings, insulation, roof construction, existing services, ground conditions, planning requirements, Building Regulations and the way the new structure will connect to the existing property.

The earlier those questions are answered, the easier it becomes to understand what is actually being built.

The Problem With Pricing an Extension That’s Not Properly Defined

One of the biggest challenges for builders is being asked to price a project that hasn’t been properly defined.

A homeowner might have architectural drawings and even planning permission. They may have spent months discussing the design and choosing the finishes they want.

But planning approval doesn’t necessarily mean a builder has all the information required to price the construction accurately.

There could still be questions surrounding foundation depth, structural steelwork, drainage, insulation, roof construction and the relationship between the existing building and the proposed extension.

This creates a difficult situation for the contractor.

A builder can make assumptions and include a contingency to cover the unknowns. But that can make their quotation appear more expensive than another builder who has made more optimistic assumptions.

Alternatively, a builder might submit a lower price and deal with the unknowns later.

That can create problems for both sides.

The homeowner may believe they have agreed to a fixed cost, only to discover that additional work is required once construction starts.

The builder may find that the project cannot be delivered for the amount they originally allowed.

Nobody benefits from that situation.

A more thoroughly investigated project gives everyone a better starting point.

Planning Permission Isn’t the Finish Line

Planning permission can feel like the biggest hurdle for homeowners.

Once the application has been approved, there is often a sense that the difficult part is finished and construction can begin.

But planning drawings and construction information have different purposes.

Planning is primarily concerned with whether a development is acceptable. Issues such as appearance, scale, overlooking, impact on neighbours and the relationship with the surrounding property can all be important.

Construction requires another level of detail.

A builder needs to understand how the approved design will actually be constructed.

That means considering foundations, wall build-ups, roof construction, insulation, structural openings, steelwork, drainage, damp protection and connections between new and existing construction.

A design can look excellent on a planning drawing while still requiring significant development before it is ready to build.

That distinction is important because homeowners can sometimes assume that planning approval means the drawings are effectively a set of construction instructions.

They aren’t necessarily.

The gap between an approved concept and a properly detailed construction project is where better preparation can make a significant difference.

Better Information Before the Builder Arrives

The fundamental objective is to reduce the number of unanswered questions before construction begins.

That might involve carrying out a measured survey, investigating the existing building, checking the site conditions, assessing nearby trees, confirming drainage arrangements and resolving structural requirements.

None of those tasks are particularly exciting compared with choosing kitchen units or bifold doors.

But they can have a much bigger effect on the final project than many of the cosmetic decisions.

A beautiful kitchen doesn’t solve an unexpected foundation problem.

Expensive doors don’t compensate for a poorly resolved structural opening.

And a carefully chosen finish doesn’t help if the builder is waiting for an engineer to clarify how the roof is supposed to connect to the existing house.

Good planning is therefore less about producing impressive drawings and more about producing useful information.

The drawings need to answer questions.

They need to communicate the design to the people who are going to build it.

Existing Buildings Are Full of Surprises

An extension is rarely being constructed on an empty site.

Instead, a new structure is being connected to a building that could have been altered several times during its lifetime.

Older houses can contain previous extensions, removed walls, altered drainage, unusual foundations and construction methods that aren’t immediately obvious.

Even relatively modern properties can contain surprises.

A drawing of the existing house may show one arrangement, while the physical building reveals something slightly different once work begins.

That is why understanding the existing building is so important.

The new extension needs to work with what is already there.

The junction between old and new construction can be particularly significant.

There may be differences in floor levels, foundations, materials and movement characteristics.

There can also be existing services running through areas where the new structure is planned.

The more of this information that can be established before construction starts, the less likely it is that the builder will have to stop and wait for decisions.

Ground Conditions Can Change the Job

Ground conditions are another major consideration.

Foundation requirements depend on the site and the proposed building. Different soils behave differently, and conditions can vary considerably even between neighbouring properties.

Clay, sand, gravel, made ground and other soil conditions can all present different considerations.

This becomes particularly important when trees are nearby.

A tree might appear completely separate from the proposed extension, but its roots and the moisture conditions within the surrounding soil can influence foundation design.

The important point is not that every extension requires an enormous investigation.

It is that the potential cost of not investigating an important issue can be far greater than the cost of finding it out early.

If excavation begins and unexpected ground conditions are discovered, the project can quickly move into reactive mode.

The builder may have to stop.

The engineer may need to reconsider the design.

Additional materials may be required.

The client may need to approve additional expenditure.

Building control may need to be involved.

What could have been a relatively straightforward investigation before the project started can become a much bigger problem once labour and machinery are already on site.

Trees Need to Be Considered Early

Trees are a particularly good example of why site investigation matters.

A homeowner may see a mature tree at the bottom of the garden and assume it has nothing to do with an extension several metres away.

However, the relationship between trees, soil and foundations can be more complicated.

Species, size, distance, soil conditions and the proposed foundation arrangement can all influence what is appropriate.

This is why tree checks should not simply be treated as a planning box-ticking exercise.

They can also provide useful information for the construction process.

Identifying a potential issue before a quotation is prepared means it can be incorporated into the design and pricing.

Finding the same issue after excavation has started is a completely different proposition.

Don’t Assume Deeper Foundations Are Automatically Better

There can also be a tendency to think that deeper foundations are always the safer option.

But foundation design should be based on the actual conditions and requirements of the project.

Going deeper costs money.

It means more excavation, more spoil removal, more concrete and potentially more labour.

If the additional depth isn’t necessary, the homeowner may simply be paying for unnecessary work.

On the other hand, if conditions do require a particular foundation solution, discovering that halfway through construction can create major disruption.

The answer isn’t to automatically specify the biggest or deepest solution.

It is to investigate properly and design appropriately.

Good planning isn’t about adding unnecessary complexity.

It is about making informed decisions.

Builder-Friendly Drawings Matter

One of the most important points for contractors is the quality and usefulness of the drawings.

A drawing can look impressive and still be difficult to build from.

For a homeowner, an architectural drawing may communicate the overall appearance beautifully.

For a builder, the critical question is often much simpler:

How do I actually build this?

Dimensions need to be clear.

Levels need to be identified.

Structural elements need to be coordinated.

Junctions need to be resolved.

Materials and construction build-ups need to be understood.

The information needs to be practical rather than simply attractive.

This becomes even more important when several trades are involved.

The bricklayer needs to understand the wall construction.

The carpenter needs to understand the roof.

The roofer needs to understand the roof junctions.

The plumber and electrician need to know where services are going.

The structural engineer’s information needs to align with the architectural drawings.

When all of those pieces fit together, the project becomes much easier to manage.

Structural Engineering Needs to Be Clear

Structural steel is another area where a lack of detail can create problems.

A drawing might indicate that a steel beam is required, but that doesn’t necessarily answer every question the builder has.

How is it supported?

What are the bearing requirements?

Where does it connect?

How does the surrounding wall construction work?

Are there additional posts or padstones?

How does the beam interact with the existing structure?

These details matter.

A beam schedule and clear structural information can help the contractor, steel fabricator and other trades understand what is required.

The more clearly these details are communicated, the less reliance there is on site improvisation.

Builders solve problems constantly, but every problem that requires an unexpected decision can introduce time, cost and risk.

Every Assumption Creates Risk

A useful way of looking at the whole process is that every unanswered question creates an assumption.

What are the foundations?

Assumption.

Where does the drainage run?

Assumption.

How is the steel supported?

Assumption.

What happens at the roof junction?

Assumption.

How does the new floor connect to the existing floor?

Assumption.

One assumption might not cause a problem.

But several assumptions can quickly create a significant amount of uncertainty.

This is why due diligence matters.

The aim isn’t to produce a project where absolutely nothing is left to resolve. Existing buildings will always contain surprises.

Instead, the aim is to remove the avoidable uncertainty.

The Builder Shouldn’t Become the Designer

Builders are extremely good at solving practical problems.

That is one of their greatest strengths.

But there is a difference between solving a construction problem and taking responsibility for an unresolved design decision.

If a structural detail hasn’t been properly resolved, the builder shouldn’t necessarily be expected to invent the structural solution.

If the foundation design is uncertain, the builder shouldn’t have to guess.

If a complicated junction isn’t shown, someone needs to take responsibility for resolving it.

Leaving those decisions until construction starts transfers risk down the chain.

It can also create delays.

The builder contacts the designer.

The designer contacts the engineer.

The engineer reviews the situation.

A revised detail is produced.

The builder waits.

Meanwhile, other trades may also be affected.

The more of those decisions that can be resolved beforehand, the smoother the construction phase becomes.

The Homeowner Doesn’t Always Need the Biggest Extension

There is also a temptation for homeowners to maximise every available square metre.

If they’re investing heavily in an extension, it is understandable that they want as much space as possible.

But the largest possible scheme isn’t necessarily the best scheme.

A bigger extension could mean more expensive foundations, more structural steel, greater drainage requirements and higher overall construction costs.

It might also reduce garden space or create planning difficulties.

The best project is often the one that balances several competing priorities.

Design. Planning. Budget. Buildability.

A successful extension needs all four.

A design that looks fantastic but costs far more than the homeowner can afford isn’t successful.

A cheap scheme that doesn’t provide the space the homeowner needs isn’t successful either.

The objective is to find the point where the design works for the client and can realistically be delivered.

The Tender Stage Is Critical

The point at which builders are asked to price a project is extremely important.

If different contractors are working from different assumptions, their quotations may not actually be comparable.

Builder A might allow for one foundation solution.

Builder B might assume another.

Builder C might exclude certain structural work altogether.

The homeowner then sees three different prices and naturally wonders why they are so far apart.

The cheapest quotation isn’t necessarily the cheapest project.

It may simply contain the greatest number of assumptions.

A more complete set of information allows builders to price the same scope of work.

That creates a fairer comparison for the homeowner and gives the contractor greater confidence that the price reflects the project that will actually be constructed.

Better Planning Can Protect the Budget

Construction budgets are often damaged by unexpected changes.

Some changes are unavoidable.

Existing buildings can reveal surprises.

Materials can change in price.

Homeowners can alter their minds.

But some variations are created because information wasn’t available at the beginning.

If a foundation solution changes because the ground conditions weren’t investigated, that can have a direct financial impact.

If structural steel changes because the design wasn’t properly coordinated, there can be fabrication and labour implications.

If drainage has to be redesigned after excavation, other parts of the project may be affected.

Better planning cannot eliminate every variation.

But it can reduce the number of variations that could have been anticipated.

That makes budgeting more realistic.

Planning, Design and Budget Need to Work Together

A successful project sits at the intersection of several different requirements.

The homeowner wants a useful and attractive space.

The planning system needs to accept the proposed development.

The engineer needs a structurally appropriate solution.

The builder needs something practical to construct.

The budget needs to work.

If one of those elements is ignored, problems can appear later.

That is why early coordination matters.

The designer should understand the site.

The structural requirements should work with the architectural design.

The planning constraints should be understood before the design becomes too advanced.

The likely construction costs should inform the decisions being made.

This doesn’t mean every decision has to be made on day one.

It means the important decisions should happen in the right order.

One Roof for the Whole Process

One of the benefits of Plan It UK’s approach is bringing architecture, engineering, surveying, planning applications and technical approvals together.

That can help because each part of the project influences another.

The survey influences the design.

The design affects the structural requirements.

The structural requirements affect cost.

Planning constraints influence the size and appearance.

Technical details influence how the builder constructs the project.

When those processes are separated without sufficient communication, information can become fragmented.

One professional may make a decision without knowing how it affects another part of the project.

Coordinating the different elements earlier can make the overall process much more straightforward.

Why Better Planning Can Actually Make Construction Faster

It might sound counterintuitive, but spending more time on planning can sometimes make the construction phase faster.

Imagine a builder arrives on Monday ready to excavate.

Unexpected ground conditions are discovered.

The work stops.

The designer is contacted.

The engineer reviews the site.

A revised foundation detail is produced.

The client is informed.

Additional costs are discussed.

The builder waits for approval.

Several days may disappear.

Compare that with investigating the ground before the project is priced.

The information can be incorporated into the design.

The builder can price the appropriate solution.

The homeowner understands the likely cost.

And construction can begin with fewer unknowns.

This is the difference between planned work and reactive work.

Good planning isn’t about trying to predict every possible problem.

It is about identifying the problems that can reasonably be predicted.

Extensions Are More Complicated Than They Look

From the outside, an extension can appear simple.

Four walls.

A roof.

Some windows.

A set of doors.

But underneath that simple appearance are dozens of technical decisions.

How does the new foundation interact with the existing structure?

Where does the drainage go?

How is the roof supported?

How does the new wall connect to the old wall?

How is the floor insulated?

How are thermal bridges dealt with?

How are steel beams supported?

What happens where old and new construction meet?

How are existing services affected?

How is the new structure protected against moisture?

These questions are the real construction project.

The finished extension is simply what people see at the end.

Loft Conversions Have Their Own Challenges

Loft conversions present similar issues.

A homeowner might see an unused loft and imagine an easy extra bedroom.

But converting a loft involves much more than installing a staircase and plasterboarding the roof.

The existing structure needs to be assessed.

New floor loads may need to be supported.

The roof structure may need modification.

Fire safety and escape routes need to be considered.

Insulation and ventilation need to be addressed.

Dormers and other roof alterations may require planning consideration.

The new structure also needs to work with the existing house.

Again, early planning can identify these issues before a builder is standing on site trying to work out what happens next.

Communication Is Part of Good Planning

Good information isn’t useful if it isn’t communicated clearly.

That means homeowners, designers, engineers, building control professionals and builders need to understand what has been decided.

It also means changes need to be communicated properly.

A revised drawing appearing halfway through construction can create confusion if the contractor doesn’t know which version is current.

Clear document control, coordinated drawings and straightforward communication can all help.

This may sound administrative, but construction is full of small details.

When information becomes unclear, those details can create bigger problems.

Better Relationships Mean Better Projects

Construction is ultimately a people business.

Even the best drawings won’t eliminate every problem.

Materials can arrive late.

Weather can cause delays.

Existing construction can differ from expectations.

A client might change their mind.

Unexpected issues will happen.

What matters is how the people involved respond.

A strong relationship between the designer and builder can make those conversations easier.

Instead of immediately looking for someone to blame, everyone can focus on solving the problem.

That benefits the homeowner too.

A builder who feels comfortable raising concerns early is more likely to identify issues before they become serious.

A designer who understands construction can produce more practical information.

And a homeowner who understands that the project is a team effort is more likely to have realistic expectations.

The Bigger Lesson

The biggest lesson is that construction quality doesn’t begin when the first brick is laid.

It begins much earlier.

It begins with the survey.

It begins with understanding the site.

It begins with asking awkward questions.

It begins with checking assumptions.

It begins with producing drawings that people can actually build from.

It begins with understanding the structural requirements.

And it begins with getting the right professionals involved before the project reaches site.

For homeowners planning an extension or loft conversion, this might initially sound like more work.

But the cost of doing the investigation properly is often small compared with the cost of discovering a major problem halfway through construction.

For builders, better information can mean fewer headaches, fewer delays and greater confidence in the price they’ve provided.

For designers, it means producing information that works in the real world rather than simply looking good on paper.

And for everyone involved, it creates a much better chance of delivering the project the homeowner originally imagined.

Key Takeaways

  • A project should be properly defined before builders are asked to price it.

  • Planning permission is not necessarily the same thing as construction-ready information.

  • Ground conditions can affect foundation design and project cost.

  • Trees and surrounding soil conditions should be considered early.

  • Deeper foundations aren’t automatically better; they should be appropriate to the site.

  • Builder-friendly drawings can reduce uncertainty and site queries.

  • Structural details, beam schedules and connection information need to be properly coordinated.

  • Homeowners should be cautious about comparing quotations based solely on the bottom-line figure.

  • Better investigation can reduce avoidable variations and unexpected costs.

  • Good communication between designers, engineers and builders can make construction significantly smoother.

  • The builder should not be left to resolve major design decisions once work has already started.

  • The best extension isn’t necessarily the biggest one; it is the one that balances design, planning, budget and buildability.

Plan Before You Build

An extension or loft conversion is a major investment, and some of the most important decisions happen before construction starts.

The temptation is to get planning permission, find a builder and get moving as quickly as possible.

But speed at the beginning doesn’t necessarily mean a faster project overall.

Sometimes spending more time investigating the site, resolving the structure and producing better drawings is exactly what makes the construction phase easier.

The objective isn’t to make the process unnecessarily complicated.

It’s to make sure that when the builder arrives on site, the major questions have already been answered.

That means fewer assumptions.

Fewer surprises.

Fewer delays.

And ultimately, a better chance of getting the extension or loft conversion that everyone agreed to build in the first place.

For homeowners, that can mean greater confidence in the budget and the finished result.

For builders, it can mean fewer unanswered questions and less time spent dealing with problems that could have been addressed before work began.

And for designers, it reinforces an important principle: good design isn’t just about how a project looks.

It is about whether the information allows someone to build it properly.

That is where better planning can make a real difference.

A well-planned extension is not necessarily one where every possible problem has been eliminated. That is unrealistic when working with existing buildings.

It is one where the important questions have been asked early, the available information has been investigated and the people involved have enough clarity to make informed decisions.

Good building starts with good information.

_______________________

#PlanItUK #Extensions #LoftConversion #PlanningPermission #HomeExtension #StructuralEngineering #BuildingRegulations

Paint Flaking But No Damp? Here’s no 1 Real Problem

0

Paint Flaking But No Damp? Here’s the Real Problem.

Paint Flaking But No Damp? Here’s no 1 Real Problem

Roger tackles a viewer’s query regarding persistent Paint Flaking, initially mistaken for a damp issue.

Explore the use of a specialised primer to address Paint Flaking, ensuring a lasting finish for your DIY home improvement projects.

Paint Flaking is one of those problems that can instantly make homeowners suspect damp.

You see flakes lifting away from the surface, patches of paint separating from the wall and areas that look rough, cracked or damaged, and the obvious conclusion can be that moisture must be getting in somewhere.

But what if there isn’t actually a damp problem?

That’s the question Roger tackles when looking at a viewer’s query about persistent paint peeling. While damp can certainly cause paint to blister, bubble, flake and fail, it isn’t the only explanation.

Sometimes, the problem is much closer to the surface.

And in some cases, repeatedly painting over the damaged area can actually make the problem worse.

The key is understanding why the paint is failing before trying to repair it.

Paint Flaking Doesn’t Automatically Mean Damp

Paint Flaking and damp often get linked together because moisture is one of the most common causes of problems with painted surfaces.

Water can enter masonry, migrate through walls or become trapped beneath coatings. As moisture moves through a wall, it can affect the bond between the substrate and the paint.

Eventually, the paint can blister, bubble, peel or flake away.

But there are other reasons for Paint Flaking.

The surface may not have been prepared properly in the first place.

Old paint may have become poorly bonded.

The wall may have been dusty or chalky.

A previous coating may be incompatible with the new paint.

The surface might have been too smooth.

The wrong primer may have been used.

Or the wall may simply have layers of old paint that have deteriorated over time.

This is why the first step shouldn’t always be reaching for a damp-proofing product.

It should be finding out what is actually happening.

Look at the Pattern of Paint Failure

The pattern of the peeling can provide useful clues.

Damp-related paint failure can sometimes be concentrated around particular areas.

You might see staining, tide marks, mould growth, salts or persistent moisture.

There could be a connection with an external defect such as damaged pointing, defective gutters, leaking pipes or cracks in the masonry.

But Paint Flaking caused by adhesion problems can look different.

You might find that the coating is simply lifting away in sheets or flakes, particularly where several layers of old paint have accumulated.

There may be no obvious staining.

There may be no musty smell.

The wall may feel completely dry.

That doesn’t prove there is no moisture problem, but it does mean you shouldn’t automatically assume damp is responsible.

paint flaking

Old Paint Can Be the Weakest Link

One of the most overlooked causes of Paint Flaking is simply the condition of the existing coating.

A wall can contain several generations of paint.

One homeowner paints it.

Another homeowner paints over that.

Years later, somebody decides to redecorate again.

Eventually, there can be multiple layers of coating sitting on the same surface.

If one of those older layers has a poor bond with the substrate, adding another coat doesn’t necessarily solve the problem.

Instead, the new paint can effectively become another layer attached to a weak foundation.

The new coating might look perfect when first applied.

Then, as it dries and the wall experiences normal movement and changes in temperature and humidity, the weak layer underneath can begin to fail.

The result?

More peeling.

More cracking.

More flakes.

And another decorating job.

Preparation Is Often the Real Fix

One of the biggest lessons from Paint Flaking is that paint preparation matters.

It can be tempting to think that decorating is mainly about choosing the right colour and applying the paint neatly.

But a durable finish starts long before the roller touches the wall.

Loose material needs to be removed.

Flaking paint needs to be dealt with.

Dust and contamination need to be considered.

The underlying surface needs to be sound.

Where necessary, repairs need to be allowed to dry properly before decorating continues.

This can be frustrating because preparation isn’t particularly glamorous.

Nobody gets excited about spending hours scraping old paint from a wall.

But preparation is often the difference between a finish that lasts and one that starts failing again a few months later.

Don’t Just Paint Over Flaking Paint

This is one of the most common mistakes when dealing with Paint Flaking.

You notice a small area of peeling paint.

You scrape away the obvious loose bits.

You apply a fresh coat.

It looks great.

For a while.

Then the surrounding paint starts lifting.

Why?

Because the underlying problem wasn’t necessarily the visible flake.

There may still be poorly bonded material around it.

The new paint can only adhere as well as the surface underneath allows.

If the substrate is weak, chalky or contaminated, the new coating is being asked to perform on an unsuitable surface.

That’s why preparation needs to go beyond simply making the wall look tidy.

The objective is to create a sound surface for the new coating.

What Is a Specialised Primer?

A specialised primer can be useful when dealing with difficult or problematic surfaces.

Primers are designed to perform specific functions.

Some help improve adhesion.

Some seal porous surfaces.

Some stabilise chalky substrates.

Others are designed to bridge between different types of coating or prepare surfaces that would otherwise be difficult to paint successfully.

This is particularly useful where the wall has been stripped, repaired or contains a mixture of old and new surfaces.

However, primer isn’t magic.

It shouldn’t be used to glue down paint that is already loose.

If the old coating is failing, the weak material needs to be dealt with first.

A primer should be applied to a suitably prepared surface.

Stabilising a Problem Surface

Where old paint or the underlying surface is friable, a stabilising primer can sometimes help consolidate the surface before decoration.

The idea is to strengthen or bind a surface that might otherwise interfere with adhesion.

This can be particularly useful on older walls where the surface has become dusty or powdery.

But the exact product needs to match the problem.

A primer designed for one type of surface isn’t automatically appropriate for another.

Always follow the manufacturer’s instructions and check whether the product is suitable for the existing coating and substrate.

Don’t Ignore the Wall Behind the Paint

It is also important to look beyond the paint itself.

Paint is only the visible finish.

Behind it could be plaster, render, masonry, plasterboard or another substrate.

If the underlying material is cracked, friable or damaged, painting won’t solve the problem.

For example, if plaster is becoming detached from the wall, simply applying primer and paint could temporarily hide the symptoms without fixing the underlying issue.

The same applies to cracks.

A hairline crack may be relatively insignificant, but a larger or recurring crack could indicate movement that needs further investigation.

The decoration should never be treated as the entire wall system.

Check for Moisture Before Decorating

Even when Paint Flaking appears to be an adhesion problem, it is sensible to rule out obvious moisture sources before carrying out a repair.

Look at the external wall.

Check gutters and downpipes.

Look for damaged pointing.

Inspect areas around windows and doors.

Consider whether there are plumbing services nearby.

Look for staining or salt deposits.

Check whether the problem is concentrated around one particular location.

The aim isn’t to become obsessed with damp.

It’s simply to avoid making an assumption in either direction.

If there is genuine moisture entering the wall, painting over it won’t solve the problem.

But if the wall is dry and the actual issue is failed paint adhesion, unnecessary damp treatments can be equally unhelpful.

For homeowners carrying out decorating or renovation work, the Planning Portal’s guidance on decorations and Building Regulations can also be useful where painting forms part of a wider building project.

Why the Wrong Repair Can Make Things Worse

One of the dangers of misdiagnosing Paint Flaking is using an inappropriate treatment.

If someone assumes every peeling wall is suffering from damp, they may start looking at waterproof coatings or other damp-related solutions.

But if the wall isn’t suffering from penetrating moisture, that may not address the actual problem.

Similarly, if someone assumes every peeling wall simply needs another coat of paint, they may trap the same problem underneath a fresh finish.

The right repair starts with the right diagnosis.

A Better DIY Approach

For a DIY homeowner, the process can be broken down into a few sensible stages.

First, identify the extent of the problem.

Don’t just look at the obvious peeling patch.

Check the surrounding paint.

Gently test whether nearby areas are firmly bonded.

Then investigate the wall itself.

Look for signs of moisture, staining, mould, salts or damage.

Next, remove loose and poorly bonded material.

The aim is to get back to a sound surface rather than simply creating a neat-looking edge around the damaged area.

Once the surface has been prepared, remove dust and contamination as appropriate.

Allow repairs and cleaning to dry properly.

Then choose a primer or stabilising product suitable for the actual substrate and existing coating.

Only after the surface has been properly prepared should the finishing paint be applied.

paint flaking

The Real Problem May Be Adhesion

Ultimately, that is the key lesson from Roger’s viewer query.

Paint Flaking doesn’t automatically mean damp.

Sometimes the real problem is adhesion.

The coating may be poorly bonded.

The surface underneath may be dusty or friable.

Previous layers may have failed.

The substrate may be porous or contaminated.

Or the wrong preparation may have been carried out before the last decorating job.

Once you understand that, the repair becomes much more logical.

Instead of repeatedly painting over the symptom, you investigate the surface, remove what has failed, prepare what remains and use an appropriate primer before applying the final coating.

And that is often the difference between painting over a problem and actually fixing it.

Zinsser B-I-N Shellac Primer 👇
https://go.skill-builder.uk/zinsser

@ZinsserUK
_______________________

#diy #homeimprovement #damp #decorating

People always get This Wrong With Garden Timber

0

Barrettine Wood Care products are available from:
Toolstation: https://bit.ly/4s3wd9O
Wood Finishes Direct: https://bit.ly/4ceHe3e 

More from Skillbuilder – https://skill-builder.uk/how-to-build-a-timber-frame-garden-room-2

@barrettineproducts2654
_______________________

Garden Timber: What Should You Replace and What Can You Save?

Not all Garden Timber needs replacing.

But some of it definitely does.

The real skill is knowing the difference.

On this job, we looked at a garden that had taken years of weathering, wear and exposure. The challenge wasn’t simply ripping everything out and starting again. It was deciding what had genuinely failed, what could be restored and what was still worth saving.

That distinction matters. Replacing every piece of tired-looking Garden Timber can be expensive and unnecessary. At the same time, trying to save timber that has genuinely lost its structural integrity can create bigger problems later.

The key is learning to look beyond appearance.

Timber can look grey, weathered and neglected while still being perfectly serviceable. Equally, a piece can look respectable on the surface while being badly deteriorated underneath.

Once the structure is sorted, the focus shifts to protecting the Garden Timber that’s staying.

Good preparation, the right treatment and regular maintenance can all help outdoor timber last longer.

Not All Weathered Garden Timber Is Rotten

One of the biggest mistakes people make when looking at old Garden Timber is assuming that grey or discoloured timber must be rotten.

Outdoor timber naturally changes appearance over time.

Sunlight can alter the surface, while rain, temperature changes and repeated wetting and drying can cause movement and weathering.

The result can be timber that looks dramatically different from the day it was installed.

But appearance alone doesn’t tell you whether the material has structurally failed.

A weathered surface can sometimes be cleaned, prepared and treated before a suitable protective finish is applied.

The important question is what is happening beneath that weathered surface.

Is the timber still firm?

Does it retain its shape?

Are joints still secure?

Are fixings sound?

Is there evidence of deep decay?

Those questions are much more useful than simply asking whether the timber looks old.

When Garden Timber Needs Replacing

There comes a point where restoration isn’t sensible.

If Garden Timber has significant structural decay, replacing it is generally the appropriate option.

This is particularly important for components carrying loads, including steps, handrails, posts and supporting beams.

If a structural component has become soft, seriously degraded or unable to perform its intended function, applying a coating won’t restore its strength.

A new coat might make deteriorated timber look better, but the underlying problem remains.

If the timber is supporting people or other parts of a structure, deterioration can become a safety concern.

The principle is simple:

If the timber has structurally failed, replace it.

Don’t confuse cosmetic restoration with structural repair.

What Garden Timber Can Be Saved?

Sound Garden Timber is a different story.

If the core remains strong and the deterioration is mainly on the surface, restoration may be worthwhile.

This is particularly common with older fences, gates, sheds, planters and garden structures.

The surface may be rough or grey, with old coating residue or areas of surface degradation.

But that doesn’t automatically mean the timber has reached the end of its useful life.

With proper preparation, tired-looking timber can sometimes be brought back into service.

The important thing is not to judge the material solely by appearance.

Garden Timber

Inspect Before You Start

Before carrying out any Garden Timber restoration, inspect the entire structure.

Look at areas that remain wet for the longest.

Check where timber meets the ground.

Inspect joints and fixings.

Examine the underside of horizontal boards.

Look at the ends of timber sections.

Check areas where water can collect.

These locations can deteriorate faster because they may remain damp for longer.

A garden structure can therefore have perfectly respectable-looking boards alongside badly deteriorated areas hidden underneath.

A proper inspection helps identify what actually needs attention.

Ground Contact and Moisture

Timber close to the ground faces particularly challenging conditions.

Soil retains moisture, vegetation can restrict airflow and rainwater can splash against the base.

For Garden Timber, prolonged moisture exposure is one of the biggest threats to long-term durability.

This is why the base of posts and other low-level components deserve particular attention.

If timber remains wet repeatedly, the risk of deterioration increases.

Good detailing and drainage can therefore be just as important as the protective treatment applied to the surface.

Preparation Is Everything

Once you’ve established that the Garden Timber is worth saving, preparation becomes the next major step.

The temptation is to grab the treatment and start applying it immediately.

But putting a new coating over degraded or contaminated timber isn’t necessarily going to produce a durable result.

The surface may need cleaning.

Loose material may need removing.

Old coatings may need to be stripped back.

Rough or degraded areas may need attention.

Mould or algae may also need to be dealt with appropriately.

The objective is to create a suitable surface for the new treatment.

For more advice on preparing and protecting outdoor surfaces, you could internally link to your existing [timber treatment and maintenance guide – INSERT YOUR INTERNAL URL HERE].

Good preparation can take longer than the application itself, but it is often the most important part of the job.

Don’t Forget Cut Ends

Cut ends deserve particular attention when working with Garden Timber.

Whenever timber is cut, new material is exposed.

End grain can provide a pathway for moisture, making these areas particularly important when preparing and treating outdoor timber.

The same principle applies to drilled holes, notches and other areas where the timber has been cut or penetrated.

These details may look insignificant, but they can have a major impact on durability.

Protect vulnerable areas according to the requirements of the chosen timber treatment system.

Choose the Right Finish

There isn’t one universal product that is right for every piece of Garden Timber.

Different areas have different demands.

A decorative garden feature may need a finish chosen primarily for appearance and general weather protection.

A fence may require something different.

A gate that is handled regularly could experience more wear.

Steps are exposed to foot traffic as well as the weather.

Handrails can be touched constantly.

That’s why choosing a product based solely on colour isn’t enough.

Think about what the timber actually has to withstand.

High-Wear Garden Timber Needs More Attention

Steps are a particularly good example.

They experience rain, sunlight, temperature changes and repeated physical contact.

Every person walking across them creates wear.

If the finish is unsuitable for that level of use, it can deteriorate quickly.

High-wear Garden Timber therefore needs to be considered differently from a decorative fence panel.

The environment matters.

The use matters.

The preparation matters.

Maintenance Is Better Than Rescue

One of the best ways to extend the life of Garden Timber is to maintain it before serious deterioration occurs.

A small crack is easier to address than a severely degraded board.

A worn coating is easier to renew than timber that has been exposed for years without protection.

A damaged end can be treated before prolonged moisture exposure causes deeper problems.

Regular inspection doesn’t necessarily mean carrying out a major restoration every year.

A quick check can identify problems while they’re still manageable.

Don’t Replace Timber Just Because It’s Grey

Grey Garden Timber can look alarming, but weathering isn’t automatically failure.

If the material is still structurally sound, it may simply need appropriate preparation and protection.

Replacing everything because it looks old can create unnecessary expense and waste.

The better approach is to assess each component.

Some pieces may need replacing.

Others may need cleaning.

Some may require more substantial preparation.

And some may simply need a suitable protective finish.

But Don’t Try to Save Everything

The opposite mistake is equally important.

There is no prize for rescuing Garden Timber that has genuinely reached the end of its useful life.

If a component is severely rotten, unstable or structurally compromised, replacing it is the sensible decision.

Trying to preserve it with filler, paint or treatment may only delay the inevitable.

Knowing when to stop restoring is just as important as knowing when restoration is worthwhile.

Restore What You Can, Replace What You Must

The best approach to Garden Timber is neither to replace everything nor to save everything.

It’s about making the right call.

Some timber will have reached the end of its useful life.

Some will simply need the surface cleaned and prepared.

Some will need old coatings removed.

Some may need local repairs.

And some will simply need the right protective treatment to keep performing for years to come.

The skill is recognising which is which.

Don’t rip out sound timber simply because it has gone grey.

Don’t paint over timber that has structurally failed.

Inspect it. Understand it. Prepare it. Protect it. Replace only what genuinely needs replacing.

Good preparation is the difference between a finish that lasts and one that fails.


_______________________

#woodworking #DIY #decking #garden #homeimprovement #timber #outdoorprojects #restoration #howto

What Happens When Construction Materials Arrive Late in Scotland

0

What Happens When Construction Materials Arrive Late in Scotland?

Construction sites across Scotland operate on tight schedules where every delivery matters. When construction materials arrive late, the consequences can quickly spread across an entire project. A delayed lorry does not simply mean waiting for a delivery. It can mean trades are unable to work, plant is left standing, subcontractors need to be rescheduled and completion dates begin to move.

For projects working to strict deadlines, reliable access to construction materials is essential. Timber, steel, concrete products, insulation, bricks, blocks and fixings all need to arrive at the right place at the right time. When one critical item is missing, an entire sequence of work can be interrupted.

Scotland presents additional challenges for construction logistics. Long distances, remote locations, ferry crossings, challenging road networks and unpredictable weather can all affect the movement of construction materials. A delivery delay that might be manageable on a mainland project can become a much bigger problem for a site in the Highlands or on one of Scotland’s islands.

The issue becomes even more important as construction methods become increasingly dependent on materials being delivered to site at specific stages. Off-site construction, for example, relies heavily on components being manufactured and transported at the right time. Skill Builder has previously looked at how off-site construction works, including the challenges involved in transporting prefabricated components and materials to site.

Why Scotland’s Geography Creates Unique Material Delivery Challenges

Scotland’s geography creates logistics challenges that are not experienced to the same extent in many parts of the UK. Construction projects can involve long journeys for freight vehicles, limited road networks and difficult access to remote locations.

Routes such as the A9 and A82 are important transport corridors for moving construction materials into the Highlands and beyond. During winter, snow, ice, flooding and other severe weather can disrupt these routes with little warning.

Planned infrastructure works can create further complications. Ongoing road improvements across Scotland’s trunk road network can result in diversions, reduced speeds and restricted access.

For a construction site relying on scheduled deliveries, even a relatively short diversion can affect the arrival time of essential construction materials.

Island and Highland projects face even greater challenges. Ferry services can provide the only practical route for transporting heavy equipment and bulk construction materials to certain locations. If a ferry is cancelled or a vehicle misses its sailing, the next available opportunity may not be until the following day or later.

This creates a domino effect.

A delivery scheduled for Monday could arrive Tuesday. If the material was needed for work scheduled on Tuesday morning, the workforce may have to be reassigned. If that work was required before another trade could begin, the delay can continue through the rest of the programme.

For projects using prefabricated components, the problem can be even more significant. If an entire section of a building is manufactured away from the site, there may be little alternative work available when the delivery fails to arrive.

How Late Construction Materials Affect Project Costs

The most obvious consequence of late construction materials is lost time. However, the financial impact can be considerably larger.

Construction projects pay for labour, machinery, accommodation, transport and site facilities. When workers cannot complete their planned tasks because materials have not arrived, the project may still be paying for those resources.

For example, a contractor might have a team of bricklayers booked to start work on a particular Monday. If the required blocks or bricks do not arrive, those workers may have to be moved to another part of the project.

If no alternative work is available, the contractor may face downtime.

Plant can also be affected. Cranes, telehandlers and other equipment may have been scheduled specifically around a particular delivery. When construction materials arrive late, equipment can sit unused while still generating hire costs.

The problem becomes more serious when subcontractors are involved.

A delayed delivery can force a contractor to cancel or rearrange a subcontractor’s visit. The subcontractor may then have limited availability when the work is eventually ready to proceed.

This can create a chain reaction where one late delivery causes several subsequent trades to move.

Even relatively small delays can therefore become expensive when they affect multiple stages of a project.

Calculating Buffer Stock Requirements

One of the most practical ways to reduce the impact of late construction materials is to maintain appropriate buffer stock.

Buffer stock provides a safety margin between the amount of material a project normally requires and the amount physically available on site. The correct level depends on consumption, lead times, storage capacity and the reliability of the supply route.

For example, a site using two tonnes of cement per day with a five-day potential supply disruption could require a substantial reserve.

A further allowance may be necessary during periods when severe weather or ferry disruption is more likely.

Winter planning is particularly important. Between October and March, Scottish construction sites may face more frequent disruption from snow, ice, flooding and high winds.

Key construction materials should therefore be reviewed before winter rather than waiting for the first major disruption.

Cement, steel reinforcement, timber, insulation and other critical products may require additional stock depending on the project.

There is, of course, a cost associated with storing additional construction materials. However, that cost needs to be compared against the potential expense of a prolonged site shutdown.

Over-ordering everything is not necessarily the answer. Storage space, cash flow, material deterioration and security all have to be considered.

The aim is to identify the materials that would actually stop the project if they were unavailable.

Choosing Materials and Suppliers Carefully

Supplier selection can make a significant difference when managing construction logistics.

Price is obviously important, but it shouldn’t be the only consideration.

Delivery reliability, communication, stock availability and the supplier’s ability to reach remote locations should all be considered.

Skill Builder has previously covered the development of online building supplies comparison services, highlighting the importance of being able to compare building products and suppliers.

For Scottish projects, however, the cheapest supplier is not necessarily the cheapest overall option.

A slightly more expensive supplier that consistently delivers on time may prove better value than a cheaper supplier whose delays repeatedly disrupt the programme.

This is particularly important for specialist or difficult-to-source construction materials.

Building a Three-Tier Supplier Contingency Framework

Relying entirely on one supplier can create unnecessary risk.

A three-tier supplier strategy can give construction companies additional options when deliveries fail.

Tier One: Primary Supplier

The primary supplier should have clearly defined delivery expectations.

A service level agreement can establish delivery expectations, communication requirements and procedures for dealing with delays.

The important point is that everyone understands what happens when a delivery starts running late.

Tier Two: Regional Backup

The second tier consists of regional backup suppliers.

These suppliers should be identified before an emergency occurs, with pricing, availability and delivery arrangements understood in advance.

For a Highland or island project, this could mean identifying suppliers within a reasonable distance of the site rather than relying entirely on a national distributor.

Tier Three: Emergency Logistics

The third tier is an emergency logistics option.

This could involve a specialist freight company capable of arranging alternative road, sea or air transport when normal supply routes are unavailable.

Having these options in place means a site manager does not have to start searching for alternative construction materials suppliers after a delivery has already failed.

Setting Realistic Delivery Expectations

Delivery times should reflect the actual location of the construction site.

A mainland project close to a major distribution centre may be able to work with relatively short delivery windows.

A remote Highland project or island development requires more flexibility.

The additional time needed for transporting construction materials should be incorporated into the programme from the beginning.

Building a project schedule around mainland delivery assumptions can create problems when the site is several hours from the nearest major distribution hub.

Weather buffers should also be considered.

A 24-hour allowance may make sense for certain deliveries, while more remote projects may require greater flexibility.

Island sites are particularly dependent on ferry schedules. Delivery planning needs to account for sailing times, vehicle capacity and the possibility of cancellations.

The same principle applies to large components.

If a delivery contains prefabricated timber panels, roof trusses or other major building elements, missing the delivery window could prevent several trades from progressing.

Using Real-Time Delivery Tracking

Technology can also help construction teams manage deliveries more effectively.

Real-time tracking allows site managers to see where vehicles carrying construction materials are located and whether they remain on schedule.

If a vehicle is delayed, the site can be informed before the driver reaches the destination.

This provides an opportunity to make decisions earlier.

A contractor might rearrange labour, move another delivery forward or change the day’s programme rather than allowing workers to remain idle.

Tracking systems can also provide useful information about supplier performance.

If a particular supplier repeatedly delivers construction materials late, the construction company can identify the pattern and take action.

This is where construction management software can also become useful. Skill Builder has previously covered systems that allow teams to request material and plant deliveries and record goods received electronically, helping improve visibility across the project.

Planning for Material Delays Before They Happen

The biggest mistake a construction company can make is treating a delayed delivery as an unexpected event every single time.

Some delays are predictable.

Winter weather is predictable. Ferry restrictions are predictable. Long distances are predictable. Busy periods for suppliers are predictable.

That means they can be planned for.

Before a project starts, site managers should identify which construction materials are critical to the programme and which can be substituted or delayed without stopping work.

They should also establish:

  • Expected delivery dates
  • Alternative suppliers
  • Minimum stock levels
  • Emergency contacts
  • Weather allowances
  • Ferry and transport constraints
  • Storage requirements
  • Alternative work for trades during delays

The more of this that is established in advance, the less likely a single late delivery is to become a major project problem.

What Happens When Construction Materials Arrive Late?

Ultimately, late construction materials can create serious consequences for Scottish construction projects.

The problem isn’t simply that a lorry arrives a few hours late.

A missing delivery can affect labour, plant, subcontractors, sequencing, cash flow and completion dates.

For remote and island projects, those risks can be magnified considerably.

Scotland’s geography means construction companies have to think differently about logistics. Ferry crossings, long-distance haulage, winter weather and limited road networks all need to be considered when creating a realistic programme.

The solution isn’t simply ordering everything earlier.

Effective logistics require careful planning, realistic lead times, appropriate buffer stock and reliable communication between suppliers, hauliers and site teams.

Construction companies that understand the risks associated with moving construction materials across Scotland can build greater resilience into their projects.

Alternative suppliers, contingency freight options and real-time tracking can all help reduce disruption.

Ultimately, reliable delivery of construction materials is not just a logistics issue.

It is an important part of project management.

When materials arrive when they are needed, trades can work efficiently, equipment can be used as planned and projects have a much better chance of staying on programme and within budget.

Scotland’s geography and weather aren’t going to change.

The construction industry therefore has to plan around them.

Because when construction materials arrive late, the cost isn’t just the delivery.

It’s everything that has to wait for it.

Key Takeaways

  • Late construction materials can cause delays far beyond the original delivery.
  • Scottish geography creates additional logistics challenges.
  • Highland and island projects require particularly careful delivery planning.
  • Ferry cancellations can create significant delays for remote sites.
  • Buffer stock can protect critical materials from short-term disruption.
  • Alternative suppliers should be identified before an emergency happens.
  • Delivery schedules need to account for weather and transport conditions.
  • Real-time tracking can give site managers earlier warning of delays.
  • The cheapest supplier isn’t always the cheapest option if deliveries are unreliable.
  • Critical construction materials should be identified before work begins.
  • Good logistics planning can prevent a single late delivery becoming a major project delay.
  • Ultimately, reliable material deliveries are essential to keeping construction projects on time and within budget.

#ConstructionMaterials #ConstructionScotland #ConstructionIndustry #BuildingMaterials #ConstructionLogistics #Scotland #SiteManagement #ConstructionDelays

UPVC Windows for UK Homes: Regulations, Selection, and Installation Standards

0

I’ve expanded it and added several natural internal Skill Builder links, including double glazing, condensation, lintels and cavity-wall detailing. I’ve also increased the use of UPVC Windows without forcing it into every paragraph.

UPVC Windows For UK Homes: Regulations, Selection And Installation Standards

UPVC Windows control far more than the view out of a property. They influence natural light, ventilation, draughts, internal comfort and the amount of heat lost through the building envelope. They can also play an important part in whether a property meets current energy-efficiency requirements.

Choosing the wrong windows can therefore cost money twice: once when the units are purchased and again when remedial work becomes necessary. Poor thermal performance, incorrect measurements, inadequate ventilation or bad installation details can turn what should be a straightforward improvement into an expensive problem.

For installers, builders and homeowners, understanding the technical side of UPVC Windows is increasingly important. Window specification is no longer simply about choosing a frame colour and deciding between casement or tilt-and-turn. U-values, glazing specifications, ventilation, lintels, thermal bridging and installation tolerances all need to be considered.

uPVC continues to dominate new and replacement window installations across the UK for three main reasons. Cost per square metre generally sits below comparable aluminium and high-quality timber systems. Maintenance requirements are relatively low. Most importantly, modern UPVC Windows can achieve strong thermal performance without requiring particularly complicated specifications.

Understanding where current performance requirements sit — and how the frame, glass and installation work together to achieve them — is something every competent specifier should consider before placing an order.

Why UPVC Windows Dominate UK Home Improvements

Traditional timber windows can last for decades when properly maintained, but they require attention. Paint coatings eventually deteriorate, joints can open and exposed sections can absorb moisture. Regular preparation, painting and sealing are part of owning them.

Aluminium offers excellent structural strength and allows slimmer profiles, but good-quality thermally broken aluminium systems can carry a significantly higher price than standard UPVC Windows.

For many homeowners, that makes uPVC the practical middle ground.

Maintenance generally involves cleaning the frames, keeping drainage channels clear, lubricating hardware where required and checking seals as the installation ages. There is no routine sanding or repainting.

Thermal performance strengthens the case further.

Multi-chamber profiles inside modern UPVC Windows create pockets of air within the frame. These chambers help slow heat transfer through the profile, allowing the frame itself to contribute to the overall thermal performance of the window.

This matters because the performance of a window cannot be judged by the glass alone.

A high-performance sealed unit fitted into a thermally poor frame will not necessarily produce a high-performance finished window. The glazing, spacer bars, frame and installation details all influence the final result.

For homeowners deciding whether replacement glazing represents good value, Skill Builder has also looked at whether double glazing is really the best investment for a home.

Sustainability has also become a bigger part of the specification conversation. Modern uPVC profiles can incorporate recycled material, while old frames can potentially be recovered and processed rather than simply becoming construction waste.

The environmental argument is therefore more complicated than simply comparing one frame material with another. Lifespan, maintenance, manufacturing, thermal performance and end-of-life recycling all need to be considered.

UPVC Windows And Heat Loss

Windows are one of several points where heat can escape through the building envelope. Walls, roofs, floors, doors, ventilation and uncontrolled air leakage all contribute to overall heat loss.

Replacing poor windows can reduce one part of that problem.

Older single glazing provides little resistance to heat transfer, while ageing double-glazed units can also perform poorly if seals have failed or draughts have developed around frames.

Modern UPVC Windows tackle this in several ways.

The glazing reduces heat transfer through the transparent part of the opening. Multi-chamber frames reduce heat transfer through the surrounding profile. Proper seals reduce uncontrolled air leakage, while warm-edge spacer technology improves performance around the perimeter of the sealed unit.

Installation remains critical.

A highly efficient window fitted badly can still leave cold areas around the opening. Large unsealed gaps, badly positioned insulation and poor cavity-closer details can undermine the performance of an otherwise excellent product.

Skill Builder’s guide to cavity wall ventilation explains why sealing and controlling air movement around openings matters to the thermal performance of the wider wall construction.

This is why UPVC Windows should be treated as part of the building envelope rather than as isolated products fitted into holes in the wall.

Part L And Part F Compliance Requirements

Replacement windows in England are subject to Building Regulations requirements, including provisions covering conservation of fuel and power.

Whole-window U-values are particularly important.

A U-value measures how easily heat passes through a building element. Lower numbers indicate better thermal performance.

Whole-window calculations consider more than the centre pane of glass. The frame, glazing, spacer and edge effects all contribute to the finished result.

That distinction is important when comparing UPVC Windows.

A glazing manufacturer may quote an impressive centre-pane figure, but that does not automatically represent the performance of the complete window.

Frame performance and thermal bridging around the glass can alter the overall result significantly.

Part F deals with ventilation.

Modern homes and refurbished properties are becoming increasingly airtight, which makes controlled ventilation more important. Depending on the circumstances of the installation, background ventilation such as trickle vents may need to be provided.

Sealing a property without considering how moisture leaves the building can create unintended consequences.

Cooking, showering, washing clothes and even breathing release moisture into indoor air. Without sufficient ventilation, that moisture can collect on colder surfaces.

Skill Builder’s guide on how to get rid of condensation explains why ventilation, insulation and moisture production need to be considered together rather than treating condensation as simply a window problem.

Understanding Building Regulations for homeowners is therefore important before replacing UPVC Windows, particularly when alterations affect both thermal performance and ventilation.

UPVC Windows And Condensation

One common misconception is that fitting new UPVC Windows automatically eliminates condensation.

It can help, but the situation is more complicated.

Condensation forms when moisture-containing air meets a surface cold enough for water vapour to condense. Older single-glazed windows frequently become the coldest surface in a room, which is why water appears on the glass.

Replacing them with thermally efficient UPVC Windows raises the internal surface temperature of the glazing and can dramatically reduce condensation on the glass itself.

However, the moisture inside the property has not magically disappeared.

If ventilation is inadequate, that moisture may simply find another cold surface.

Cold corners, poorly insulated reveals, external walls and thermal bridges can then become the new condensation points.

This is why window replacement and ventilation need to be considered together.

Skill Builder has previously examined damp problems that can actually be caused by condensation, highlighting the importance of diagnosing moisture correctly before spending money on unnecessary remedial treatments.

Well-specified UPVC Windows, adequate background ventilation and sensible moisture management work together. Treating one without considering the others can simply move the problem elsewhere.

Glazing Configurations For UPVC Windows

Modern double glazing normally consists of two panes separated by a sealed cavity.

The performance of that unit can be improved through several technologies.

Low-emissivity, or Low-E, coatings reduce radiant heat loss by reflecting heat back towards the warmer side of the glazing.

Argon gas is commonly used inside the cavity because it transfers heat less readily than ordinary air.

Warm-edge spacer bars reduce heat transfer around the perimeter of the sealed unit compared with older highly conductive spacer systems.

Combined correctly, these technologies allow modern UPVC Windows to achieve considerably better thermal performance than older double-glazed systems.

Triple glazing adds another pane and another insulated cavity.

That can produce very low U-values, but triple glazing should not automatically be treated as the correct choice for every property.

The additional pane adds weight and cost. Hinges, locking mechanisms and frame specifications need to be capable of carrying that additional load.

Orientation also matters.

Windows are not only responsible for heat loss. They can provide useful solar gains when sunlight enters the property.

Specification therefore involves balancing insulation, solar gain, overheating, daylight, ventilation and cost rather than simply selecting the lowest possible U-value.

Measuring UPVC Windows Correctly

Accurate surveying is one of the most important parts of replacing UPVC Windows.

Wall openings are rarely perfectly square.

Measure the width at the top, middle and bottom. Measure the height on the left, centre and right.

Do not assume one measurement represents the entire opening.

An opening can narrow towards the top, lean sideways or contain old render and plaster that disguises the true structural dimensions.

The survey should also establish exactly what is being measured.

Are measurements being taken between brickwork openings, existing frames or internal plaster reveals?

Confusing these reference points can result in an expensive custom-manufactured window that does not fit.

Fitting tolerances must also be included.

UPVC Windows require sufficient clearance around the frame for positioning, adjustment, packing, insulation and sealing. Ordering a frame to exactly the same dimensions as the smallest opening measurement leaves virtually no room for installation.

At the other extreme, excessive gaps create their own problems.

Large perimeter spaces become harder to insulate and seal properly and can leave poor-looking external joints.

Accurate surveying is therefore about finding the correct manufacturing size rather than simply finding the size of the hole.

Check The Lintel Before Replacing UPVC Windows

The condition of the structure above the opening should be checked during the survey.

Replacing UPVC Windows will not repair a defective lintel.

Cracking above an opening, movement in the masonry, sagging brickwork or corrosion can indicate a structural problem that needs investigating before the existing frame is removed.

The lintel carries the load above the opening and transfers it into the masonry at either side.

Skill Builder has covered this problem directly in How To Make This Lintel Replacement Look Good, where an ageing steel lintel above a window had begun rusting and cracking the surrounding brickwork.

There is also a detailed Skill Builder guide to Catnic lintels, including cavity-wall lintels, thermally broken lintels and options for different opening sizes and wall constructions.

This becomes particularly important with wider UPVC Windows, bay windows and large glazed openings.

A window frame should never be expected to compensate for inadequate structural support above it.

Cavity Closers, Damp Protection And Window Openings

The junction between the window and wall deserves just as much attention as the window itself.

Cavity walls are designed to manage moisture entering the outer leaf. Openings interrupt that construction, which means cavity trays, closers, lintels and seals need to be correctly detailed.

Poor detailing around UPVC Windows can allow moisture to track across the cavity or create cold bridges around the reveals.

Cavity trays positioned above openings help direct moisture towards the outside of the wall rather than allowing it to reach the internal leaf.

Skill Builder has previously examined cavity tray systems and detailing, including how water is directed outwards above lintels.

Older properties can contain some questionable window-opening details.

Mortar may have been used to close cavities. Insulation may stop short of the frame. Old sealant can hide significant gaps.

Replacing UPVC Windows therefore provides an opportunity to inspect and improve details that may have been inaccessible for decades.

Common UPVC Window Survey Errors

Several mistakes repeatedly cause problems.

The first is measuring too quickly.

The second is failing to identify structural defects before ordering.

The third is assuming every opening in the same property is identical.

They rarely are.

Even windows that appear to be the same size can differ by several millimetres because of historic brickwork tolerances, previous alterations or movement.

Sill details also need checking.

Water should drain away from UPVC Windows, not back towards them. External sealant should prevent driven rain entering the perimeter joint while allowing the drainage system built into the frame to operate correctly.

Drainage slots should never be accidentally covered by sealant, render or finishing trims.

Custom shapes require even greater care.

Arched, angled and unusually proportioned UPVC Windows can have longer manufacturing lead times and offer much less tolerance for surveying errors.

Measure twice is not enough.

Measure, record, check and then verify the order before manufacture begins.

Installation Process For UPVC Windows

Installation starts with controlled removal of the existing frame.

The objective is to remove the old window without unnecessarily damaging surrounding brickwork, plaster, render or cavity details.

Once the opening is exposed, old fixings, loose mortar and failed sealant should be removed.

This is also the point where hidden defects often appear.

Previous installers may have packed large voids with expanding foam. Damp timber may be concealed behind trims. Cracks that were hidden by the old frame can suddenly become visible.

Do not simply cover these problems with the new UPVC Windows.

Investigate them first.

The replacement frame should then be positioned according to the manufacturer’s installation requirements.

Packers support the frame at appropriate load-bearing points and prevent the profile from distorting when fixings are tightened.

Frame screws or brackets are installed at specified positions.

Over-tightening fixings can pull the frame out of square.

Once that happens, opening lights may bind, locking points may fail to engage correctly and seals may not compress evenly.

The frame needs to remain square, level and plumb throughout installation.

Sealing Around UPVC Windows

The perimeter joint is one of the most overlooked parts of window installation.

External sealing protects against weather penetration.

Internal sealing contributes to airtightness.

Insulation between the frame and structural opening reduces heat loss around the perimeter.

All three matter.

Simply filling a large gap with foam and covering it with decorative trim does not automatically create a high-quality installation.

Poor perimeter sealing can produce draughts and cold spots around otherwise efficient UPVC Windows.

Cold reveals can then increase the likelihood of condensation and mould.

External seals must also cope with movement.

Frames expand and contract as temperatures change. Sealants need sufficient flexibility and adhesion to remain effective rather than cracking away from the frame after a few seasons.

Quality Checks After Installation

Every unit should be checked before the job is signed off.

Open every sash.

Close every sash.

Operate every handle and locking point.

Check that seals compress consistently and that the frame has not been distorted during fixing.

Drainage holes should remain unobstructed.

Trickle vents should operate correctly where installed.

External perimeter seals should be continuous and neatly finished.

Internal reveals should be inspected for gaps or damage.

For larger projects involving multiple UPVC Windows, these checks should be carried out on every opening rather than assuming that because the first few units work correctly, the rest will too.

Problems caught while the installer is still on site are normally straightforward to correct.

Problems discovered weeks later become callbacks.

Certification And Documentation

Where applicable, FENSA or Certass registered installers can self-certify replacement window work and provide documentation showing that the installation meets the relevant requirements.

Keep that paperwork.

Homeowners may need evidence of compliant replacement UPVC Windows when selling a property, arranging certain mortgage matters or demonstrating previous building work.

Documentation should also include manufacturer information and relevant guarantees covering frames, sealed glazing units and hardware.

The UK Government has also consulted on reforms to the energy performance of buildings regime, showing how energy-performance information continues to play a significant role in the way buildings are assessed.

Good paperwork is therefore part of a professional installation rather than something to be dealt with as an afterthought.

Are UPVC Windows Always Worth Replacing?

Not necessarily.

An ageing window should not automatically be replaced simply because newer UPVC Windows offer better headline performance.

Condition matters.

If existing double glazing remains reasonably airtight, operates correctly and has intact sealed units, the financial return from immediate replacement may be relatively modest.

Other improvements can sometimes deliver greater reductions in heat loss for the money.

Loft insulation, draught-proofing, wall insulation and improvements to heating controls may deserve attention first.

That is why Skill Builder’s examination of whether double glazing is the best home investment is useful before committing thousands of pounds purely on the assumption that new windows will dramatically reduce energy bills.

Comfort also matters, however.

New UPVC Windows can reduce draughts, improve acoustic performance, increase security and make rooms more comfortable even where the simple financial payback calculation is less impressive.

Home improvement decisions are rarely based on one number alone.

Getting UPVC Windows Right First Time

Good UPVC Windows are only as effective as the specification and installation surrounding them.

The frame needs to perform thermally.

The glazing specification needs to suit the property.

Ventilation requirements must be considered.

Lintels and surrounding masonry need to be sound.

Openings must be measured accurately.

Frames need suitable fitting tolerances.

Perimeter joints must be insulated and sealed properly.

Hardware must be adjusted and checked.

Certification and warranty documents need to reach the homeowner.

None of those steps is particularly complicated on its own.

Problems arise when one is skipped.

Consistent installation quality comes from following the same disciplined sequence on every unit: survey accurately, identify structural issues, specify the correct UPVC Windows, order with appropriate tolerances, install according to manufacturer requirements, seal the building envelope properly and check every unit before signing off.

The best UPVC Windows installation is not simply the one that looks good on completion day. It is the one that remains weather-tight, thermally efficient and easy to operate years later.

For trades, that distinction matters. Certification gets the installation signed off. Consistently getting the details right builds the reputation that brings the next job through the door.

Destination Nuclear – Rewarding Careers Britain Is Building for the Future

0

Destination Nuclear and Why the UK Needs Experienced Trades

When people talk about the UK’s future, energy, infrastructure and national security are always part of the conversation. Nuclear sits right in the middle of that discussion. What is talked about far less, however, is the people needed to make these projects happen.

The UK nuclear sector is expected to need up to 40,000 new workers by 2030. That is not simply a distant ambition. It reflects a growing pipeline of nuclear projects, infrastructure investment and long-term plans that will require a huge range of skilled people.

If the UK is serious about delivering long-term energy and infrastructure projects, those roles need to be filled. But this is not simply a case of bringing new people into the industry. The sector also needs experienced workers who already understand what it means to work safely, accurately and professionally on complex projects.

That is where Destination Nuclear comes in.

Destination Nuclear is designed to make the sector easier to understand and more accessible to people who may never previously have considered working in nuclear. That includes experienced tradespeople, engineers, supervisors, technical specialists and people who have spent years working in construction, manufacturing, utilities or other highly controlled industries.

For many of those workers, moving into nuclear through Destination Nuclear does not mean starting again.

It means taking existing knowledge into a sector that increasingly needs it.

A Skills and Experience Challenge

The nuclear industry is growing rapidly, but traditional training and development routes cannot solve the skills challenge on their own.

Nuclear projects are highly regulated and often involve complex systems, strict safety procedures and demanding quality standards. Workers need to understand not only how to complete a task, but why processes exist and what can happen when they are not followed correctly.

That kind of understanding often comes from experience.

Someone who has spent years working on construction sites, industrial projects or engineering installations already understands many of the fundamentals that nuclear employers are looking for. They know how to work as part of a team, manage changing conditions, communicate with other trades and take responsibility for the quality of their work.

They are also used to working in environments where mistakes have consequences.

That matters.

A tradesperson who has spent years dealing with live services, structural work, heavy plant, pressure systems or complex installations already understands that procedures are not simply paperwork. They exist because something can go badly wrong when standards are ignored.

Destination Nuclear has been created to help connect that existing experience with opportunities across the nuclear sector.

Rather than assuming that everyone needs to start again, Destination Nuclear recognises that many of the skills required already exist within the UK’s workforce.

Skills That Transfer Into Destination Nuclear Opportunities

For tradespeople and technical professionals, moving into nuclear may be more achievable than they initially think.

Electricians, for example, already have experience with electrical systems, fault-finding, testing and working to technical specifications. These skills can have clear applications in nuclear environments where electrical systems and equipment need to be installed, maintained and inspected to exacting standards.

Plumbing and heating engineers also bring valuable experience. Pipework, mechanical systems, pressure, installation procedures and working safely around other services are all familiar areas for experienced engineers.

Mechanical engineers, fabricators, welders and maintenance specialists can also bring highly relevant technical knowledge.

These are exactly the kinds of transferable skills that Destination Nuclear is trying to highlight.

Then there are the people who have moved beyond hands-on work into supervision and management.

A site supervisor who has spent years coordinating subcontractors, managing programmes and ensuring work is completed correctly has developed skills that can transfer into project delivery, quality, inspection and assurance roles.

Even roles that appear less obviously connected can involve useful crossover.

A construction planner may already understand sequencing, dependencies and programme risk.

A quantity surveyor may have experience controlling costs on large technical projects.

A document controller may already understand the importance of accurate records and version control.

A health and safety professional may be familiar with permit systems, risk assessment and site auditing.

A quality inspector may have years of experience checking workmanship against specifications and identifying defects before they become larger problems.

These are not abstract career ideas. There are genuine opportunities across the sector, and Destination Nuclear provides a way for experienced workers to explore where their existing skills could potentially fit.

The important point is that moving into nuclear through Destination Nuclear does not necessarily mean throwing away everything you have learned.

It can mean applying that experience somewhere new.

Why Mid-Career Workers Matter to Destination Nuclear

For many people in their 40s and 50s, the question is not whether they want to keep working. It is how they want to work for the next stage of their career.

Years of physical work can take their toll. Constantly moving between projects, dealing with unpredictable workloads and working to tight deadlines can become increasingly difficult.

At the same time, experience becomes more valuable.

Someone who has spent 20 years in construction or engineering has encountered problems that cannot easily be taught in a classroom. They have seen what happens when something goes wrong. They know how to spot potential issues and understand the importance of getting things right before moving forward.

That judgement can be extremely valuable in a safety-critical industry.

Experienced workers often develop an instinct for when something does not look right.

They know when a drawing does not match what is actually on site.

They know when a sequence of work is likely to create problems for another trade.

They know when a temporary fix is about to become a permanent problem.

They know when a programme has become unrealistic.

That kind of judgement is hard to manufacture quickly.

Nuclear projects require people who understand processes, take standards seriously and can make sensible decisions when dealing with complex work.

This is one reason Destination Nuclear is particularly relevant to experienced tradespeople who might otherwise assume that the nuclear sector is only looking for young graduates or people starting their careers.

There is a need for experience as well.

Destination Nuclear Is Not About One Type of Job

For people outside the industry, nuclear can sound like a very narrow career field.

It is easy to imagine scientists, reactor engineers and highly specialised technical roles and assume that the sector has little relevance to conventional trades.

In reality, the industry needs a far wider workforce.

Large nuclear projects involve civil engineering, building services, fabrication, electrical installation, mechanical systems, logistics, security, quality control, commissioning, maintenance and project management.

They need people who can build things.

They need people who can maintain things.

They need people who can inspect work, verify quality and manage teams.

They also need people who understand how projects actually operate on the ground.

That is where Destination Nuclear could become particularly useful.

Instead of seeing nuclear as an entirely separate profession, Destination Nuclear gives experienced workers a way to look at it as another environment in which their existing abilities might be useful.

A Different Kind of Career Through Destination Nuclear

Another attraction of the nuclear sector is the potential for longer-term employment.

Construction can involve a succession of individual projects. A job finishes, the workforce moves on and the next contract begins. While that can provide variety, it can also create uncertainty.

Nuclear is different.

Major projects can run for many years, while the wider sector requires people for construction, maintenance, engineering, operations, decommissioning and specialist technical work.

That creates opportunities across different stages of a career.

For an experienced tradesperson, Destination Nuclear could potentially provide a route away from some of the physical demands of traditional site work while still making use of the knowledge and expertise they have built up over the years.

Someone who has spent years carrying tools may eventually move into inspection.

A supervisor may progress into project management.

An experienced installer may move into commissioning or quality assurance.

A fabricator might progress into welding inspection or production supervision.

A maintenance technician could move into planning or reliability work.

That progression can be valuable for workers who want to remain in technical industries without necessarily performing the same physically demanding role indefinitely.

It is not about leaving the trades behind.

It is about finding another place where those skills can be valuable, and Destination Nuclear helps make that route more visible.

Destination Nuclear and the Importance of Quality Culture

One major difference between ordinary construction and nuclear work is the level of documentation and assurance surrounding many activities.

In nuclear, proving that something has been done correctly can be almost as important as doing it correctly.

That can mean detailed inspection records, sign-offs, traceability and formal quality procedures.

For some tradespeople, that may initially feel bureaucratic.

But the underlying principle should be familiar.

Good trades already work this way to some extent.

Electricians test installations.

Gas engineers record safety checks.

Welders work to specified procedures.

Roofers follow manufacturer requirements.

Site managers maintain inspection records.

Building control requires evidence that certain work complies with regulations.

Nuclear simply takes that culture much further because the consequences of failure can be much greater.

Experienced workers who already value workmanship, traceability and doing a job properly may find that mindset surprisingly familiar.

That makes them a natural fit for many roles highlighted through Destination Nuclear.

Destination Nuclear as a Single Gateway into the Sector

One of the challenges of moving into a new industry has historically been knowing where to begin.

The nuclear sector involves numerous organisations, employers, contractors and locations across the UK. For someone looking from the outside, understanding which companies are hiring and which roles match their experience can be difficult.

Destination Nuclear aims to simplify that process.

It is the UK’s first sector-wide, national recruitment programme for nuclear, bringing together opportunities from across the industry in one place.

Instead of searching through individual employers and trying to work out which roles might be suitable, workers can use the Destination Nuclear careers portal as a starting point.

That makes the process more accessible for experienced tradespeople who may never have considered nuclear before.

You may not have a nuclear background, but Destination Nuclear could help show you that you already have many of the skills an employer needs.

That is an important message because job descriptions can sometimes discourage good candidates.

A worker may look at a nuclear vacancy and immediately assume they are unsuitable because they have never worked on a nuclear site.

In reality, employers may be looking for the technical capability, attitude and experience they already have.

Additional sector-specific training can then bridge the remaining gap.

Training Still Matters

Of course, transferring into nuclear through Destination Nuclear does not mean that no additional training will be required.

The sector has its own rules, procedures and safety requirements, and workers will need to understand the environment they are entering.

Depending on the role, this could involve site induction, security clearance, radiation-awareness training, quality systems, permit procedures or specialist technical qualifications.

However, there is an important difference between learning a new industry and learning an entirely new profession.

An experienced electrician remains an electrician.

An experienced mechanical engineer remains an engineer.

A supervisor still has years of experience managing people, programmes and work.

Additional training can build on that existing foundation.

That is a much more realistic approach to addressing the skills shortage than expecting every nuclear worker to start their career from scratch.

This is one of the central strengths of Destination Nuclear.

It recognises the value of what people already know.

Apprentices Still Matter Too

None of this means younger workers are less important.

Quite the opposite.

If the nuclear sector is going to expand over the coming decades, apprentices and early-career workers will be essential.

But they need experienced people around them.

One of the biggest challenges across construction and engineering is the loss of knowledge when older workers retire without enough time for skills to be passed on.

A healthy workforce needs both.

Young people bring energy, new ideas and the opportunity to develop long careers.

Experienced workers bring judgement, technical knowledge and lessons learned from years of real work.

Destination Nuclear therefore has the potential to support more than recruitment.

It could also help strengthen the transfer of skills between generations.

Destination Nuclear Needs More Than Engineers

One misconception worth challenging is that nuclear recruitment is mainly about degree-qualified engineers.

Engineers are obviously essential.

But they cannot deliver major infrastructure projects alone.

Someone still needs to install containment systems.

Someone needs to fabricate pipework.

Someone needs to run cable.

Someone needs to test electrical systems.

Someone needs to inspect welds.

Someone needs to coordinate lifting operations.

Someone needs to maintain plant.

Someone needs to manage stores and logistics.

Someone needs to supervise subcontractors.

Someone needs to keep the programme moving.

These are exactly the kinds of practical roles that experienced tradespeople understand.

That is why Destination Nuclear matters to more than engineers and graduates.

The skills shortage cannot be solved purely through universities.

The nuclear sector needs the practical workforce as much as it needs designers and engineers.

Destination Nuclear and the Value of Experience in Safety-Critical Work

There is another reason experienced trades matter.

They have usually seen failure.

That may sound negative, but it is incredibly valuable.

A newly qualified worker may understand the correct way to complete a task.

Someone with 20 years of experience may also know ten different ways that task can go wrong.

They have seen incorrect fixings.

They have seen poorly coordinated services.

They have seen components arrive with the wrong dimensions.

They have seen rushed jobs fail inspection.

They have seen shortcuts create expensive remedial work.

This practical memory influences decision-making.

In safety-critical industries, knowing what can go wrong is often just as important as knowing what should happen.

That is exactly the kind of practical experience Destination Nuclear is trying to attract into the sector.

Destination Nuclear and the UK’s Infrastructure Pipeline

The demand for workers is also linked to the sheer scale of the UK’s infrastructure ambitions.

Nuclear power stations are enormous projects involving thousands of workers over long periods.

But new construction is only part of the picture.

Existing facilities need maintenance.

Some sites require upgrading.

Others are moving through decommissioning.

Research, fuel-cycle work, waste management and specialist engineering also require skilled people.

This means the nuclear jobs market is not tied entirely to one new power station.

It is a wider national sector with multiple forms of work.

That breadth matters for anyone considering a career change through Destination Nuclear.

A worker may enter through a construction project and later move into maintenance, operations, inspection or decommissioning.

Destination Nuclear and Decommissioning

Decommissioning is often overlooked when nuclear careers are discussed.

Power stations and nuclear facilities do not simply disappear when they stop operating.

They need to be dismantled safely.

Materials need to be classified, handled and processed correctly.

Buildings need to be maintained during the process.

Plant needs isolating and removing.

That can take decades.

Decommissioning therefore creates long-term demand for technical skills.

For workers who already understand demolition, mechanical systems, electrical isolation, lifting, fabrication or maintenance, some of those skills may transfer well.

Again, Destination Nuclear can help people see that the sector is broader than simply constructing reactors.

Long-Term Projects and Destination Nuclear

A long project creates something that short construction jobs sometimes struggle to provide: time.

Workers have time to learn the site.

Teams have time to develop.

Employers can invest more seriously in training.

People can progress through different roles without constantly changing company or location.

That may appeal particularly to mid-career workers who want greater stability.

It may also allow experienced tradespeople to mentor younger workers rather than spending every few months adapting to another short programme.

There is no guarantee that every role found through Destination Nuclear offers permanent security, of course.

But the overall sector involves infrastructure with extremely long operational lives.

That creates a very different employment landscape from many short-term construction projects.

Regional Destination Nuclear Opportunities

Another important point is that nuclear investment is often tied to particular regions.

Large projects can create local employment and supply-chain opportunities for years.

That can have a significant effect on surrounding communities.

It creates demand not only for direct nuclear workers but also for accommodation, logistics, transport, manufacturing and supporting services.

For tradespeople living within reach of major sites, Destination Nuclear may therefore open up opportunities without necessarily requiring an entirely different profession or even a completely different region.

It is worth looking through Destination Nuclear opportunities rather than assuming all nuclear work is concentrated in one part of the country.

Destination Nuclear and the Bigger Picture

The UK’s nuclear ambitions are about more than individual jobs.

Nuclear energy and infrastructure form part of the country’s wider plans for future energy security, while major projects also create opportunities for local economies, apprenticeships, technical training and long-term employment.

Energy security has become a much bigger political and economic issue in recent years.

Countries want greater control over where their electricity comes from.

They want reliable generating capacity.

They also need to reduce emissions while demand for electricity is likely to increase through electric vehicles, heat pumps, data centres and wider electrification.

Nuclear is one part of that wider mix.

But none of that infrastructure can be delivered through policy announcements alone.

Buildings, facilities and infrastructure do not construct themselves.

Complex projects need electricians, engineers, welders, fabricators, pipefitters, supervisors, inspectors, project managers and countless other specialists.

Many of those skills already exist within the UK workforce.

The challenge is connecting those people with the opportunities.

That is exactly why Destination Nuclear is worth knowing about.

Why Tradespeople Should Not Undervalue Their Skills

One of the biggest barriers may actually be confidence.

People who have spent their entire careers in traditional trades often underestimate how valuable their experience is outside the sector they know.

They may look at nuclear, aerospace, defence or advanced manufacturing and assume those industries require completely different people.

But many of the fundamental skills are the same.

Reading drawings.

Working to tolerances.

Following specifications.

Understanding materials.

Diagnosing faults.

Working safely.

Communicating with teams.

Planning work.

Checking quality.

Solving problems.

Taking responsibility.

Those skills are valuable because they are difficult to teach quickly.

Someone who has spent decades developing them should not assume they have to remain within one narrow part of construction forever.

Destination Nuclear gives those workers a practical way to see where their experience could take them next.

What Destination Nuclear Employers Are Really Looking For

Technical skills matter, but attitude matters too.

Safety-critical industries need people who follow procedures even when nobody is watching.

They need workers who are willing to raise concerns.

They need people who understand that “nearly right” may not be good enough.

They need employees who document work accurately and communicate clearly when problems arise.

Experienced tradespeople who already work professionally often possess exactly those qualities.

That is another reason moving into nuclear through Destination Nuclear may be more realistic than it first appears.

The sector-specific knowledge can be taught.

Professional judgement takes much longer to develop.

Looking Ahead with Destination Nuclear

The conversation around skills shortages often focuses on what the UK does not have enough of.

But perhaps the bigger question is what skills we already have — and where they could be put to better use.

For experienced tradespeople and technical professionals, Destination Nuclear could offer a route into a sector with major long-term projects and a continuing demand for skilled workers.

You do not necessarily need to start again.

You may simply need to look at your experience differently.

That could mean moving from installation to inspection.

From site supervision to project delivery.

From fabrication to quality assurance.

From maintenance to commissioning.

Or it could simply mean doing the same trade in a more regulated environment with different opportunities for progression.

Destination Nuclear provides a way to explore current opportunities, understand where your existing skills could fit and discover what additional training may be required.

For someone who has spent years building practical experience, that is potentially significant.

The UK needs new workers entering the trades.

It needs apprentices.

It needs graduates.

But it also needs to make better use of the people who already know how to build, repair, install, inspect and manage complex work.

Those people are already on sites, in workshops and in engineering businesses across the country.

The question is whether they realise how transferable their skills could be.

Destination Nuclear is one way of helping make that connection.

If you are an experienced tradesperson, engineer, supervisor or technical professional thinking about what comes next, Destination Nuclear could be worth taking a closer look at.

Explore Destination Nuclear

Find out more about current opportunities and see how your existing experience could transfer into the nuclear sector through the Destination Nuclear Careers Portal:

Destination Nuclear Careers Portal

For further information about the UK’s nuclear industry, you can also explore the official UK Government nuclear energy information.

The UK’s nuclear future will need new talent, but it will also need something that cannot simply be taught overnight: experience.

That is why Destination Nuclear matters.

The sector needs skills, judgement and practical knowledge, and much of that experience already exists across the UK workforce.

Destination Nuclear is helping show experienced workers where that knowledge could take them next.

Could Superwood Solve Construction’s Biggest Problem?

0

Superwood. The strength of steel. The soul of wood.
https://go.skill-builder.uk/superwood

@InventWood_official
_______________________

Superwood: Could This New Material Change the Future of Construction?

Superwood: Could This New Material Change Construction?

Superwood, from InventWood, is being described as one of the most exciting new materials in construction — stronger than natural wood, significantly lighter than steel and potentially capable of reducing reliance on some of construction’s most carbon-intensive materials.

Those are big claims.

But how much is proven, and how much still needs to be demonstrated in real buildings?

Construction has seen plenty of revolutionary materials arrive with impressive laboratory results. Some have genuinely changed the industry. Others have struggled once cost, regulation, manufacturing, weather exposure and real-world installation are taken into account.

Superwood deserves attention because the science behind it is genuinely interesting.

The technology grew from research led by Professor Liangbing Hu and colleagues at the University of Maryland. Their work demonstrated that the internal structure of natural wood could be altered and densified to produce a material with dramatically improved mechanical properties.

The original research published in Nature reported densified wood with approximately 12 times the strength and ten times the toughness of the natural wood used to produce it.

The University of Maryland also published an explanation of the research, including the potential for the material to compete with materials such as steel and titanium on a strength-to-weight basis.

That research has since been developed commercially by InventWood.

There is no doubt that the early performance figures are impressive.

But as always in construction, the real test is what happens outside the laboratory.

Can Superwood survive decades of moisture, temperature changes, loading and everyday abuse?

Can contractors cut and fix it?

Can engineers design with it confidently?

Can manufacturers produce millions of identical components?

And perhaps most importantly, can anyone afford to use it?

Those questions will ultimately determine whether Superwood becomes another specialist material or something capable of changing mainstream construction.

What Is Superwood?

Superwood is an engineered wood material developed commercially by InventWood using technology originating from research at the University of Maryland.

It starts with natural timber.

That distinction matters because the material is not created by simply mixing wood fibres with large quantities of plastic or producing another conventional wood composite.

Instead, the internal structure of the timber itself is modified.

Wood has been used as a building material for thousands of years for good reasons. It is relatively lightweight, renewable, widely available and easy to cut, drill and connect.

But traditional timber also has limitations.

Natural wood contains knots, grain variations and microscopic voids. Its properties vary according to species, growing conditions, moisture content and the section of the tree from which it was cut.

Anyone who has worked with structural timber knows that two apparently identical pieces of wood can behave differently.

That variability is one reason timber needs to be structurally graded.

Engineered timber products such as plywood, laminated veneer lumber, glulam and cross-laminated timber have already helped address some of those limitations.

Superwood takes a different approach.

Instead of assembling smaller timber sections into larger engineered components, the technology attempts to improve the wood itself.

How Is Superwood Made?

The science behind Superwood is probably the most interesting part of the story.

Natural wood contains cellulose, hemicellulose and lignin.

Cellulose fibres provide much of wood’s structural strength, while lignin helps bind the structure together.

Wood is also highly porous.

Look at timber under a microscope and it is very different from something like steel. Its cellular structure contains significant amounts of empty space.

The original University of Maryland research involved partially removing lignin and hemicellulose before compressing the timber under heat.

That process caused the cellular walls to collapse.

As the material became denser, cellulose fibres were pushed much closer together, allowing stronger hydrogen bonding to develop between them.

The result was a much denser material with substantially improved mechanical properties.

InventWood has continued developing the manufacturing process since that original research.

The company describes its current technology as a combination of molecular restructuring and precision densification.

More information about the current commercial process can be found on InventWood’s Superwood technology page.

The important point is that Superwood is not simply compressed timber.

The chemistry and structure of the wood are altered before and during densification.

That is what allows the finished product to behave very differently from the timber it started as.

Why Densifying Wood Makes Such A Difference

Ordinary timber is already surprisingly strong for its weight.

The problem is that much of the volume inside natural wood is effectively empty space.

Imagine taking that cellular structure and collapsing much of the space while keeping the cellulose fibres aligned.

The amount of structural material within the same volume increases significantly.

That is broadly what happens during densification.

But simply crushing timber would not necessarily produce a useful construction product.

The clever part is controlling the chemistry and compression so that the internal fibres form stronger bonds rather than simply breaking apart.

That combination is what gives Superwood its unusual strength.

It also demonstrates something important about materials science.

Sometimes creating a stronger material does not require inventing an entirely new substance.

It can mean changing the internal arrangement of a material humans have been using for thousands of years.

Stronger Than Wood, Lighter Than Steel?

This is where the headlines surrounding Superwood become particularly interesting.

The original University of Maryland research reported that the densified material could become approximately 12 times stronger than the natural timber used to produce it and around ten times tougher.

Those are extraordinary improvements.

Researchers also compared its strength-to-weight performance with metals.

Because wood is considerably lighter than steel, dramatically increasing its strength creates the possibility of a material with an extremely competitive strength-to-weight ratio.

InventWood says its commercial Superwood technology can provide substantially greater strength and stiffness than conventional timber while remaining significantly lighter than steel.

But “stronger than steel” needs some context.

It does not mean that engineers can simply replace every steel beam with an identically sized piece of Superwood.

Strength is only one characteristic.

Construction materials have many.

Strength Isn’t The Only Number That Matters

When structural engineers specify materials, they consider far more than maximum strength.

They need to know how a material behaves under:

  • compression
  • tension
  • bending
  • shear
  • repeated loading
  • long-term loading
  • impact
  • moisture
  • temperature changes
  • fire

Stiffness matters too.

A material might technically withstand a particular load without failing but still deflect too much to be useful.

Creep is another consideration.

Structural components can slowly deform when subjected to load for long periods. This is particularly important with timber-based materials.

Then there are connections.

Buildings are not made from isolated laboratory samples.

Beams need to connect to columns.

Floors need to connect to walls.

Panels need to be screwed, bolted, bonded or otherwise fixed together.

The strength of Superwood therefore means relatively little unless engineers can also develop reliable and predictable connection systems.

Could Superwood Replace Steel?

Potentially — in certain applications.

But steel is not going anywhere soon.

Steel remains one of the world’s most important structural materials because it combines high strength with predictable engineering behaviour.

Engineers have more than a century of detailed data showing how structural steel behaves.

Design codes exist.

Connection systems exist.

Fabricators understand it.

Contractors understand it.

Supply chains exist globally.

If a structural engineer specifies a particular steel section, they can calculate its expected performance extremely accurately.

For Superwood to compete directly, the construction industry needs similar confidence.

That means testing.

Lots of it.

Manufacturing consistency needs proving.

Fire performance needs establishing.

Connection design needs developing.

Long-term moisture behaviour needs understanding.

Creep needs measuring.

Building regulations and engineering standards need to catch up.

This is why the journey from an impressive laboratory sample to a mainstream structural material can take years.

Where Could Superwood Be Used First?

Interestingly, the first major opportunities for Superwood may not involve replacing structural steel at all.

InventWood identifies a wide range of potential Superwood applications, including interior and exterior uses.

Potential applications include:

  • exterior cladding
  • decking
  • fencing
  • architectural features
  • interior panels
  • ceilings
  • furniture
  • cabinetry
  • doors
  • stairs
  • railings
  • specialist components

This makes commercial sense.

Trying to immediately replace the steel frame of a high-rise building would involve enormous regulatory and engineering hurdles.

Cladding, decking and interior architectural components provide a much easier route into the market.

They also allow Superwood to build something every new construction material desperately needs:

a track record.

Could Superwood Work With Engineered Timber?

One particularly interesting possibility is combining Superwood with existing engineered timber technology.

Cross-laminated timber, or CLT, has already demonstrated that timber can be used for much larger buildings than traditional timber framing allowed.

Glulam beams can also carry substantial structural loads.

These products work by engineering ordinary timber into larger, more predictable structural elements.

Imagine combining those techniques with timber that has itself been significantly strengthened.

The possibilities become interesting.

High-performance Superwood sections might eventually reinforce critical areas of engineered timber structures.

It might be used where ordinary timber sections would otherwise become excessively large.

It could potentially strengthen connections or highly loaded areas.

This may prove more realistic than simply imagining a future where Superwood replaces every steel beam.

Construction rarely moves from one material to another overnight.

Hybrid systems are often more practical.

Could Superwood Replace Concrete?

Concrete presents an even more difficult challenge.

Concrete is one of the most widely used materials on Earth because it is relatively inexpensive, widely available and exceptionally useful under compression.

Reinforced concrete combines that compressive strength with steel reinforcement capable of handling tensile forces.

That makes it extremely versatile.

Foundations, retaining walls, columns, bridges, slabs and massive infrastructure projects all depend on it.

Superwood is unlikely to simply replace concrete across all of those applications.

Foundations are an obvious example.

Putting a wood-derived material permanently into wet ground presents very different challenges from using it in a dry structural frame.

But Superwood might reduce the amount of concrete required indirectly.

If a building’s superstructure becomes lighter, its foundations potentially carry less dead load.

That could allow engineers to reduce foundation sizes in some circumstances.

Less weight can mean less material below ground.

So Superwood may influence concrete use even where it does not directly replace concrete.

What About Sustainability?

This could become one of the strongest arguments for Superwood.

Construction has a huge environmental footprint.

Cement and steel production are both major sources of global carbon emissions.

The International Energy Agency’s work on cement highlights the challenge of reducing emissions from cement production, while the agency also tracks the substantial decarbonisation challenge facing the iron and steel sector.

Timber offers an interesting alternative because trees absorb carbon dioxide while growing.

But saying something is made from wood does not automatically make it environmentally friendly.

The full lifecycle matters.

Where did the timber come from?

Was the forest responsibly managed?

How far was the wood transported?

How much energy did manufacturing consume?

What chemicals were required?

How long will the finished material last?

Can it be repaired?

Can it be recycled?

What happens at the end of its life?

Those questions need answering before Superwood can be described confidently as a low-carbon replacement for conventional structural materials.

Could Fast-Growing Timber Become More Valuable?

One particularly interesting possibility is the use of lower-density timber species.

Traditionally, high structural performance often requires stronger species or larger timber sections.

But if the Superwood process can dramatically increase the mechanical performance of relatively ordinary timber, fast-growing species could potentially become much more valuable.

That would change the economics of timber construction.

Instead of relying solely on naturally dense hardwoods or increasingly large softwood sections, manufacturers might be able to take relatively inexpensive renewable timber and engineer significantly better performance into it.

That could also reduce pressure on slower-growing species.

However, this advantage depends heavily on whether the manufacturing process remains economically and environmentally sensible at scale.

The Difference Between A Laboratory And A Building Site

This is probably the biggest question surrounding Superwood.

Laboratory testing is controlled.

Construction sites are not.

Materials arrive on lorries.

They get left outside.

It rains.

Someone drops them.

A plumber drills through the wrong place.

An electrician cuts a notch that was never shown on the drawings.

Components are installed slightly out of tolerance.

Fixings get over-tightened.

Edges become damaged.

Buildings then spend decades going through heating cycles, cooling cycles, humidity changes and structural movement.

A successful construction material has to survive all of that.

That is why contractors will eventually ask much more practical questions about Superwood.

Can I cut it with a circular saw?

What blades does it need?

Can I drill it?

Will screws split it?

Can it be nailed?

Can it be repaired?

What happens when an edge gets damaged?

How heavy is a full-sized panel?

Can two people lift it?

Does it absorb water?

Those questions might sound less impressive than tensile-strength graphs.

On site, they matter just as much.

What Happens When Superwood Gets Wet?

Moisture will be a major consideration.

Natural timber expands and contracts as its moisture content changes.

Engineered wood products are designed to manage this behaviour, but moisture remains one of the biggest considerations in timber construction.

InventWood says its material has enhanced resistance to moisture compared with natural wood.

That is encouraging.

But construction will ultimately demand long-term evidence.

How does Superwood behave after years of repeated wetting and drying?

What happens at cut edges?

What happens around fixings?

How does it perform if protective coatings are damaged?

How does it behave in Britain’s wet climate?

A façade material in Arizona faces very different conditions from one installed in Manchester or Glasgow.

Long-term field performance will therefore matter enormously.

What About Fire?

Fire performance is another unavoidable question for any timber-based construction product.

Timber behaves differently from steel during a fire.

Large timber sections can develop a predictable char layer that protects material deeper within the section, which allows structural engineers to design mass-timber buildings with calculated fire resistance.

But densified timber is different from ordinary timber.

Its fire behaviour needs to be tested and understood independently.

How quickly does Superwood char?

How does densification affect combustion?

Does its manufacturing treatment change flame spread?

How does it perform after prolonged exposure?

What happens to connections during a fire?

For widespread structural adoption, those questions will require robust answers supported by recognised testing and certification.

Manufacturing Consistency Could Make Or Break It

Laboratory prototypes can be produced carefully.

Factories need to produce thousands or millions of components with almost identical properties.

That is much harder.

If one batch of Superwood performs differently from another, structural engineers cannot confidently design with it.

Quality control therefore becomes critical.

Timber already varies naturally.

Manufacturing needs to compensate for those variations so the finished engineered material has predictable properties.

This is one of the biggest differences between interesting materials science and commercially viable construction products.

Repeatability matters.

Cost Will Ultimately Decide A Lot

Construction can be surprisingly conservative for a simple reason:

money.

A product may be stronger, lighter and more sustainable than the material it replaces.

But if it costs five times as much, adoption becomes difficult.

Steel and concrete benefit from enormous existing manufacturing infrastructure.

Timber already has mature global supply chains.

Superwood needs to compete within that reality.

Initial production will almost inevitably target applications where customers are willing to pay for higher performance, aesthetics or sustainability.

As manufacturing scales, costs may fall.

That is what happened with many technologies that eventually became mainstream.

But whether Superwood reaches that point remains to be seen.

Could Superwood Reduce Transport Costs?

Weight could provide an advantage beyond structural performance.

Construction materials are constantly transported.

Raw materials travel to factories.

Finished components travel to distribution centres.

Products then travel to building sites.

Heavy materials require more fuel and heavier handling equipment.

If Superwood can provide useful structural performance at substantially lower weight than steel or concrete components, transport could potentially become easier.

Prefabricated components might also become simpler to handle.

Cranes could potentially lift larger assemblies.

Vehicles might transport more components within weight limits.

Again, these benefits depend entirely on how Superwood eventually gets used.

But lightweight construction has consequences throughout the supply chain.

Could Foundations Become Smaller?

Every kilogram added to a building eventually needs supporting.

The structure transfers loads down through floors, beams, columns and walls until they reach the foundations.

Reduce the weight above and foundation loads can potentially fall.

This does not mean swapping steel for Superwood automatically halves foundation sizes.

Ground conditions, wind loads, building geometry and many other factors determine foundation design.

But reducing structural dead load gives engineers more options.

That is particularly interesting for extensions, modular buildings and sites with difficult ground conditions.

Superwood And Prefabrication

Modern construction is increasingly interested in manufacturing more components away from site.

Factory production provides better control over dimensions, moisture, tolerances and quality.

Superwood could potentially suit this approach.

Components could be manufactured precisely, machined using CNC equipment and delivered ready for assembly.

If the material proves strong enough, lighter prefabricated sections might allow larger components to be transported and installed.

That could reduce on-site labour and shorten construction programmes.

It could also make Superwood particularly relevant to modular and off-site construction.

Will Superwood Become Mainstream?

There is clearly potential.

But there is still a long road between exciting technology and everyday building material.

Steel, concrete and conventional timber have enormous established industries behind them.

Engineers understand them.

Architects specify them.

Building regulations recognise them.

Merchants stock them.

Contractors know how to work with them.

Insurance companies understand the risks.

Mortgage lenders understand the buildings constructed from them.

Superwood needs to enter that entire ecosystem.

That will take time.

Manufacturers need to demonstrate consistent performance and competitive pricing.

Engineers need reliable design data.

Building-control bodies need confidence in testing.

Architects need reasons to specify it.

Contractors need practical installation methods.

Clients need to trust it.

And buildings constructed from it need to perform successfully for decades.

A New Material Or A New Way Of Building?

The most exciting possibility may not be Superwood replacing one established material.

It may be what happens when designers gain access to a new set of material properties.

If timber-based structural components become significantly stronger without becoming dramatically heavier, architects and engineers can start thinking differently.

Longer spans might become practical.

Prefabricated assemblies might become larger.

Structural frames might become lighter.

Foundations could potentially become more efficient.

Hybrid timber structures could become more capable.

Renewable materials might enter applications where conventional timber was previously unsuitable.

That is arguably more interesting than asking whether Superwood will simply “replace steel”.

Construction rarely works like that.

Steel did not eliminate timber.

Concrete did not eliminate brick.

Engineered timber has not eliminated either.

New materials usually find the applications where their particular combination of properties makes sense.

Superwood will probably be no different.

The Real Test For Superwood Starts Now

The science behind Superwood is impressive.

The original peer-reviewed research demonstrated that the internal structure of timber can be modified to produce extraordinary improvements in mechanical performance.

That alone makes this technology worth watching.

But construction requires more than impressive laboratory results.

It requires products that can survive transport, storage, rain, fire, fixings, installers, structural loads and decades of service.

It also requires products that clients can afford.

So the biggest questions surrounding Superwood remain practical ones.

Can it be produced consistently at industrial scale?

Can it compete with established materials on cost?

Can contractors work with it efficiently?

Can engineers design connections that take advantage of its strength?

Can it survive long-term moisture exposure?

Can it meet demanding fire requirements?

Can manufacturers provide the certification needed for widespread structural use?

And will its environmental performance remain attractive once the entire manufacturing process is considered?

If the answer to those questions is yes, Superwood could become considerably more than an interesting new timber product.

It could help push engineered wood into areas of construction traditionally dominated by steel and concrete.

For now, though, it should be treated for what it is: a genuinely promising technology with impressive science behind it, but one that still has plenty to prove in mainstream construction.

Because ultimately, construction does not care how impressive something looks in a laboratory.

The real test is what happens when it reaches site.

Would you build with Superwood? Let us know what you think.

_______________________

#Superwood #Construction #BuildingMaterials #Engineering #SustainableBuilding

Spray Foam Disaster | Now It’s Going to Court

0

Spray Foam Insulation: When An Energy Upgrade Goes Wrong

Spray foam insulation is often marketed as a straightforward way to improve a home’s energy efficiency, reduce heat loss and make a roof space warmer. But insulation is only one part of how a building manages heat, air and moisture.

When Spray foam is installed into an unsuitable roof, applied incorrectly or used without properly considering ventilation and moisture movement, the consequences can be serious.

In this case, Spray foam insulation was followed by severe condensation, mould and deterioration within the roof. What started as an attempt to reduce energy bills eventually resulted in the roof being stripped and rebuilt.

The homeowner’s experience is particularly important because it demonstrates something that applies to almost every major home improvement: a product cannot be considered separately from the building it is being installed into.

A material that performs successfully in one construction may create problems in another.

The case is currently going through the courts, so Skill Builder is not naming the company or individuals involved at this stage. The purpose is not to decide legal responsibility, but to look at the practical lessons homeowners and trades can take from what happened.

For anyone considering Spray foam, insulation upgrades or significant roofing work, those lessons are worth understanding before a contract is signed.

👇 SUPPORT SB – BECOME A MEMBER
https://www.youtube.com/channel/UC9GdB6vG6m6cDAwrTAWXgyg/join


Why Spray Foam Became So Popular

The appeal of Spray foam is easy to understand.

Energy prices have increased the pressure on homeowners to improve the efficiency of older properties. At the same time, government policy has placed greater emphasis on reducing domestic energy consumption and improving the performance of existing housing.

Heat escaping through an inadequately insulated roof is an obvious target.

Traditional insulation methods normally involve mineral wool, rigid insulation boards or other materials installed at ceiling or rafter level. Spray foam offers a different approach because the material is applied directly onto a surface, expands and then hardens.

This expansion allows the insulation to fill irregular spaces and form a relatively continuous layer.

On paper, that can sound ideal.

But roofs are not simply barriers designed to keep heat inside.

They are systems that also have to deal with rainwater, water vapour, ventilation, structural movement and changes in temperature.

Any insulation installed within that system needs to work with the existing construction.

That is where Spray foam installations can become complicated.

What Happened In This Spray Foam Case?

The homeowner initially wanted to improve the energy efficiency of the property.

The promise was familiar: reduce heat loss, improve comfort and potentially lower heating costs.

Spray foam was subsequently installed within the roof space.

Instead of solving the problem, however, significant moisture issues developed.

Condensation appeared.

Mould followed.

Eventually, the condition of the roof became serious enough that substantial remedial work was required, including stripping and rebuilding the roof.

That is a very different outcome from the relatively simple energy-efficiency improvement the homeowner believed they were purchasing.

It also demonstrates why insulation work should begin with an assessment of the existing building rather than a sales pitch for a particular product.

Before Spray foam is installed, questions need answering.

How is the roof currently ventilated?

What type of roofing underlay or felt is present?

What condition are the rafters in?

Where is the existing insulation?

How does moisture currently leave the roof?

Are there existing condensation problems?

Is the roof construction appropriate for the proposed insulation system?

Without understanding those details, adding insulation can change the way moisture behaves inside the structure.

Spray Foam And Condensation

Condensation is one of the biggest concerns when altering the thermal performance of an older building.

Warm indoor air contains moisture produced by normal activities such as cooking, showering, drying clothes and even breathing.

As that warm, moisture-laden air travels through a building, it can eventually encounter a sufficiently cold surface.

When the air cools below its dew point, water vapour condenses into liquid water.

Roof spaces are particularly vulnerable because they sit between the warm interior of the home and cold external conditions.

Correct ventilation and insulation detailing help manage that moisture.

Problems can occur when Spray foam changes the way air and water vapour move through an existing roof.

A roof that previously relied on ventilation beneath the roofing material may behave differently once foam has been applied.

If moisture enters a roof construction but cannot escape effectively, the conditions for condensation can develop.

The homeowner may initially see nothing.

That is part of the problem.

Moisture can accumulate behind insulation or against roof timbers long before visible staining appears inside the property.

Why Roof Ventilation Matters

Roof ventilation is not there by accident.

Depending on the age and construction of a property, airflow through the roof space can help remove moisture before it condenses on cold surfaces.

Traditional cold-roof arrangements generally keep insulation at ceiling level while allowing the roof void above to remain ventilated.

If that arrangement is changed, the moisture strategy needs to change with it.

Simply applying Spray foam between or against rafters does not automatically create a correctly designed warm roof.

The entire build-up needs to be considered.

That includes insulation thickness, vapour control, underlay, ventilation, thermal bridging and the position of the dew point.

Skill Builder has previously looked at the wider issue of moisture and airflow in The Truth About Cavity Wall Ventilation, which explains why uncontrolled moisture and poorly understood ventilation can create significant building problems.

The same fundamental principle applies to roofs.

Buildings need a controlled strategy for heat, air and moisture.

Blocking one route without understanding why it existed can create another problem elsewhere.

Spray Foam And Older Roofs

Older UK housing presents a particular challenge.

Many roofs were built decades before modern insulation standards existed.

Traditional roofing felt may have relatively low vapour permeability. Some older roofs may have no modern breathable membrane at all.

Timbers may already contain elevated moisture levels.

Roof coverings may be approaching the end of their service life.

There may also be historic leaks, poor ventilation or previous repairs that complicate the structure further.

Applying Spray foam to such a roof without properly investigating its condition risks concealing problems rather than solving them.

This is why a proper survey matters.

A survey should not simply establish whether there is enough physical space to apply foam.

It should establish whether Spray foam is appropriate for that particular roof.

The Problem With The Word ‘Breathable’

“Breathable” is one of the most confusing words in construction.

Homeowners may understandably interpret breathable as meaning moisture can simply pass through a material and disappear.

Building physics is not that simple.

Materials have different levels of vapour permeability. Roof systems contain multiple materials, and each layer influences how water vapour moves through the construction.

A Spray foam product being described as breathable does not automatically mean the entire roof assembly will manage moisture correctly.

The roofing felt may behave differently.

The timber behaves differently.

The insulation itself behaves differently.

Internal finishes and vapour-control layers also influence moisture movement.

What matters is how the complete assembly performs.

A single marketing description cannot replace a proper understanding of the roof construction.

Closed-Cell And Open-Cell Spray Foam

Not all Spray foam products are identical.

Two broad categories commonly discussed are open-cell and closed-cell foam.

Open-cell foam has a softer, less dense structure. It can allow more vapour movement than closed-cell products and is often promoted for applications where some vapour permeability is desirable.

Closed-cell foam is denser and generally provides greater resistance to moisture and air movement.

Neither description tells you whether the material is suitable for a particular roof.

That depends on the construction.

The distinction is important because homeowners can sometimes hear statements such as “it’s open-cell, so the roof can breathe” and assume that means condensation is impossible.

It does not.

The performance of Spray foam needs to be assessed as part of the complete roof system.

What Is Behind The Spray Foam?

One practical problem with Spray foam is visibility.

Once foam has been applied directly against roofing materials and structural timbers, inspecting what sits behind it can become more difficult.

A small roof leak may not immediately become visible.

The underside of a roof covering can be obscured.

Sections of timber may become difficult to inspect properly.

That matters during routine maintenance, surveys and property transactions.

A surveyor examining a conventional roof can often inspect rafters, battens, felt and other components from inside the loft.

Where Spray foam covers these areas, the inspection can become considerably more difficult.

It does not automatically mean there is a defect.

It does mean the surveyor has less visual information available.

Spray Foam And Timber Moisture

Roof timbers need to remain within acceptable moisture conditions.

Persistent dampness creates an environment where fungal decay can develop.

The risk is not simply that Spray foam itself damages timber.

The more important question is whether the insulation system allows timber to dry if moisture reaches it.

Moisture can enter a roof from several directions.

It can come from condensation inside the property.

It can enter through a damaged tile.

It can penetrate around flashings.

Gutters, valleys, chimneys and roof penetrations can all develop leaks.

Under normal conditions, timber may be able to dry once the source of moisture is removed.

If Spray foam restricts drying or makes moisture harder to detect, a relatively minor leak can potentially become a much more significant issue.

Why Independent Advice Matters

One of the biggest lessons from this case has nothing specifically to do with Spray foam.

It is about how major home improvements are purchased.

The person selling a product should not necessarily be the only person assessing whether that product is appropriate.

If someone earns money when Spray foam is installed, there is an obvious commercial incentive for the recommendation to favour installation.

That does not mean every installer is giving bad advice.

It means homeowners should recognise the difference between sales advice and independent technical advice.

For significant work, particularly where the roof structure is involved, getting an independent opinion can be extremely valuable.

A competent roofer, building surveyor or other suitably qualified professional may identify issues that a product-focused survey does not.

Never Be Pressured Into Signing Immediately

Time-limited discounts are common in home-improvement sales.

“Sign today.”

“The discount ends tonight.”

“We’ve already got another job nearby.”

“The survey is free if you agree now.”

These techniques create urgency.

A roof should last for decades.

There is rarely a good technical reason why a homeowner needs to decide on a major insulation system within a few hours.

If a Spray foam quotation suddenly becomes dramatically more expensive because you want two days to think about it, that alone should encourage caution.

A legitimate technical specification should survive comparison.

Take the quotation away.

Read it.

Check the product.

Research the installer.

Get another opinion.

Understand exactly what happens if something goes wrong.

Then decide.

Get More Than One Opinion

For substantial insulation and roofing work, obtain several quotations.

But do not simply ask three Spray foam companies for prices.

That gives you three prices for essentially the same proposed solution.

Instead, ask whether Spray foam is actually the best solution.

A roofer may recommend improvements to ventilation.

An insulation specialist may suggest mineral wool.

A building surveyor may identify an existing moisture problem that needs addressing before insulation is considered.

Another professional may conclude that the existing roof needs repair first.

Different perspectives help separate the problem from the product being sold to solve it.

Check What Is Actually Being Installed

Specifications matter.

Homeowners should know exactly which Spray foam product is being installed and where.

Ask for the product name.

Ask for technical data.

Ask whether it is open-cell or closed-cell.

Ask what thickness will be installed.

Ask what preparation is required.

Ask how roof ventilation will be affected.

Ask what happens around rafters and other timber components.

Ask whether existing roofing felt is compatible.

Ask what warranty is being offered and exactly what that warranty covers.

Most importantly, compare those answers with the written contract.

If the installation taking place does not match what was promised, stop the work and ask questions.

Spray Foam, Mortgages And Property Sales

Another consideration is what happens when the property is eventually sold or remortgaged.

Spray foam in a roof space can attract additional scrutiny from surveyors and lenders because the roof structure may be harder to inspect.

This does not mean every property containing Spray foam is unmortgageable.

But homeowners should understand the potential implications before installation rather than discovering them when a buyer’s surveyor enters the loft years later.

Keep every piece of documentation.

That includes quotations, surveys, technical specifications, invoices, installation photographs, warranties and certificates.

If questions are raised in the future, documentation can help demonstrate what was installed and how the work was specified.

Removal Can Become A Major Job

Removing Spray foam is not necessarily as straightforward as installing it.

Where foam has bonded directly to roof timbers, felt or other components, separating the materials can be labour intensive.

In serious cases, remedial work may involve much more than scraping insulation away.

Roof coverings may need to be removed.

Battens and membranes may require replacement.

Damaged timber may need repairing.

Insulation and ventilation details then have to be reconstructed correctly.

That is how an energy-efficiency measure costing thousands can potentially develop into a much larger roofing project.

In the case discussed here, the problems eventually led to a full roof strip and rebuild.

Insulation Is A System, Not A Product

The central lesson is straightforward.

You cannot improve a building properly by looking at one component in isolation.

Adding Spray foam changes the thermal behaviour of a roof.

Changing the thermal behaviour can change where condensation occurs.

Changing airtightness can alter ventilation requirements.

Changing ventilation can affect indoor humidity.

Every alteration has consequences.

Good retrofit work considers those interactions before installation begins.

The objective is not simply to put as much insulation into the building as possible.

It is to create a building envelope that controls heat loss while safely managing air and moisture.

Key Takeaways From This Spray Foam Case

Never feel pressured to sign immediately. If a salesperson says a major discount disappears unless you sign that day, take time to consider why that urgency is necessary.

Get multiple opinions. Before installing Spray foam, speak to professionals who are not financially dependent on selling the product.

Investigate the existing roof. Check ventilation, roof covering condition, underlay, rafters and existing moisture problems.

Be cautious with claims about “breathability”. A breathable product does not automatically create a moisture-safe roof construction.

Understand exactly which Spray foam is being used. Open-cell and closed-cell products have different characteristics.

Check the written specification. Make sure what arrives on site matches what was promised.

Think about future inspections. Consider how Spray foam may affect access to roof timbers and future surveys.

Keep documentation. Contracts, technical specifications, warranties, photographs and certificates may become extremely important later.

Consider resale and mortgage implications. Understand how future surveyors or lenders may assess the installation.

Stop if something does not look right. Once Spray foam has been applied across an entire roof, reversing the work can become considerably more difficult.

The Bigger Lesson From Spray Foam Problems

Spray foam itself should not become the distraction from the broader lesson.

Every retrofit product has circumstances where it can work and circumstances where it may be inappropriate.

The problem begins when a complex building is reduced to a simple sales equation:

“Your home is losing heat. This product stops heat loss. Therefore, you need this product.”

Buildings do not work like that.

Ventilation, insulation, moisture, airtightness, structure and weather protection interact.

A change to one affects the others.

The homeowner in this case wanted what thousands of homeowners want: a warmer, more efficient property with lower energy costs.

Instead, the Spray foam installation was followed by condensation, mould, substantial remedial work and an ongoing legal dispute.

That makes this more than a story about one roof.

It is a reminder to investigate before insulating, question before signing and understand the complete building rather than concentrating on one promised improvement.

When Spray foam or any other major insulation system is being considered, the cheapest quotation or strongest sales pitch should never make the decision.

The right question is much simpler:

Is this actually the right solution for this particular building?

If the answer has not been established independently and technically, more investigation is needed before the work begins.

If you’ve had a similar experience with Spray foam, insulation work or a home-improvement installation that caused unexpected problems, let us know in the comments.

_______________________

#sprayfoam #homeimprovement #roofing #construction #insulation

Tampering With Your Meter? The Serious Risks you cant ignore

0

Meter tampering removes the safety systems that prevent fires and explosions in your home.

👇 SUPPORT SB – BECOME A MEMBER
https://www.youtube.com/channel/UC9GdB6vG6m6cDAwrTAWXgyg/join


Meter tampering removes the safety systems that prevent fires and explosions in your home.

As energy costs rise, more people are tampering with gas and electricity meters, but doing so breaks the chain of protection that keeps high levels of energy under control.

Gas meter tampering can cause uncontrolled leaks, allowing gas to build up over time and creating the conditions for explosions that can affect entire homes and neighbouring properties.

Electrical tampering often bypasses the main fuse and protective devices, allowing excessive current to flow unchecked.

Poor or improvised connections generate heat, leading to insulation breakdown, electrical arcing and fires that can start within walls, cupboards or meter boxes.

Modern installations are designed as a complete safety system, from the service head and meter through to the consumer unit.

Once that system is compromised, electricity and gas behave unpredictably and the risks increase significantly.

While the pressures behind energy theft are understandable, the consequences can include fire, explosion, serious injury, loss of life and criminal prosecution.

Why Meter Tampering Is More Dangerous Than It Looks

To someone without electrical or gas experience, a meter can look like little more than a box that records how much energy a property uses. In reality, it sits within a much larger system designed to deliver energy to a building while controlling the risks associated with it.

Electricity entering a property has the potential to deliver extremely high levels of current under fault conditions. Gas, meanwhile, needs to remain contained within a properly installed and tested pipework system.

Both services therefore rely on equipment, connections and protective measures working together.

Meter tampering interferes with that arrangement.

A modification that appears relatively small can introduce a weak connection, damage a cable, compromise pipework or bypass equipment designed to protect the installation.

The danger is not necessarily immediately obvious either. A tampered installation may appear to work normally for days, weeks or even longer while a serious fault develops out of sight.

Heat can gradually damage cable insulation. A connection can deteriorate. Gas can escape into enclosed spaces.

By the time someone notices a smell, scorching, unusual noises or another obvious warning sign, the installation may already be in a dangerous condition.

Electricity Needs a Complete Safety Chain

A modern domestic electrical installation contains several stages of protection.

Electricity arrives at the property through the incoming supply before passing through equipment associated with the service head, meter and consumer unit.

The consumer unit then distributes electricity around the property while protective devices are designed to disconnect circuits when certain faults occur.

Circuit breakers are a particularly important part of this protection. They are designed to interrupt the electrical supply when problems such as overloads or short circuits occur, helping reduce the risk of overheating and fire. You can read more about why circuit breakers trip and how they protect an electrical installation in Skill Builder’s guide to circuit breaker faults.

Meter tampering can interfere with this safety chain before electricity has even reached the normal protective devices inside the property.

That is one reason interference around the incoming supply is particularly dangerous.

The Problem With High Fault Current

One of the biggest misconceptions surrounding electricity meter tampering is that domestic electricity is somehow too small-scale to create a major incident.

The opposite can be true.

The incoming electrical supply is capable of delivering substantial current under fault conditions. If a poor connection, damaged conductor or improvised bypass creates a fault, the amount of energy involved can be considerable.

Electrical conductors also generate heat when current flows through resistance.

A properly designed connection keeps that resistance extremely low. However, a loose, damaged or badly made connection can create additional resistance.

As current continues to pass through that point, heat can build.

That heat may then begin damaging surrounding insulation and components.

Eventually the insulation can deteriorate sufficiently for conductors to become exposed or for electrical arcing to occur.

Why Electrical Arcing Is So Dangerous

Electrical arcing occurs when electricity jumps across a gap between conductors or conductive surfaces.

An arc can produce intense localised heat and may ignite surrounding combustible materials.

This becomes particularly concerning around meter cupboards and service areas where there may be timber, plastics, insulation or stored household items nearby.

A fire beginning in a meter cupboard can also spread before occupants fully understand what is happening.

If the cupboard is positioned beneath stairs, close to an entrance or along an escape route, the consequences can become even more serious.

The fire itself is only part of the danger.

Smoke can rapidly travel throughout a property, reducing visibility and making escape difficult.

This is why electrical safety cannot simply be judged by whether the lights and sockets appear to be working.

An installation can continue supplying electricity while a dangerous connection is deteriorating somewhere else in the system.

Gas Meter Tampering Creates a Different Risk

Gas meter tampering presents its own potentially catastrophic hazards.

A domestic gas installation is designed to keep gas contained as it travels from the incoming supply through the meter and onwards to appliances.

Interfering with this arrangement can damage connections or create leaks.

Natural gas escaping into the open air may disperse, but inside a building it can accumulate.

Enclosed areas are particularly concerning because gas may gradually build until it reaches a concentration where ignition becomes possible.

At that point, an ignition source can potentially trigger an explosion.

The resulting damage may not remain confined to the property where the tampering occurred.

Blast damage can affect neighbouring homes, particularly in terraces, flats and other buildings where properties share walls, floors or communal areas.

That means meter tampering does not only put the person interfering with the supply at risk.

It can endanger families, neighbours, emergency services and anyone else in or around the building.

The Danger Can Remain Hidden

Another major issue is that the consequences of meter tampering may develop gradually.

People often associate dangerous electrical faults with dramatic sparks, bangs or immediate power cuts.

In reality, some of the most serious problems begin quietly.

A loose connection can heat and cool repeatedly as electrical demand changes throughout the day.

Over time, this can worsen the connection.

Materials can expand and contract. Terminals can deteriorate. Insulation can become brittle or damaged.

Eventually, a fault that initially produced little visible evidence can become a serious fire hazard.

Gas leaks can also remain unnoticed, particularly if they occur in voids, cupboards or poorly ventilated areas.

This delayed nature of the danger is one reason a tampered meter should never be assumed to be safe simply because nothing has happened yet.

Meter Boxes Are Not DIY Work Areas

The meter and incoming supply should not be treated like ordinary DIY electrical equipment.

There is a significant difference between replacing a light fitting on an appropriately isolated circuit and interfering with equipment around the incoming electricity supply.

Likewise, gas meters and associated pipework should only be worked on by appropriately competent and authorised people.

Attempting to alter these systems without the correct training, equipment and authority introduces risks that may not be obvious to someone carrying out the work.

Improvised repairs can make the situation even worse.

Tape, unsuitable connectors, makeshift wiring and other temporary solutions are not substitutes for properly designed electrical equipment.

What appears to be a quick fix can become the hottest and weakest point in the installation.

Tampering Can Put Future Workers at Risk

The person interfering with a meter is not necessarily the only person who may encounter the altered installation.

An electrician, gas engineer, meter technician, maintenance worker or future homeowner may later work on the property without knowing that the supply has previously been modified.

They may reasonably expect the installation to follow recognised standards and normal arrangements.

Hidden alterations can undermine those assumptions.

That creates another layer of risk because someone could encounter unexpected live conductors, damaged equipment or compromised gas pipework.

This is why unauthorised alterations can remain dangerous long after the original tampering has taken place.

The Pressure Behind Energy Theft

It is also important to understand why meter tampering happens.

Rising energy prices and wider cost-of-living pressures can leave households struggling to afford heating and electricity.

For someone facing serious financial difficulty, bypassing a meter may appear to offer immediate relief.

But the physical risks do not disappear because the motivation is understandable.

Electricity does not know why a safety system has been bypassed.

Gas does not become less flammable because someone is struggling financially.

The engineering consequences remain exactly the same.

Anyone struggling with energy bills should seek legitimate support through their supplier, recognised support schemes or independent energy and debt advice rather than attempting to interfere with the supply.

What Should You Do If You Suspect Meter Tampering?

If you move into a property and suspect that the electricity or gas meter has been altered, damaged or bypassed, do not attempt to investigate or repair it yourself.

The same applies if you discover suspicious wiring, broken seals, unusual connections, damaged meter equipment or evidence that someone has previously interfered with the supply.

The safest response is to keep away from the equipment and contact the appropriate energy supplier or relevant qualified professional.

If there are immediate signs of danger, such as burning, smoke, sparking or a suspected gas leak, the situation should be treated as an emergency rather than a DIY repair.

Trying to undo somebody else’s tampering can expose you to exactly the same hazards created by the original interference.

Modern Safety Systems Work Together

One of the most important lessons from meter tampering is that building safety depends on systems working together.

Electrical protection is not provided by one fuse or one breaker.

Gas safety is not provided by one fitting.

The safety of a property depends on equipment being correctly selected, installed, connected, maintained and left in the condition it was designed to operate in.

Changing one part of that system can have consequences elsewhere.

A bypassed connection can create excessive heat.

Damaged insulation can lead to arcing.

Arcing can ignite surrounding materials.

A compromised gas connection can leak.

Gas can accumulate.

An ignition source can then turn a hidden leak into a major incident.

That chain of events is why apparently small alterations around energy supplies can have disproportionately serious consequences.

There Is No Safe Meter Bypass

There is no clever shortcut that makes meter tampering safe.

Even if someone believes they understand what they are doing, interfering with incoming electrical or gas supplies can expose them and others to hazards that are difficult to predict or control.

The protective systems used in modern homes exist because electricity and gas contain significant amounts of energy.

Those systems are designed to keep that energy controlled.

Once they are deliberately bypassed, damaged or altered, the installation can no longer be assumed to behave as intended.

The result may be overheating, electrical arcing, gas leakage, fire, explosion, electric shock or serious injury.

In the worst circumstances, the consequences can be fatal.

Key Takeaways

• Gas meter tampering can lead to leaks, build-up and explosions that can destroy homes and harm neighbours.

• Electricity meter tampering can compromise the safety chain, increasing the risk of overheating, arcing, electric shock and fire.

• Loose or poor electrical connections create heat, which can break down insulation and ignite surrounding materials.

• The incoming electrical supply can deliver extremely high fault current, making interference particularly dangerous.

• Meter tampering can create hidden hazards for electricians, gas engineers, meter technicians and future occupants.

• Problems may develop gradually, meaning a tampered installation can appear to work while dangerous faults develop out of sight.

• Rising energy costs may contribute to energy theft, but financial pressure does not reduce the physical dangers associated with interfering with gas or electricity.

• Suspected meter tampering should never be investigated or repaired as a DIY job.

• Modern gas and electrical installations rely on multiple safety measures working together. Compromising one part can undermine the protection provided by the entire system.

• There is no safe way to bypass a meter, even with good intentions.

_______________________

#EnergyTheft #ElectricalSafety #GasSafety #MeterTampering #FireRisk

The Smart Heat Pump Nobody Is Talking About – 8 Surprising Benefits

0

👇 THE CONTRACTORS GROUP
https://go.skill-builder.uk/contractors


Air-to-air heat pumps are often dismissed as “just air conditioning”, but modern systems are reverse-cycle heat pumps capable of both heating and cooling a home very efficiently.

For many smaller properties and retrofits, they can be quicker and cheaper to install than traditional air-to-water heat pumps while still delivering impressive efficiency.

In this discussion with installers Sam and Myuran from The Contractors Group, we look at how air-to-air systems actually work, how heat spreads through a home, and why some installers see them as a practical option for terraces, bungalows and smaller houses.

We also explore emerging systems that combine air-to-air heating and cooling with hot water cylinders using heat recovery, capturing waste heat from cooling and turning it into hot water.

Air-to-Air Heat Pumps Are More Than Air Conditioning

One of the biggest barriers facing air-to-air heat pumps in the UK is perception.

Mention an air conditioning unit and most people immediately imagine cooling a bedroom during a summer heatwave. What is often overlooked is that many modern air conditioning systems are actually reversible heat pumps.

Instead of only moving heat from inside a building to the outside, the refrigeration cycle can be reversed.

During winter, the system extracts heat from the outside air and transfers it indoors. During warmer weather, it operates in the opposite direction, removing heat from inside the property and releasing it outdoors.

That ability to provide both heating and cooling makes air-to-air heat pumps particularly interesting as UK homes experience hotter summers while pressure continues to grow to reduce reliance on fossil-fuel heating.

The UK Government provides further information about heat pumps and low-carbon heating, including how heat pumps work and the wider transition towards lower-carbon domestic heating.

How Does an Air-to-Air Heat Pump Work?

At its simplest, an air-to-air heat pump consists of an outdoor unit connected to one or more indoor units.

The outdoor unit contains components including a compressor and heat exchanger. Refrigerant circulates between the outdoor and indoor equipment, carrying thermal energy through the system.

When heating is required, the heat pump extracts energy from the outside air.

Even when outdoor temperatures feel cold, there is still thermal energy available. The refrigerant circuit and compressor allow this low-temperature energy to be collected and raised to a temperature that can be useful inside the home.

The indoor unit then transfers this heat directly into the room air.

This differs significantly from an air-to-water heat pump.

An air-to-water system normally heats water that is then circulated through radiators or underfloor heating. An air-to-air system removes that additional stage and transfers heat directly into the air inside the building.

That simplicity can offer advantages, particularly during retrofit projects.

Why Installation Can Be Simpler

Retrofitting an air-to-water heat pump into an existing home can involve substantial work.

Depending on the property, radiators may need upgrading, pipework could require modification and a suitable hot water cylinder may need to be installed.

The system also needs to be designed around the heat loss of the building.

Air-to-air systems can avoid some of these requirements because they do not rely on a traditional wet central heating system to distribute heat.

Instead, indoor fan units deliver conditioned air directly into rooms.

This can make installation considerably faster in the right property.

A smaller terrace, bungalow, flat or park home may not require the same scale of alterations that could be associated with a complete air-to-water conversion.

However, simpler does not mean that design can be ignored.

The location of indoor units, capacity of the system and heat loss of individual rooms still need careful consideration.

Understanding Heat Pump Efficiency

One of the main attractions of heat pump technology is the amount of heat that can potentially be delivered compared with the electrical energy consumed.

This is often expressed using the Coefficient of Performance, or COP.

A COP of 4 means that under the measured operating conditions, the heat pump delivers around four units of heat for every unit of electricity consumed by the system.

That does not mean the machine is somehow creating free energy.

Instead, electricity is being used to operate the compressor and other components that move existing thermal energy from one location to another.

Performance also changes depending on conditions.

Outdoor temperature, indoor temperature, system design, equipment selection and the amount of heating required can all affect efficiency.

For a better picture of performance across an entire heating season, installers and homeowners may also consider Seasonal Coefficient of Performance figures rather than relying on a single headline COP.

The Energy Saving Trust’s heat pump guidance provides useful independent information about air-source heat pumps, efficiency and factors that can influence performance.

Can Warm Air Really Heat an Entire House?

A common concern with air-to-air heat pumps is heat distribution.

Traditional central heating places radiators throughout a property. With an air-to-air system, homeowners may wonder whether one indoor unit can realistically heat several rooms.

The answer depends heavily on the layout and thermal characteristics of the building.

Warm air naturally moves towards cooler areas, and an open-plan property may allow heat to spread surprisingly effectively.

However, closed doors, long corridors and heavily divided layouts can restrict airflow.

This is why multiple indoor units can be useful.

A multi-split system can connect several indoor units to an outdoor unit, allowing heating or cooling to be delivered more directly to different areas of the property.

Rather than expecting a single unit in the hallway to heat every bedroom, correctly positioned indoor units can provide much more consistent comfort.

Air-to-Air Heat Pumps in Terraced Houses

Terraced properties could be an interesting application for air-to-air heating.

Many terraces have relatively compact floor areas, and neighbouring properties can reduce the number of exposed external walls compared with a detached home.

That does not automatically make every terrace suitable, but it can influence the overall heat-loss calculation.

Installation space can also be a consideration.

Traditional air-to-water conversions may require space for additional equipment and potentially a hot water cylinder. In smaller houses, finding that space can sometimes be difficult.

An air-to-air arrangement may provide another route, particularly where domestic hot water is handled separately.

Every property still needs to be assessed individually. Insulation, glazing, airtightness, layout and occupant behaviour all influence how effectively a heating system will perform.

Bungalows and Park Homes

Bungalows can also suit air-to-air heat pumps because their single-storey layout may simplify heat distribution.

With careful positioning of indoor units, conditioned air can potentially reach a significant proportion of the property without needing to travel between floors.

Park homes present another interesting possibility.

These properties are often relatively compact and may have limited space for traditional heating equipment.

A suitably designed air-to-air system can potentially provide heating and cooling from relatively compact equipment.

Again, sizing is critical.

Installing equipment that is too small may leave the system struggling during colder weather. Oversizing equipment can introduce different performance and comfort problems.

Professional heat-loss calculations remain important regardless of the type of heat pump being considered.

Heating and Cooling From One System

Cooling is arguably one of the strongest additional benefits of air-to-air heat pumps.

British homes have historically been designed primarily around keeping warm during winter.

However, overheating is becoming an increasingly important consideration, particularly in highly insulated homes, properties with large areas of glazing and bedrooms exposed to strong summer sunshine.

An air-to-air heat pump provides active cooling without requiring a completely separate system.

During winter, it heats the property.

During summer, the refrigeration cycle reverses and removes unwanted heat from the rooms.

That dual function can make the investment more attractive to homeowners who are considering both winter heating costs and summer comfort.

Using Waste Heat for Hot Water

One particularly interesting development is the integration of air-to-air systems with domestic hot water production.

Traditionally, one limitation of air-to-air heating has been that it does not automatically provide hot water.

An air-to-water heat pump can heat a cylinder as part of the same overall system, while an air-to-air installation usually needs another solution for showers, baths and hot taps.

Heat recovery technology could change this.

Some systems can recover heat from the refrigerant circuit and use it to contribute towards heating domestic hot water.

This becomes particularly interesting during cooling operation.

When a house is being cooled, the system is actively removing heat from indoors.

Instead of simply rejecting all that energy outdoors, heat recovery can potentially redirect some of it towards a hot water cylinder.

In effect, unwanted heat from the building becomes useful energy elsewhere in the home.

Manufacturers including Daikin and Mitsubishi Electric provide information on modern heat pump and air-conditioning technologies, including systems designed for domestic and commercial applications.

What Happens During Very Cold Weather?

Another frequent question is whether air-source systems can continue heating when outdoor temperatures fall.

Modern heat pumps are designed to operate at low external temperatures, although efficiency and available output can change as conditions become more demanding.

During cold weather, moisture can also freeze on the outdoor heat exchanger.

The heat pump therefore periodically enters a defrost cycle to remove this ice and maintain operation.

Correct sizing is particularly important here.

A system that performs comfortably during mild weather may struggle if it has not been designed for the property’s heating requirement at lower design temperatures.

This is one reason installers need to understand the building rather than simply selecting equipment based on floor area.

Keeping an Existing Boiler as Backup

For retrofit projects, replacing every part of the existing heating system immediately is not always necessary.

Where practical and safe, some installers may recommend retaining an existing boiler initially.

This can provide redundancy.

If temperatures become particularly low, or if the heat pump is temporarily unavailable, the existing heating system can potentially provide backup.

It can also allow homeowners to transition towards heat pump heating without immediately removing equipment that is still functional.

Whether this approach makes sense will depend on the property, existing system and long-term plans.

The important point is that heating design does not always have to be an all-or-nothing decision.

Why Proper Installation Matters

Air-to-air heat pumps may look straightforward compared with major wet heating installations, but they still require specialist knowledge.

Refrigerant systems operate under pressure and need to be installed, tested and commissioned correctly.

Connections must be properly made and pressure tested before the system is put into operation.

Poor workmanship can lead to refrigerant leaks, reduced efficiency, unreliable operation and premature equipment failure.

Engineers working with fluorinated greenhouse gases must also comply with the relevant requirements.

The UK Government provides guidance on qualifications and certification for working with F-gases, including requirements affecting technicians and businesses working on relevant refrigeration, air-conditioning and heat pump equipment.

This is not an area where installation quality should be compromised simply because the equipment appears compact.

System Design Matters as Much as the Equipment

Choosing a reputable heat pump manufacturer is only one part of achieving good performance.

The design of the installation is equally important.

Installers need to consider heat loss, airflow, indoor-unit positioning, outdoor-unit location, noise, condensate drainage, refrigerant pipe runs and how occupants actually use the property.

A technically excellent heat pump installed in the wrong position may provide disappointing comfort.

Likewise, a correctly designed system using appropriately sized equipment can often outperform a larger system that has simply been installed without proper assessment.

This is why experienced installers play such an important role in the move towards heat pump technology.

Are Air-to-Air Heat Pumps the Answer for Every Home?

No heating technology is perfect for every property.

Large houses with many individual rooms may require multiple indoor units, potentially making an air-to-air installation more complicated.

Some homeowners may also prefer traditional radiators rather than fan-driven heating.

Domestic hot water needs must also be addressed.

But dismissing air-to-air heat pumps simply because they resemble air-conditioning systems overlooks what modern equipment can actually do.

For the right building, they can offer efficient heating, summer cooling, relatively straightforward installation and potentially lower retrofit costs.

As heat recovery and hot water integration develop further, the distinction between traditional air conditioning and whole-home heat pump systems may become increasingly blurred.

For terraces, bungalows, park homes and other smaller properties, air-to-air heat pumps deserve serious consideration alongside conventional air-to-water systems.

Key Takeaways

• Modern air conditioning systems are reverse-cycle heat pumps capable of heating in winter and cooling in summer.

• Air-to-air systems can be significantly quicker and cheaper to install than air-to-water heat pumps in many retrofit situations.

• Efficient systems can achieve COP figures above 4 under suitable conditions, meaning several units of heat output for every unit of electricity consumed.

• Heat recovery technology can potentially use energy from the refrigerant circuit to contribute towards domestic hot water production.

• During cooling, recovered heat that would otherwise be rejected outdoors may potentially be redirected towards hot water.

• Multiple indoor units can improve heat distribution, particularly in properties with separate rooms or more complex layouts.

• Terraces, bungalows and park homes can be particularly interesting applications because of their relatively compact size and layouts.

• Keeping an existing boiler can provide backup and redundancy where the overall system has been appropriately designed.

• Proper heat-loss calculations and equipment sizing remain essential, even when installation appears simpler than an air-to-water system.

• Refrigerant systems must be installed and pressure tested correctly by appropriately qualified professionals.

• Air-to-air heat pumps should not automatically be dismissed as “just air conditioning”. For the right home, they can provide a practical combination of heating, cooling and high efficiency.

_______________________

#heatpump #airtoairheatpump #airconditioning #energyefficiency #retrofit #heatingandcooling #homeheating #skillbuilder

Lime: I Was Wrong – The Surprising Truth

0

👇 SUPPORT SB – BECOME A MEMBER
https://www.youtube.com/channel/UC9GdB6vG6m6cDAwrTAWXgyg/join

🧱 Stormdry Masonry Protection Cream
https://go.skill-builder.uk/stormdry

FEATURED IN THIS EPISODE

@HeritageBuildingsAssociation

@nigelcopsey7488

@interiordesignschool

@MikeHaduck

@Londonunionchapel

@michaeljamesdesign

@dportercontracting9974

@LimeworksUs

_______________________

Lime Mortar: Why the Debate Is More Complicated Than It Looks

Mortar sparks fierce debate in the building world, and after the reaction to our previous video, we decided it was worth digging deeper and letting the experts speak.

Talk to conservation specialists, bricklayers, plasterers and restoration contractors and you will quickly discover that there is no single agreed answer. Some argue passionately for traditional lime mortar, others regularly use NHL, while plenty of experienced tradespeople have worked successfully with cement-based mixes for decades.

Then there is hot mixing, which brings another layer to the argument.

The problem is that discussions around traditional mortar can quickly become ideological. One method is presented as correct and everything else as damaging. In reality, buildings are rarely that simple.

Mortar choice depends on the bricks, the wall construction, exposure, moisture, workmanship and the age and condition of the building. What works perfectly well on one property could cause problems on another.

Why Lime Mortar Was Traditionally Used

Before modern Portland cement became widespread, traditional binders were widely used in masonry construction.

Traditional lime mortar is softer and generally more vapour permeable than strong modern cement mortars. This can be particularly important in older solid-wall buildings.

Historic walls were often designed to manage moisture differently from modern cavity-wall construction. Rather than attempting to create an entirely sealed structure, moisture could enter and subsequently evaporate through the masonry and mortar joints.

A relatively soft mortar joint could also act as the sacrificial element of the wall.

Ideally, weathering occurs in the mortar rather than the brick or stone. Repointing mortar is considerably easier than replacing damaged historic masonry.

This is one reason conservation specialists can become concerned when very hard cement mortars are introduced into buildings containing soft bricks.

The Problem With Making Simple Rules

It is tempting to turn this into a straightforward rule: old building equals traditional mortar, new building equals cement.

Unfortunately, construction rarely works like that.

The condition and hardness of the masonry matter enormously. Some historic bricks are extremely soft and porous, while others are much harder.

Exposure matters too.

A sheltered wall in southern England experiences very different conditions from an exposed elevation subjected to driving rain and repeated freeze-thaw cycles.

The existing building also needs to be considered as a complete system.

Has it been rendered? Are the gutters working? Is there a leaking downpipe? Has the ground level been raised? Is water entering around windows? Has an impermeable coating already been applied?

Simply replacing the mortar cannot compensate for poor moisture management elsewhere.

Air Lime: Traditional but Slow

Pure air lime is often associated with traditional conservation work.

It sets primarily through carbonation, reacting with carbon dioxide in the atmosphere. This is very different from Portland cement, which develops strength through a hydraulic reaction with water.

One advantage of traditional mortar is its relative softness and vapour permeability.

For appropriate historic masonry, these characteristics can be extremely useful.

The disadvantage is speed.

Air-based mortar can take a considerable amount of time to develop strength, particularly in cold or damp conditions. Protection from weather can also be necessary while the material cures.

That might be manageable on a carefully controlled conservation project, but it becomes more challenging on commercial building sites where programmes, labour costs and weather windows matter.

Traditional does not automatically mean practical for every project.

What About NHL?

Natural Hydraulic Lime, usually shortened to NHL, occupies another part of the debate.

Unlike pure air mixes, NHL contains naturally occurring hydraulic components that allow it to develop strength through reaction with water as well as carbonation.

Different grades provide different characteristics and strengths.

For contractors, NHL can offer an attractive compromise because it retains many characteristics associated with traditional materials while generally developing strength more predictably than pure air mixes.

However, simply specifying “NHL” does not solve the problem.

The grade, aggregate, proportions, masonry and exposure conditions still need to be considered. A mortar that is too strong for the surrounding brick can potentially create the same fundamental problem people were trying to avoid in the first place.

The objective should be compatibility rather than simply choosing a material because it sounds traditional.

Cement-Based Mortars Have Worked for Decades

One of the more controversial parts of the discussion concerns cement-based mortar containing a secondary binder.

Mixes such as 1:2:9 — broadly one part cement, two parts lime and nine parts sand — became widely used in 20th-century construction.

Millions of houses were built using these mixes, and many remain perfectly serviceable.

That matters.

It demonstrates why claims that cement should never appear in mortar need some qualification.

Adding a secondary binder to a cement mortar can improve workability and water retention while producing a mix considerably different from a very strong sand-and-cement mortar.

For appropriate masonry, this can provide a perfectly practical solution.

Problems are more likely to arise when extremely strong, dense mortar is combined with relatively weak or porous masonry.

Again, context matters.

Moisture May Be the Bigger Problem

One of the most useful lessons from the lime mortar debate is that mortar should not be considered in isolation.

Water is one of the biggest threats to masonry.

Imagine a wall where a gutter has been leaking for years. The brickwork becomes saturated. Winter arrives and temperatures fall below freezing.

Water inside porous masonry freezes and expands. Repeated freeze-thaw cycles can gradually damage the surface of the brick.

If the mortar surrounding that brick is significantly harder and less permeable than the masonry itself, deterioration may become concentrated in the brick rather than the joint.

But simply blaming the mortar misses an important point: the leaking gutter created the excessive moisture load in the first place.

Good building conservation therefore requires investigation rather than assumptions.

Hot Mixing

Hot mixing has also attracted renewed interest within conservation and traditional building circles.

The technique involves combining quicklime with aggregate and water so that slaking takes place as part of the mortar-making process.

Supporters argue that hot-mixed mortar can provide excellent workability and produce results closely related to those used historically.

There is good reason for specialist contractors to understand these techniques, particularly when repairing significant historic buildings.

However, quicklime is not something to approach casually.

It reacts vigorously with water and generates considerable heat. Appropriate training, PPE and handling procedures are essential.

The process can also be labour-intensive compared with modern bagged products.

For specialist conservation work that may be justified. For an ordinary modern housing project, it may provide little practical advantage.

Workmanship Still Matters

Another factor sometimes lost in arguments over mortar specifications is workmanship.

You can specify an excellent lime mortar and still end up with poor masonry if it is mixed incorrectly, applied badly or inadequately protected while curing.

Joint preparation matters. Aggregate matters. Water content matters. Weather conditions matter.

The person using the material matters too.

Conversely, a technically less fashionable mortar that is compatible with the masonry and properly applied may perform successfully for decades.

Specification cannot replace skill.

Stop Treating Every Building the Same

Perhaps the biggest lesson from the mortar debate is that buildings need to be assessed individually.

Before deciding on a mortar, consider:

  • The age and construction of the wall
  • The strength and porosity of the bricks or stone
  • Existing mortar
  • Exposure to wind and driving rain
  • Moisture sources
  • Freeze-thaw risk
  • Required strength
  • Heritage or conservation requirements
  • Practical site conditions
  • The experience of the person carrying out the work

A soft Georgian brick and a modern engineering brick clearly should not be treated as though they are the same material.

The mortar needs to work with the masonry rather than against it.

Context Matters More Than Dogma

The debate surrounding traditional mortar is valuable because it encourages builders to think about how older buildings actually function.

But it becomes less useful when the discussion turns into absolute rules.

Pure air mixes have genuine advantages. NHL can provide a useful solution. Cement-based mortars have performed successfully in huge numbers of buildings. Hot mixing can be extremely effective in appropriate conservation work.

None of these facts needs to contradict the others.

The important question is not simply, “Is lime better than cement?”

It is: What mortar is appropriate for this particular wall?

Answer that properly and you need to understand the masonry, moisture conditions, exposure and history of the building.

That approach may be less exciting than declaring one side of the argument completely right and the other completely wrong, but it is far closer to how good building work is actually done.

Key Takeaways

  • Mortar debates are rarely black and white. Even experienced conservation specialists and tradespeople disagree about the best approach.
  • Pure air lime provides useful breathability and sacrificial protection, particularly with softer historic masonry, but its slow setting time can make it impractical for some projects.
  • NHL can provide a middle ground, but the correct grade and specification still depend on the masonry and exposure.
  • Cement-based mortars have a long track record. Mixes such as 1:2:9 were widely used during the 20th century and continue to perform successfully in many buildings.
  • Moisture management is critical. Leaking gutters, driving rain, saturated masonry and freeze-thaw cycles can sometimes cause more damage than the choice of mortar itself.
  • Hot mixing has legitimate conservation applications, but it requires knowledge, additional labour and careful safety procedures.
  • There is no universal mortar specification. The correct choice depends on the building, masonry, environment and quality of workmanship.

Ultimately, lime mortar should be treated as part of a wider building system rather than a material that can be judged in isolation. Understand the wall first, then choose the mortar.

_______________________

#lime #limemortar #brickwork #buildingmaterials #restoration

The Compact Solar Solution Everyone’s Missing

0

👇 Thunder Energy
https://go.skill-builder.uk/thunderenergy

Thunder Energy: A Compact Solar Solution for UK Homes

Solar panels have traditionally meant one thing for UK homeowners: a large rooftop installation, several panels, scaffolding and a fairly substantial upfront investment.

But that model does not work for every property.

What happens if you have limited roof space, significant shading or simply do not want a conventional rooftop array? What about smaller homes where finding enough suitable space for several panels is difficult?

Thunder Energy is approaching the problem from a different direction with a compact solar solution designed to make use of smaller spaces around the home.

Its “balcony and garden” solar kits are intended for locations such as balconies, fences, sheds and garden walls, potentially giving households another way to generate a modest amount of electricity without installing a large rooftop system.

This type of solar solution is already an established concept in parts of Europe, where compact systems have become particularly interesting for homes with restricted access to suitable roof space.

It is important to keep expectations realistic. A few hundred watts of solar capacity will not provide the same output as a conventional multi-kilowatt rooftop array.

But it does not necessarily need to.

For the right property, a smaller solar solution could contribute towards everyday electricity consumption while making use of an area of the home that would otherwise generate nothing.

What Is Balcony Solar?

Balcony solar is essentially small-scale photovoltaic generation.

Rather than installing numerous panels across a roof, a compact system uses one or more panels positioned in a location where they can receive useful sunlight.

Despite the name, a balcony is only one possible location.

Depending on the system, mounting method and individual property, panels could potentially be positioned on:

  • Balconies
  • Garden fences
  • Garden walls
  • Sheds
  • Garages
  • Outbuildings
  • Other suitably positioned structures

This opens up possibilities that conventional rooftop solar does not always provide.

For example, a homeowner might have a heavily shaded roof but a sunny garden wall. Another property could have limited roof space but a detached garage or shed that receives good sunlight during the day.

A compact solar solution allows those smaller areas to become part of the conversation.

Why Would You Want Such a Small Solar System?

At first glance, a 360W or 710W system might sound insignificant compared with the larger rooftop arrays commonly installed on UK homes.

But domestic electricity consumption is not simply about large appliances.

Most homes have a constant background electrical load.

Broadband routers, fridges, freezers, smart-home equipment, alarm systems and appliances left on standby can all consume electricity throughout the day.

There may also be computers, televisions, chargers and other devices operating at different times.

If a small solar system is producing electricity while the home is consuming power, that generation could potentially offset part of the household’s daytime electricity demand.

The aim is not necessarily to generate huge quantities of surplus electricity.

Instead, this type of solar solution is about producing useful power from a relatively small available space.

Thunder Energy’s Approach

Thunder Energy’s systems are designed around this smaller-scale approach to domestic generation.

Rather than assuming every customer wants or can accommodate a large rooftop installation, the company offers compact systems for homes where space is more restricted.

Its main kits include the Storm 360W and Storm 710W.

The choice between them largely comes down to available space and the amount of potential generation required.

Storm 360W Solar Kit

The Storm 360W solar kit is the smaller entry-level system.

With 360 watts of rated panel capacity, it is intended for situations where mounting space is particularly limited.

A small balcony, suitable garden fence or other appropriately positioned structure could potentially provide enough room for this type of installation.

Clearly, 360 watts will not run an entire house.

That is not what this solar solution is trying to achieve.

Instead, it can generate electricity during daylight hours that may contribute towards appliances and equipment already consuming power within the property.

Actual generation will depend on several factors.

Panel orientation is important. So is the angle of the panel, surrounding buildings, trees, seasonal sunlight and general weather conditions.

Shading can have a particularly noticeable effect on a small installation.

If a panel spends much of the day behind a neighbouring building or tree, annual generation will inevitably be lower.

That makes choosing the right position extremely important.

Storm 710W Solar Kit

Thunder Energy also offers the larger Storm 710W solar kit.

This system uses additional panel capacity to provide greater potential generation during daylight hours.

For households with more usable space, the 710W system could provide a more substantial contribution towards background electricity demand.

However, rated wattage needs to be understood correctly.

A 710W solar system does not continuously produce 710 watts from sunrise to sunset.

Solar panels are rated under specified test conditions, while real-world generation constantly changes.

Cloud cover, shading, temperature, panel orientation, time of day and season all influence output.

A bright day in June will produce very different results from a cloudy afternoon in December.

Nevertheless, additional panel capacity increases the potential amount of electricity that can be generated when conditions are favourable.

For somebody looking for a compact solar solution without moving to a full rooftop array, that additional capacity could make the larger kit more attractive.

Why Not Just Install Solar Panels on the Roof?

For many homeowners, conventional rooftop solar remains the obvious choice.

If you own a property with a large, relatively unshaded and appropriately orientated roof, a professionally designed rooftop array can provide substantially more electricity.

A typical domestic installation can contain several kilowatts of solar capacity rather than a few hundred watts.

But not every home has the right roof.

Trees can cause shading. Neighbouring buildings can block sunlight. Roof shapes can restrict usable space, while dormers, chimneys and roof windows can reduce the area available for panels.

There may also be structural, leasehold, conservation or practical considerations.

Then there is the upfront investment.

A full rooftop solar installation is a considerably larger home improvement project than a compact balcony or garden system.

That means Thunder Energy’s solar solution should not necessarily be viewed as a direct competitor to conventional rooftop solar.

It potentially fills a different gap.

The more useful comparison may be between installing a small system and installing no solar generation at all.

Making Use of Forgotten Spaces

One of the more interesting aspects of compact solar is the possibility of using parts of a property that are normally ignored when discussing renewable energy.

A garden fence is usually just a boundary.

A shed is primarily storage.

A garage wall is simply part of an outbuilding.

But if one of those surfaces receives good sunlight, it potentially represents usable space for solar generation.

That does not mean panels should simply be attached to any convenient surface.

Orientation, structural suitability, wind loading, shading and electrical requirements still need to be considered.

But the concept changes the way homeowners can think about available space.

Instead of asking, “Is my roof suitable for solar?”, the question becomes, “Where around my property receives useful sunlight?”

For some households, the answer may reveal an unexpected location for a compact solar solution.

Positioning Is Critical

Positioning matters with every photovoltaic installation, but it becomes especially important when the system is small.

With a large rooftop array, several panels contribute towards overall generation.

With a 360W system, there is much less panel capacity available, so poor positioning can have a proportionally greater effect.

Shading should therefore be carefully considered.

A fence might receive excellent sunlight in summer when the sun is high but spend long periods shaded during winter.

Similarly, a balcony may appear sunny in the afternoon but receive very little direct sunlight during the rest of the day.

Panel orientation also affects when electricity is generated.

South-facing panels are traditionally associated with strong overall generation in the UK, but east- and west-facing panels can also generate useful electricity.

In some circumstances, generating electricity earlier or later in the day may even correspond more closely with when the household consumes power.

The best solar solution therefore depends not only on total generation but also on how and when electricity is used.

What About Britain’s Weather?

The British weather is inevitably part of any conversation about solar.

There is still a misconception that solar panels need constant direct sunshine to work.

They do not.

Photovoltaic panels generate electricity from available light and can continue producing power during cloudy conditions, although output will generally be lower.

The bigger issue is seasonal variation.

Summer days are longer and brighter, giving solar panels considerably more opportunity to generate electricity.

Winter brings shorter days, a lower sun angle and frequently poorer weather.

A compact solar solution therefore needs realistic expectations attached to it.

It should not be viewed as a guaranteed way of eliminating electricity bills.

It is a way of generating some electricity locally and potentially reducing the amount drawn from the grid during suitable conditions.

Solar Generation and Household Demand

The usefulness of small-scale solar also depends on when electricity is consumed.

Solar panels naturally generate electricity during daylight hours.

If the house is using electricity at the same time, that generation can potentially contribute towards those loads.

For somebody working from home, for example, daytime electricity consumption might include computers, monitors, broadband equipment, lighting and kitchen appliances.

Other households may have relatively little daytime consumption.

Understanding the household’s electricity pattern can therefore help determine whether a compact solar solution makes sense.

Simply looking at the wattage of the panels does not tell the entire story.

Could Compact Solar Become More Common?

The wider idea behind systems such as Thunder Energy’s is arguably more interesting than any individual panel.

Domestic energy is becoming increasingly decentralised.

Households are no longer simply consuming electricity supplied from large power stations.

Many now generate electricity through rooftop solar, store it in batteries, charge electric vehicles at home and use smart tariffs to shift consumption to different parts of the day.

Small-scale solar could become another part of that changing energy landscape.

Not every household needs exactly the same system.

One property might benefit from a large rooftop array and battery.

Another might only have room for a couple of panels.

For that second household, a smaller solar solution could offer an accessible entry point into domestic generation.

Installation Still Matters

The word “compact” should not be confused with “install it anywhere”.

Solar panels mounted outdoors need to withstand wind, rain and changing weather conditions.

A panel attached to a balcony, fence or garden structure can experience significant wind loading, particularly during storms.

The mounting method therefore needs to be appropriate for both the panel and the structure supporting it.

Electrical safety is equally important.

Homeowners need to understand exactly how a system is intended to operate and connect to their electrical installation.

Any installation should follow the manufacturer’s instructions and comply with the relevant UK electrical and grid requirements.

A simple-looking solar solution still involves generating electricity, and that needs to be treated properly.

Is Thunder Energy’s Solar Solution Worth Considering?

For homeowners with the perfect roof and the budget for a conventional installation, a larger rooftop system is likely to offer substantially greater generation.

But that does not make smaller systems pointless.

Thunder Energy is targeting households with a different set of circumstances.

The Storm 360W provides an entry-level option where space is particularly restricted, while the Storm 710W provides greater potential generation for properties with room for additional panel capacity.

Neither system should be treated as a substitute for a large domestic solar array.

Instead, they provide an alternative solar solution for properties where conventional solar might otherwise be difficult.

That distinction is important.

Key Takeaways

  • Thunder Energy offers a compact solar solution designed for smaller spaces around UK homes.
  • The Storm 360W is the entry-level system, aimed at locations such as small balconies, fences and other restricted areas.
  • The Storm 710W provides additional capacity for households with more available space and greater potential daytime electricity demand.
  • Compact solar is not intended to replace a full rooftop array. Its purpose is to provide modest local generation where larger installations may not be practical.
  • Positioning makes a major difference. Orientation, shading, panel angle, season and weather all affect real-world output.
  • UK weather does not prevent solar generation, although output varies significantly throughout the year.
  • Installation and mounting still matter. Outdoor panels need to be securely installed and the electrical system must be appropriate for UK requirements.
  • Household electricity habits matter too. A small system can be particularly useful when solar generation coincides with daytime electricity consumption.
  • Unused areas around a property could potentially become generating surfaces, changing the way homeowners think about domestic solar.

Thunder Energy’s approach highlights an interesting shift in the solar market.

For years, the question has largely been whether homeowners can justify putting a large solar array on their roof.

Compact systems introduce another possibility.

Instead of requiring a major installation, households may be able to start with a smaller solar solution that makes use of a balcony, fence, shed or garden wall.

It will not make every home energy independent, and it will not replace conventional rooftop solar where a larger system is practical.

But for properties where roof space, cost or other practical limitations have previously ruled solar out, a compact solar solution could make small-scale home generation possible.

Sometimes the most useful space for solar might not be on the roof at all.

_______________________

Thunder Energy Links

https://www.facebook.com/profile.php?id=61579150676116

https://www.instagram.com/thunder.uk

https://www.linkedin.com/company/thunder-energy-services

@ThunderEnergy

_______________________

#solar
#solarpower
#balconysolar
#microgeneration
#renewableenergy
#homesolar
#solaruk
#energybills
#energysaving
#heatpump
#electrichome
#greenenergy
#solarinstallation
#solarbattery
#skillbuilder

sSolar Panels Replace Slate Roofing: The Surprising Benefits

0

Solar Panels Replace Slate Roofing: Here’s What Changes

A good set of drawings can solve plenty of problems before a project reaches site, but construction rarely goes exactly as planned.

This project is a good example of why skilled trades and on-site problem-solving remain so important.

Factory-manufactured roof trusses, detailed drawings and modern roofing systems might suggest that much of the difficult work has already been done.

Once everything arrives on site, however, the reality can be very different.

Trusses still need adjusting. Timbers need packing. Awkward junctions need resolving.

Crane availability can dictate how the roof is assembled, while complicated features such as lantern openings and turrets can turn what appears straightforward on a drawing into a much bigger job.

There is also another significant change happening above our heads.

Solar panels are increasingly becoming part of the roof itself.

Instead of fitting panels over finished slate or tiles, in-roof solar systems can replace sections of the traditional roof covering.

As solar technology becomes cheaper and new-build energy requirements become more demanding, that approach is starting to make considerably more sense.

Factory Roof Trusses Don’t Remove the Need for Skill

Factory-manufactured roof trusses are designed to make roof construction faster, more predictable and more efficient.

The manufacturer works from the drawings, produces the required components and delivers them to site ready for installation.

In theory, it sounds straightforward.

In practice, the building underneath them may not correspond perfectly with the dimensions expected on paper.

Small differences accumulate.

Walls may vary slightly in position or height.

Timber dimensions have tolerances. Complicated roof intersections can create unexpected clashes.

That means even factory-produced trusses can require cutting, packing and adjustment once they arrive.

It is a useful reminder of something that is sometimes forgotten when discussing modern methods of construction: manufacturing accuracy does not eliminate the need for skilled trades.

Someone still has to understand how the building actually fits together.

Crane Time Can Change the Entire Installation

Getting large roof trusses into position is significantly easier with mechanical lifting equipment.

But access to a crane is not unlimited.

On this project, limited crane time meant a substantial part of the truss installation had to be completed manually.

That changes the job considerably.

Large timber components need to be handled safely, manoeuvred around the structure and positioned accurately.

The sequence of installation becomes even more important because getting something wrong early can make later sections considerably harder to install.

It demonstrates why logistics are just as important as the drawings.

A roof might have been perfectly designed, but somebody still needs to determine how the components will physically reach their final position.

Complex Roof Geometry Changes Everything

Simple pitched roofs are relatively easy to understand.

Introduce lantern openings, valleys, hips, turrets and other architectural features and the complexity increases rapidly.

These details affect far more than appearance.

Loads need to be transferred correctly through the structure. Timber components need to meet at unusual angles. Roofing materials have to form weatherproof junctions around complicated geometry.

Even seemingly small architectural changes can have significant consequences for the structural design.

On this project, features such as the lantern opening and turret added considerable complexity to the planning process.

That can mean months of additional design work before construction reaches the point where the roof can actually be built.

It is another example of the difference between drawing an architectural feature and constructing it successfully.

Solar Panels Are Becoming Part of the Roof

Perhaps the most interesting feature of the project is the use of integrated solar panels.

Traditional domestic solar installations generally involve completing the roof first and then mounting panels above the tiles or slate using rails and brackets.

It works, but it effectively means installing two layers.

You pay for the roof covering and then install the solar equipment over it.

In-roof systems take a different approach.

The solar panels become part of the weathering layer, replacing sections of the slate or tiles that would otherwise have been required.

This creates a much cleaner appearance because the panels sit closer to the surrounding roofline.

It can also change the economics of installing solar on a new build.

Solar Panels Replacing Slate

The important point is that the financial calculation should not simply compare the cost of solar with doing nothing.

If solar panels replace slate roofing, the cost of the slate that would have occupied that section of roof also needs to be considered.

There are associated materials and labour involved with installing a conventional roof covering too.

As the cost of photovoltaic equipment continues to fall, this can make integrated systems increasingly attractive during new construction.

Instead of completing an entire slate roof and then paying for another system to sit above it, part of the roof budget can effectively contribute towards the solar installation.

That does not mean integrated solar will automatically be cheaper in every situation.

Roof design, panel specification, installation costs, electrical work and long-term maintenance all need consideration.

But on a new build, the calculation is becoming increasingly interesting.

For further independent guidance on domestic solar PV, homeowners can also consult Energy Saving Trust’s solar panel guidance, which covers solar electricity generation, installation considerations and potential savings.

Why In-Roof Solar Looks Different

Appearance remains one of the main objections some homeowners have to traditional solar.

Conventional panels mounted on rails sit visibly above the roof covering.

On some houses that is barely noticeable. On others, particularly properties where the roof forms a major part of the architecture, the difference can be obvious.

Integrated solar panels provide a flatter appearance.

Rather than looking like equipment that has been added after the roof was completed, the panels appear more deliberately incorporated into the building.

For architects and self-builders, that can be a major attraction.

It also demonstrates how solar is gradually moving away from being treated as an optional accessory and becoming another standard building component.

New Builds Are Particularly Suited to Integrated Solar

Retrofitting solar to an existing roof is different from designing it into a building from the beginning.

With a new build, panel location, roof orientation, electrical routes and other requirements can potentially be considered during the design stage.

There is no need to remove perfectly serviceable tiles or slate simply to install the system.

The roof covering can instead be designed around the solar panels from day one.

That can reduce duplicated materials while creating a neater finished installation.

It also allows designers to think about solar generation as part of the building rather than something added later.

As energy efficiency becomes increasingly important, that approach is likely to become more common.

Roofing Is Becoming More Technical

Solar is only one example of how roofing is changing.

Modern roof construction increasingly combines structural timber systems, membranes, ventilation products, mechanical fixings, insulation requirements and renewable technologies.

That means coordination between different trades becomes increasingly important.

The carpenter needs to understand what the roofer requires.

The roofer needs to know where the solar panels are being installed.

The solar installer needs to understand the roof system.

Electricians need appropriate cable routes and connection points.

A mistake made by one trade can create problems for several others.

Modern construction might involve more factory-manufactured components, but that does not necessarily mean it requires less knowledge on site.

Dry Ridge and Dry Hip Systems

Another significant change is the move away from relying entirely on mortar for ridge and hip tiles.

Traditional roofs commonly used mortar bedding to secure these components.

The problem is that roofs move.

Timber structures expand and contract. Temperatures change. Wind places repeated loads on exposed roof components.

Over time, mortar can crack and deteriorate.

Modern dry ridge and dry hip systems use mechanical fixing systems instead.

The ridge or hip tiles are physically secured while the system is designed to accommodate the ventilation and weatherproofing requirements of the roof.

One of the biggest advantages is reduced dependence on the condition of mortar.

Mechanical fixing can also provide greater security during high winds when correctly specified and installed.

That does not mean traditional mortar suddenly has no place in roofing, but modern dry systems provide a practical alternative that is increasingly common across UK construction.

The Roof Is Becoming an Energy System

Perhaps the biggest change is conceptual.

Historically, the primary purpose of a roof was straightforward: keep the weather out.

It still needs to do that exceptionally well.

But the roof is increasingly being asked to perform additional jobs.

It needs to accommodate high levels of insulation, control ventilation and moisture, support increasingly complex architectural designs and, in many cases, generate electricity.

With integrated solar panels, the roof covering itself becomes part of the property’s energy infrastructure.

That changes the way roofs need to be designed and built.

Solar can no longer simply be treated as something another contractor adds at the end.

Modern Systems Still Depend on Skilled Trades

There is sometimes an assumption that factory manufacturing and modern construction systems remove craftsmanship from building.

Projects like this demonstrate the opposite.

Factory trusses still need to fit the actual structure.

Complicated architectural features still need to be interpreted and built.

Integrated solar panels need to work with the roofing system rather than against it.

Dry ridge and hip systems still need to be installed correctly.

The products may have changed, but the need for people who understand buildings has not.

If anything, modern construction increasingly requires trades to understand how several systems interact.

Key Takeaways

  • Factory-made roof trusses are not always plug-and-play. Cutting, packing and adjustment may still be necessary once components reach the real building.
  • Site logistics matter. Limited crane availability can completely change how roof trusses are installed.
  • Complex roof geometry adds considerable design work. Lanterns, turrets, valleys and unusual roof shapes can dramatically increase planning and construction complexity.
  • In-roof solar panels replace sections of the traditional roof covering, rather than simply sitting above finished slate or tiles.
  • Falling solar costs are changing the financial calculation. On new builds, savings on conventional roofing materials can help offset part of the cost of integrated solar.
  • Integrated solar provides a cleaner appearance, with panels sitting closer to the surrounding roofline.
  • Dry ridge and dry hip systems mechanically secure roof components, reducing reliance on traditional mortar bedding.
  • Modern roofs require greater coordination between trades. Carpenters, roofers, electricians and solar installers increasingly need to understand how their work interacts.
  • Technology has not removed the need for skilled trades. Drawings and factory manufacturing can improve accuracy, but real buildings still require experienced people to solve problems on site.

The way roofs are built is changing.

Factory-manufactured trusses, mechanically fixed ridge systems and integrated solar panels can make construction more efficient, predictable and energy-conscious.

But none of these systems eliminates the realities of building on site.

Ultimately, a roof still has to work as one complete system.

And whether you’re dealing with a complicated turret, adjusting factory trusses or replacing sections of slate with solar panels, the difference between a good drawing and a good building still comes down to how well everything is put together in the real world.

USE CODE: SKILLBUILDER 👇

Carly offer for Skill Builder viewers