HEAT PUMPS EXPLAINED
Roger rants about air source heat pump disadvantages, the green homes grant, types of heat pumps and asks are heat pumps worth it?
Another quick tip or two with Roger and Dan, a quick preview of an exciting new woodworking project coming up on Skill Builder soon.
Snickers Workwear = Comfort = Wellbeing and Improved Performance.
Combining hi-tech fabric technology with verifiable sustainability, Snickers Workwear delivers market-leading workwear solutions for a wide range of working environments and weather conditions.
With organisations increasingly focused on environmentally responsible corporate activities, Snickers Workwear’s eco-friendly garment solutions could prove to be the right ‘sustainable choice’ for you and your business.
For example, with government legislation on the horizon, employing the Snickers Workwear garments made from recycled polyester, organic cotton and muelsing-free fabrics as well as the ‘100% Circularity’ in EMMA safety footwear, will deliver peace of mind and compliance in an increasingly demanding corporate world.
This socially responsible approach to kitting out a workforce is complimented by the brands’ well-established hallmarks of comfort and functionality.
They’re delivered through the use of stretch fabrics and a comprehensive sizing system which ensures that whatever the size of your workforce, there’s a product to fit each individual perfectly – for improved wellbeing and performance at work.
Roger’s favourite plastering tools, check out the links…
🛒 Ox Speedskim Flexible: https://amzn.to/36D8Tbs
TROWELS
🛒 Spear & Jackson Stainless Steel: https://amzn.to/3xGhG8A
🛒 Marshalltown PB145D Pre Worn: https://amzn.to/2VH5OFf
🛒 Ox Pro Series: https://amzn.to/3wE8bpc
🛒 Refina Superflex 16” 228196: https://amzn.to/3hzNgPD
🛒 Ragni R618S-16 Feather Edge: https://amzn.to/3wFgWiw
🛒 NELA MediFLEX: https://amzn.to/3i7ayeJ
🛒 NELA MAX System Set: https://amzn.to/3wGp0Qj
SQUEEGEES
🛒 12″ Marshalltown Squeegee: https://amzn.to/3bJgKY2
🛒 18″ Marshalltown Squeegee: https://amzn.to/2SgsEl7
🛒 22″ Marshalltown Squeegee: https://amzn.to/2RBPBiL
RETARDERS & ACCELERATORS
🛒 Extratime Plaster Retarder: https://amzn.to/3i7cKTv
🛒 Halftime Plaster Accelerator: https://amzn.to/3wHwFOd
🛒 Halftime 4bonding Accelerator: https://amzn.to/3kmjSOD
🛒 Halftime 4DRYLINING Accelerator: https://amzn.to/3r8OrbW
SOCKET COVERS
🛒 BeadMaster Rectangle Socket Cover: https://amzn.to/3wzjWNu
🛒 Safetyshield Disposable Sockitz: https://amzn.to/2TeeH8q
CHAPTERS
00:00 – Intro
00:20 – Speedskim
01:00 – Trowels
02:33 – Squeegee
03:33 – Magic Powder
04:55 – Sockets
Roger looks at Eco Joists and the micro cracking defect with flooring and ceiling construction when floors are walked across causing plasterboard ceiling cracks and creaks below.
CURA Homecare after-sales maintenance services to national housebuilders.
https://www.cura-home-care.co.uk/portfolio-item/micro-cracking/
In the UK, where the weather often tips towards the cooler side of the thermometer, the quest for a comfortably warm home extends right into the heart of our bathrooms.
Bathroom underfloor heating systems offer an efficient, evenly distributed warmth, turning what was once a chilly tile ordeal into a cosy, welcoming experience.
Water-based, or hydronic, underfloor heating systems circulate warm water through pipes beneath the floor. This system is often connected to the house’s central heating system, drawing heat from the boiler to warm the floor surface gently.
The appeal of water-based systems lies in their efficiency and the uniform distribution of heat they provide. They are particularly cost-effective in homes where the central heating system is used regularly, making them a popular choice in many UK homes.
One significant advantage of water-based systems is their compatibility with various heat sources, including standard gas boilers, biomass boilers, and even ground-source heat pumps. This versatility can be a boon for homeowners looking to reduce their carbon footprint or utilise renewable energy sources.
However, installing a water-based system can be more complex and intrusive. It often requires removing the existing floor and potentially raising the floor level, which might not suit every bathroom renovation project.
On the other hand, electric underfloor heating systems use electric wires or mats installed beneath the flooring to generate heat.
These systems are known for their quick and straightforward installation process, making them an attractive option for new builds and retrofit projects. Electric systems can be particularly beneficial for smaller bathrooms or spaces where installing a water-based system might not be practical.
The primary allure of electric underfloor heating lies in its simplicity and the speed with which it can heat a space. Unlike water-based systems, there’s no need to connect to a central heating system, making it an ideal choice for rooms that require independent temperature control.
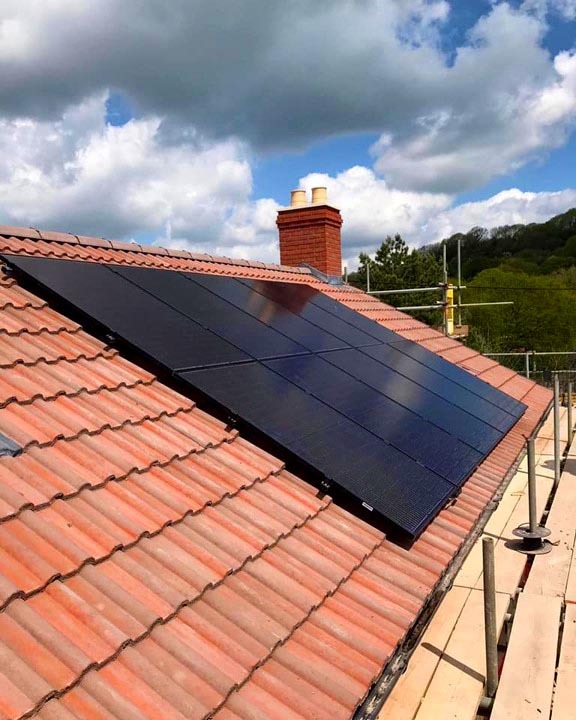
Additionally, electric systems often have a lower upfront cost than their water-based counterparts. However, depending on your electricity tariff and how often you use the heating, electric underfloor heating can be more expensive to run over time, unless you have a solar setup.
In the UK, the choice between water-based and electric bathroom underfloor heating systems largely depends on your specific needs, the scope of your project, and long-term running cost considerations.
Water-based systems are best suited to larger bathrooms and projects where the floor will be replaced. They offer efficient heating for those who already rely on their central heating.
Electric systems, with their ease of installation and quick heating times, are ideal for smaller bathrooms or as a supplementary heating source.
Bathroom underfloor heating systems add a luxurious touch to any UK home, providing warmth and comfort where it’s most appreciated without breaking the bank.
Whether you opt for a water-based or electric system, the end result is a cozy, inviting space that enhances your home’s overall comfort and value.
As with any home improvement project, it’s essential to consult professionals to determine the most suitable option for your specific circumstances, ensuring a warm and welcoming bathroom for years.
_______________________
▶ ProWarm ProGrid+ Heating System
▶ Dunlop LX-360 Fibre Leveller
▶ Dunlop CF-03 Flexible Fast Set Tile Adhesive
▶ Wooden Squeegee With Handle 600mm (24″)
_______________________
RELATED VIDEO LINKS
? How To Build An Extension series playlist: https://bit.ly/2LnUhG5
? How to Cut Hip Rafters: https://youtu.be/CmKZoPmROn8
? Ultimate Roofing Square: https://youtu.be/_TmXZ0cGNEI
? 6 Roofing Squares Compared: https://youtu.be/7qlQW3j6OIQ
? How to Make a Tusk Tenon Joint Like a Pro: https://youtu.be/osoItQj_blw
See more about underfloor heating on Skill Builder
How to look after your decking with Roxil Wood & Patio Cleaner and Wood Protection Cream.
Find more at Safeguard: https://www.safeguardeurope.com/products/roxil/roxil-wood-and-patio-cleaner
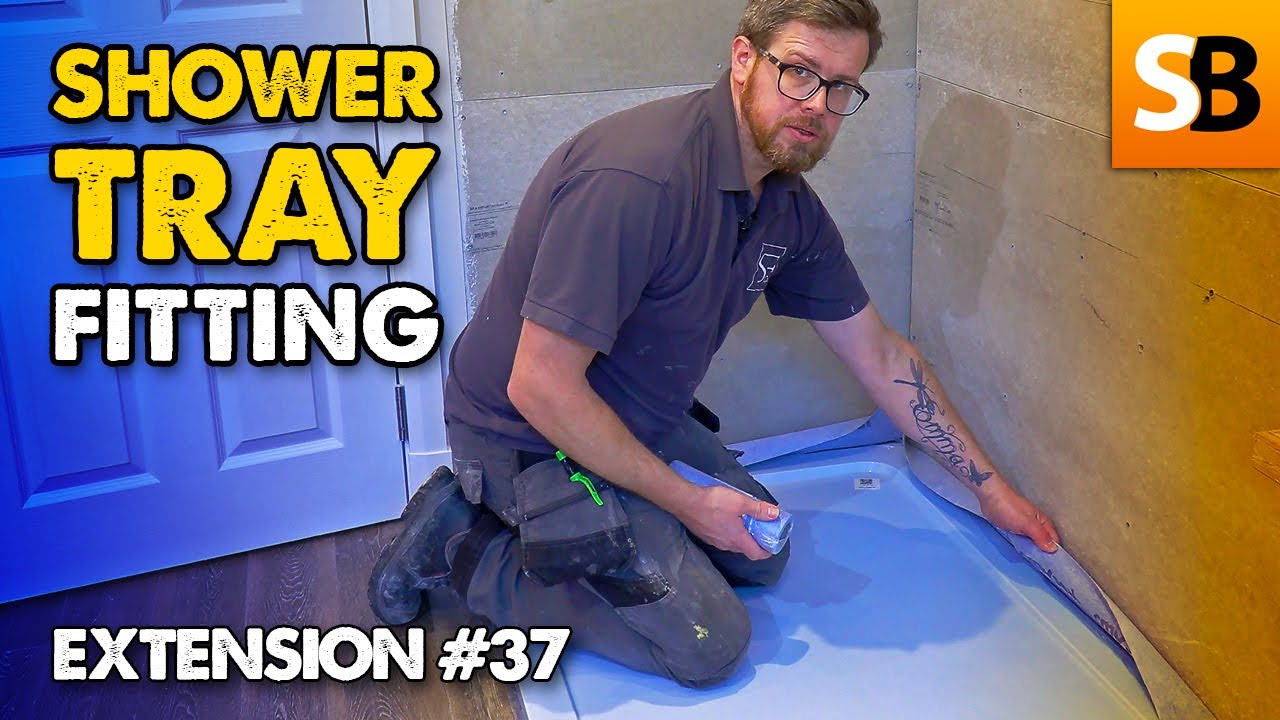
I went to look at a shower tray leak today. It was the usual story, a shower tray leak. The water was pouring out. The householder had been trying to solve the problem for months. He had even renewed the grout and silicone on the bottom three courses of tiles and still the water poured out onto his lovely oak floor.
For 15 years I was the DIY expert on a London Broadcasting show called The Fix-It Phone In, hosted by the talented Therese Birch, and we used to get asked the same shower tray leak questions week after week. The first thing people do when they get a leak around a tray is to squirt silicone all around the inside – big mistake. If there was a chance of finding out where the leak was coming from, the application of half a tube of silicone ruins that prospect at a stroke.
Despite the fact that someone had been busy with the silicone I could tell straight away where today’s leak was coming from, but one thing I have learned about fault-finding is to never assume. I always go through the basics regardless of hunches. Each possibility has to be eliminated by evidence, not by guesswork.
First I played the water all around the tray where it met the wall. No leak. Then I moved slowly up the wall. Still no leak. Then I aimed the spray into the corner where the shower screen wall profile meets the wall. Still no leak.
It is necessary when carrying out these tests to stand in the shower and it is also necessary to replicate the weight of the person who normally uses the shower. This can be difficult at times. I took my socks off so I could stand in the right position and then I gradually raised the height of the spray up the corner profile. Suddenly the water started pouring out from the back of the profile.
I knew immediately that the hollow profile had simply filled up with water. On every shower screen installation instruction sheet I have ever seen it says, “Do not seal around the inside of the shower screen.” But the reason is hardly ever explained. The frame or wall profile will fill up and it needs to leak into the tray. A DIYer could be forgiven for not knowing this and perhaps not reading the instructions but the silicone seal was applied by one of the growing band of silicone sealant specialists who ought to know better.
The guy who did this job had clearly never read the instructions on a shower screen installation but even if he had, the fact that he follows the plumber after the installation means he can never do the job properly.
There is an order in which things must be done.
The first job is to seal the tray against the wall. The second job is to tile. The third job is to grout and the fourth job is to apply the second run of silicone. Only then can you fit the profile to the wall, fit the surround panels and seal around the outside. If the job isn’t done in this order it is not just a possibility that it will leak, it is inevitable.
The fact that large housebuilders employ silicone specialists on all their properties explains why shower tray leaks remain the number one call back on new homes. It is a problem that has persisted for years and in this respect, the building industry remains stubbornly resistant to change.
Northern Building Plastics are a leading supplier of high-quality uPVC plastics and building products to the trade. They offer a wide range of products including; roofline, drainage, windows, doors, insulation, cladding, composite decking, sealants and consumables.
_______________________
RELATED VIDEO LINKS
🎬 How To Build An Extension series playlist: https://bit.ly/2LnUhG5
🎬 How to Cut Hip Rafters: https://youtu.be/CmKZoPmROn8
🎬 Ultimate Roofing Square: https://youtu.be/_TmXZ0cGNEI
🎬 6 Roofing Squares Compared: https://youtu.be/7qlQW3j6OIQ
🎬 How to Make a Tusk Tenon Joint Like a Pro: https://youtu.be/osoItQj_blw
_________________________________________________________________
Our thanks go to James and Ian of The Supreme Finishing Company.
◾ https://thesupremefinishingcompany.co.uk
◾ https://www.facebook.com/thesupremefinishingcompany
Getting your damp proof course (DPC) right first time is critical in preventing rising damp in your property.
If you don’t install it correctly you could end up having to put things right at a later date leading to major disruption and unnecessary costs.
So why not take a look at these 8 handy hints for installing horizontal damp proof course put together by our technical experts.
When do you need to use a stepped DPC?
If you are building on a sloping site you may need to install a stepped DPC. The DPC must be stepped in the masonry coursing so that it is never less than 150mm above the finished ground level as shown in the diagram below:
This article is from LABC Warranty, providing complete support for your structural warranty needs.
Since 2007 LABC Warranty has worked in partnership with Local Authority Building Control (LABC) to provide structural warranties. Their unique partnership with LABC means that together they can provide building control and warranties throughout England and Wales using the combined technical expertise of over 3,500 surveyors.
Flat roofs are popular among many homeowners in the UK because they are:
Despite the popularity of flat roofs, you may encounter some difficulties when you come to insure it. As these roofs are often made from felt, asphalt or other similar materials, insurers may have doubts about their durability compared to tiled, slate or EPDM roofs.
In reality, however, if you maintain your flat roof regularly, it can protect your property for around 50 years as long as they are properly installed.
Moreover, regular checks and maintenance will help you avoid:
The best time to carry out a check is during the spring and autumn months, or after a heavy storm or snowfall.
Many flat roofs are covered in felt, making them vulnerable to:
If your flat roof is showing any early signs of damage, you will need to arrange repairs as soon as possible. So, how can your leaking flat roof be repaired?
Here is some guidance on the variety of problems that can occur.
Splitting is a typical flat roof problem that occurs once cracks or tears appear on the felt or asphalt cover. When this happens, water may leak through the gaps, resulting in damage to your property due to dampness.
There are several reasons why splits can occur, including:
How can you determine whether your flat roof has splits?
You should check for signs of staining or dampness in the following areas:
How can you fix splitting?
Despite being called a ‘flat’ roof, certain sections may have slight slopes where water can collect when it rains. This is called ponding and it could indicate that you have a problem with your roof’s drainage system. If the indents are not repaired, the water may seep into your home.
As soon as you notice signs of ponding, you should clean the drains and guttering. Remove any leaves or other debris blocking the water’s path. If the ponding is not clearing, you may need to install:
You can also build up or re-lay the slope to prevent the water from collecting in the problem areas.
Don’t worry though, by regularly maintaining your flat roof, you will be able to spot the first signs of ponding. It is also easier to repair the damage if it is still only minor.
While ponding and splitting are caused by water, blisters are due to excessive heat. So, how does blistering occur? During the summer months, air becomes trapped between the felt and the felt substrate. Heat will then cause the air pocket to expand and contract. This continuous process can cause the material to burst or rupture. As a result, before long, rainwater or snow will be able to seep inside your home.
If the blisters are small, you can cut around the area until it is flat. Take care not to damage the layer under and around the blisters. Then:
You can extend the lifespan of your flat roof by carrying out maintenance work every five years. It also pays to check the roof twice a year, preferably during the spring and autumn months. This will help ensure that your flat roof does not suffer any damage during the hot summer or the cold winter. Here are some proactive steps you can take during your maintenance checks.
After a heavy storm or a bout of inclement weather, check your roof and ceilings for any signs of damage. Also, during the winter, try to remove thick layers of snow before it can cause any damage to your home.
“If you maintain your flat roof regularly, it can protect your property for around 50 years.”
The primary reason for the popularity of flat roofs is their affordability and easy maintenance. Although insurers are sometimes wary of providing protection against damage, flat roofs can actually last a long time. Nevertheless, it is imperative that the felt or asphalt material is installed correctly and properly maintained. The most common problems that can occur with flat roofs are splitting, bonding and blistering. Fortunately, regular checks and effort to maintain your flat roof, will enable minor repairs before any significant damage can be caused to your home.
He asks the question, is the future of construction robotic? or are other materials and techniques going to take us to the next level?
Find out more about SAM (Semi-Automated Mason) the bricklaying system designed and engineered to make the process safer and less physically demanding.
https://www.construction-robotics.com
Considering the aftermath of the Champlain Towers collapse in Miami, what can be done to prevent future disasters?
⬇ RELATED VIDEO LINKS ⬇
🎬 Failing Building Materials: https://youtu.be/UiQNf9k795g
🎬 Cowboy Builders Rant: https://youtu.be/auZSQxJ_Dso
Morandi Bridge image by mattiarainieri0
https://bit.ly/3qw955o
Work Gloves for Healthy Hands that deliver Precision and Protection.
Snickers Workwear now has an extensive collection of Work Glove styles in a wide range of sizes, developed for different workplaces and tasks – designed for dexterity, durability, comfort and precision.
With advanced features and material combinations, there’s something to suit a wide variety of trades, and workplaces, weather conditions and hazardous environments.
Added to which the advanced ergonomic designs ensure strong, secure grips while sophisticated patterns, vents and ribs combined with durable materials deliver cut-protection, ventilation, waterproofing and insulation.
What’s more, for specialist use where health and safety standards are key requirements, the Gloves are EN certified for performance and protection in hazardous and foul weather environments.
Getting more information on the Snickers Workwear Gloves Range is easy. You can call the Helpline on 01484 854788; check out snickersworkwear.co.uk/products/109 and download a digital catalogue or email sales@hultaforsgroup.co.uk
Acoustic Consultants, KP Acoustics, is restructuring its business. The acoustic consultancy will now sit within the holding group, KP Acoustics Group, which also includes KP Monitoring and KP Acoustics Research Labs. The company is now in the unique position of being the only acoustic consultancy that possesses its own Research and Development capability in-house.
KP Acoustics has been growing. The consultancy is now one of three divisions within KP Acoustics Group. In an industry first, the new formation is launching its own R&D division. KP Acoustics Research Labs has recruited two experienced academics to lead this exciting new project.
The Research Labs already has an exciting array of proposals lined up. These include projects on noise emissions from drones and electric vehicles, virtual and augmented reality, and the possible use of hearing tests for improved dementia screening.
The team will be building relationships with both public and private sector organisations to pursue multiple streams of research. According to Dr Kyriakos Papanagiotou, founder and director of KP Acoustics, the academics will be the company’s ‘‘imagineers,’’ combining scientific expertise with imaginative curiosity as they help push the boundaries of existing research.
The Research Labs will also allow the company to offer its own bespoke courses. Whether it is for recent engineering graduates or professionals who have been working in the acoustics industry for many years, the team will be able to tailor its expertise and resources to deliver new and innovative courses on acoustics, no matter how specialised.
While KP Acoustics will continue offering the full range of acoustic consultancy services, a separate division has also been created for the group’s monitoring products and services. KP Monitoring will focus on the growing range of monitoring services and products the company can offer for noise monitoring, vibration monitoring and dust monitoring.
‘‘Synergy has always been a central part of our ethos,’’ explained Dr Kyriakos Papanagiotou, director of KP Acoustics. ‘‘With this restructuring and the creation of our own Research Labs, we are demonstrating the value of a synergetic relationship between business and academia, bringing the best of both together.’’
“We can continue to offer the full range of acoustics services through KP Acoustics, while our new monitoring division will soon have an exciting new product to launch that we believe will be the gold standard in noise and vibration monitoring. These are definitely exciting times.’’
KP Acoustics Group is the first acoustics formation to offer its own R&D capability in-house. Dr Kyriakos Papanagiotou is available for interview and can be contacted via info@kpacoustics.com
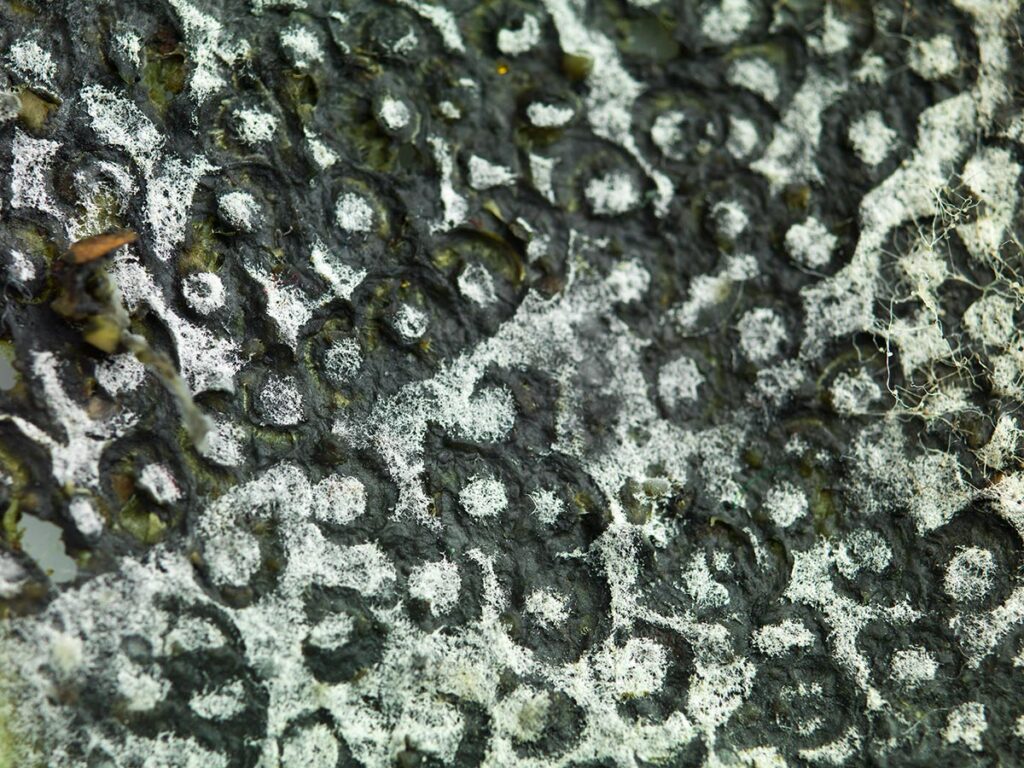
Humidity is the presence of moisture in the air, and it can lead to a myriad of issues in your home. Mould and mildew growth is much more prevalent in homes with high humidity levels or improper moisture control. When the humidity levels are too high, it can cause many health concerns, including allergies, asthma, and other respiratory issues. Certain types of mould can even be fatal or cause long-term, chronic health problems. If you live in a region with high humidity, this guide will show you how to remove the humidity from your furniture, textiles, and more. This guide will also tell you how to get the moisture in your home under control so you can breathe easily.
How to identify humidity in your home
Before you can remove excess humidity, you need to recognize when levels get too high. Humidity levels can vary depending on where you live, current weather conditions, and how much ventilation you have. Ideally, the Consumer Product Safety Commission recommends a humidity level between 30 and 50 per cent. Comparatively, the EPA recommends levels between 30 and 60 per cent to reduce or prevent the growth of mould and mildew. If you are having trouble breathing or you’re sweating indoors even with the air conditioner on, your home humidity levels may be too high. If you’re having difficulty determining the humidity level in your home, a hydrometer can help. This device measures moisture levels in the air. You can find one easily online or at many home improvement stores to monitor the status indoors. You can also always contact a local inspector for a professional opinion.
How to remove mould and mildew from furniture
Too much humidity can cause your furniture to accumulate mould, mildew, and musty odours. Here are some tips to help you remove it.
Wood furniture. Wood and other hard surfaces can be cleaned much more easily than fabric. Clean your wood furniture by using a vacuum with a HEPA filter to eliminate any mould sitting on the surface, and always wear goggles, gloves, and a mask to avoid touching it or breathing it in. Wipe down the wood using a mixture of ¼ cup of bleach and one gallon of water with a non-abrasive scrubbing sponge or tool. Let the wood dry, then place it outdoors in the sun to dry completely.
Leather furniture. Removing mould from leather surfaces will release the spores into the air. Take your leather furniture outside on a dry, sunny day and wear eye protection, gloves, and a facemask. Using a stiff plastic brush, scrape off any mould or mildew that you can see. Next, wipe the furniture down using one part water and one part denatured alcohol. You can also treat the furniture with a leather-safe fungicide. Make sure everything is thoroughly dry before bringing it back indoors.
Knowing when to clean or when to dispose of furniture. There may be some situations where your furniture can’t be salvaged. Upholstery and foam can hold onto mould particles, and they’re often impossible to remove. Upholstered furniture with visible damage is not likely able to be saved. If you want to keep the furniture frame, consider having it re-cushioned and reupholstered by a furniture restoration professional. Plastic, glass, metal, wood, and leather furniture have a much better chance of being adequately cleaned and salvaged than fabric.
How to clean other surfaces, rooms, and household items
Other than your furniture, you’ll need to remove mould, mildew, and moisture from textiles and various spaces in your home.
Removing musty odours. Too much humidity and moisture can create an unpleasant musty odour in your home. Diluted bleach is a good way to remove unpleasant odours from hard surfaces. Make sure all surfaces are bleach-safe first so that it doesn’t cause discolouration or damage. Wash curtains and fabrics by soaking them in bleach for thirty minutes, then use your washing machine’s regular cycle on the hot water setting. Place them in the dryer immediately and use dryer sheets to freshen them up. A mixture of plain white vinegar and baking soda is another DIY household cleaner that can easily remove musty odours and mildew safely from materials like wood and tile.
Bathroom grout. To get rid of mould and mildew from bathroom grout, use a stiff-bristled brush and scrub it away with a mixture of distilled vinegar and baking soda. You can also use hot water, hydrogen peroxide, or Borax to get rid of stubborn mould on grout.
Household items. If mould or mildew isn’t too bad, you can remove it from mattresses with a mixture of rubbing alcohol and warm water. Vacuum the mattress, then scrub it away in a circular motion. Rinse it clean and allow the mattress to dry completely before using it. Even books can be affected by mould. To remove it, use a fine brush, soft cloth, or vacuum to wipe it away. Denatured alcohol dipped in a soft cloth can kill mildew on paperback books, but always make sure that wet books are entirely dried before removing the mould.
Walls and closets. Mould spreads quickly, so it’s likely affecting your walls and inside your closets. Mix Borax, distilled white vinegar, and water in a spray bottle for an easy DIY method that will make removing mould easy. Simply spray the walls or closet shelves with the mixture and scrub immediately with a clean cloth or soft brush.
Kitchen pantries, laundry room cabinets, and cupboards. Dark, damp areas are a magnet for mould and mildew. Remove everything from your pantry or cabinets before you begin cleaning. If you see anything that has been contaminated, it’s best to throw it away to prevent illness. Try a commercial cleaner specially formulated to kill and remove mould spores. You can also mix bleach or hydrogen peroxide with water to scrub it away. Repeat the process once more and dry it before putting food and cooking items back into the pantry or kitchen cabinets.
Hidden areas. Moisture and mould can lurk behind your furniture, in corners of the room, and under the windows. Follow one of the methods listed previously to clean these hard-to-reach areas. The key is to quickly identify areas where mould and dampness are present before it gets out of control.
DIY tips for easy fixes. If you notice mould or mildew, mixing vinegar and baking soda to make a household cleaner is a quick DIY fix. You can also remove mould by juicing a few lemons to make a DIY cleaner. Lemons break mould spores down and leave a pleasant scent behind. Let the lemon juice sit for five minutes, then gently wipe the area clean with a dry, soft cloth or stiff brush depending on the severity of the mould.
What to do to prevent it
Prevention is critical when it comes to removing humidity and getting better moisture control in your home. Here are some prevention tips to help you keep excess moisture at bay.
Vent your home properly. Make sure that your attic, basement, or crawlspace has ample ventilation. Bathrooms should also be adequately ventilated, and fans should be used whenever you bathe or shower.
Consider a dehumidifier. If humidity levels are too high, a dehumidifier can help to bring them back down. There are many types of dehumidifiers to choose from. They range from desktop models to whole-home solutions. Especially useful if you live in an area where humidity is practically uncontrollable.
Chemicals that absorb moisture. Some chemicals can absorb moisture in damp areas like a basement, kitchen, or bathroom. Silica, clay absorbers, and calcium chloride are all excellent options. Most are safe as long as they’re stored away from pets and children.
More prevention tips. An excellent way to reduce humidity levels is to keep the air in your home moving. Install ceiling fans in the home and keep your windows open on days when outdoor humidity levels are low. Prevent condensation from building up on windows and in the bathroom to control humidity and mould growth.
DIY vs calling the experts. In most cases, you can remove mould and mildew yourself if it’s not too severe. However, if you suspect the presence of black mould or if the mould growth is too robust, it’s time to call in the experts for help.
Preventing moisture when living in humid climates. States like Florida have exceptionally humid climates. If you live in a primarily humid region, ensure that your home is well-ventilated and that your plumbing is in good condition. Leaking pipes can cause humidity levels to rise. A quality air conditioning system can keep your home cool and keep mould growth from occurring.
A few simple preventative measures can help you get the best moisture control in your home. Know how to recognize the signs of high humidity and mould growth so you can stop it before it gets out of control. With a few simple cleaning tips and some regular monitoring, it’s easy to live in a home that’s safe, dry, and free from mould and mildew.
Originally Posted on Porch.com
Roger and James are making sure we have a completely waterproof shower.
_______________________
RELATED VIDEO LINKS
🎬 How To Build An Extension series playlist: https://bit.ly/2LnUhG5
🎬 How to Cut Hip Rafters: https://youtu.be/CmKZoPmROn8
🎬 Ultimate Roofing Square: https://youtu.be/_TmXZ0cGNEI
🎬 6 Roofing Squares Compared: https://youtu.be/7qlQW3j6OIQ
🎬 How to Make a Tusk Tenon Joint Like a Pro: https://youtu.be/osoItQj_blw
_________________________________________________________________
Our thanks go to James and Ian of The Supreme Finishing Company.
◾ https://thesupremefinishingcompany.co.uk
◾ https://www.facebook.com/thesupremefinishingcompany
Is spray-applied plaster a practical alternative to traditional plastering for walls and ceilings?
Knauf Airless Finish Light
▶ https://www.knauf.co.uk/store/airless-finish-light/c-23/p-584
Send us your 2-minute tip
▶ https://skill-builder.uk/tip
WIN A FORGEFAST ORGANISER PRO 1000-PIECE WOOD SCREW KIT
https://www.forgefastelite.com
Roger has a problem with his 2016 Vauxhall Vivaro 2900 1.6 CDTI Van clutch, and he’s hoping the SB community will help with finding a solution.
Send us your tip ▶ https://skill-builder.uk/tip
WIN A FORGEFAST ORGANISER PRO 1000-PIECE WOOD SCREW KIT
https://www.forgefastelite.com
The Vivaro clutch pedal stays down and will not return without being pulled.
Ian is back to help James with fitting the aluminium doors & windows.
🛒 Pica Dry Longlife Automatic Pen: https://amzn.to/3yVTQqm
🛒 Pica 150/46 Deep Hole Ink Marker: https://amzn.to/3fKOsP9
_______________________
RELATED VIDEO LINKS
🎬 How To Build An Extension series playlist: https://bit.ly/2LnUhG5
🎬 How to Cut Hip Rafters: https://youtu.be/CmKZoPmROn8
🎬 Ultimate Roofing Square: https://youtu.be/_TmXZ0cGNEI
🎬 6 Roofing Squares Compared: https://youtu.be/7qlQW3j6OIQ
🎬 How to Make a Tusk Tenon Joint Like a Pro: https://youtu.be/osoItQj_blw
_________________________________________________________________
Our thanks go to James and Ian of The Supreme Finishing Company.
◾ https://thesupremefinishingcompany.co.uk
◾ https://www.facebook.com/thesupremefinishingcompany