The biggest of Solar panel myths – Britain is simply too cloudy for rooftop solar has been around for years, but it is gradually losing ground. A 2026 consumer survey found that just 2% of people now believe there is “no point” having solar in the UK, compared with 9.6% in 2025. Separate YouGov research found that 62% of adults believed panels were effective at generating energy, although around a third remained unsure or unconvinced.
For homeowners considering solar, the bigger concerns now appear to be cost and confidence in the installation itself. Solar specialists at Recharge Renewable reviewed current consumer research alongside independent guidance on costs, output and installation to examine some of the most persistent Solar Panel Myths.
Cloudy weather remains one of the biggest misconceptions. Solar PV works with light rather than heat, so panels continue generating electricity on overcast days. Cloud, shorter winter days and weaker light will reduce output, but a grey sky does not mean a solar system suddenly stops producing electricity.
This sits alongside rapid growth in home renewable technology. MCS reported that UK homes installed a certified small-scale renewable system at a rate of one every 90 seconds during 2025, an increase of 34% on the previous year.
Solar Panel Myths Versus The Reality Of Your Property
National averages only tell part of the story. Whether solar works financially and practically depends on the individual property. A proper assessment should consider location, roof direction and pitch, shading from trees and chimneys, usable roof space and when the household actually consumes electricity.
A solar specialist at Recharge Renewable explained: “Solar PV uses light rather than heat, so a grey day does not mean generation stops. A cool, bright day can still be productive, but no installer should pretend cloud and winter make no difference.”
Cost is another area surrounded by Solar Panel Myths. Current independent guidance puts a typical system at around £6,100, with payback commonly estimated at around 10 to 12 years and potentially as little as nine years in favourable circumstances. Actual performance will depend on the property, system size, household electricity use and export payments.
Panels are not completely maintenance-free either. Current guidance suggests a solar system can last around 25 years with appropriate care, while the inverter will commonly need replacing after around 10 to 12 years. A typical inverter replacement can cost roughly £800, depending on the manufacturer and size of the system.
10 Common Solar Panel Myths And Misconceptions
Some claims about solar contain an element of truth but become misleading when applied to every home. The review identified ten recurring misconceptions:
The electricity generated can never repay the purchase and installation cost.
A solar system is permanently tied to one property and can never be relocated.
Fitting panels will inevitably damage the roof.
Solar is only worthwhile when spare electricity is sold to the grid.
Panels need uninterrupted direct sunshine to produce electricity.
Adding solar automatically increases buildings insurance premiums.
Solar electricity cannot be used after dark, so all night-time power must come from the grid.
Panels become obsolete before homeowners recover their investment.
Only a due-south roof can produce worthwhile results.
A household solar system is too difficult to install or manage.
A correctly installed system should not damage a sound roof, although poor workmanship or an unsuitable roof can cause problems. Independent guidance recommends choosing an MCS-certified installer and obtaining at least three quotes, while a standard installation will usually take one or two days.
Getting Past The Solar Panel Myths
Trust in the installation industry remains an issue. In YouGov research, 61% of adults expressed concerns about the reliability of solar installation offers and quotes, while 36% said dependable independent advice would make them more likely to consider panels.
Selling surplus electricity through the Smart Export Guarantee can improve the financial return, but exporting electricity is not the only benefit. Power used directly in the home reduces the amount bought from the grid, while battery storage can save daytime generation for use later.
The question, then, is not simply whether solar “works in Britain”. It does. The more useful question is whether it works for a particular house, roof and household. Getting beyond the Solar Panel Myths means looking at realistic annual generation, installation quality, electricity use and long-term costs rather than judging a system by a perfect summer day – or a typically grey British one.
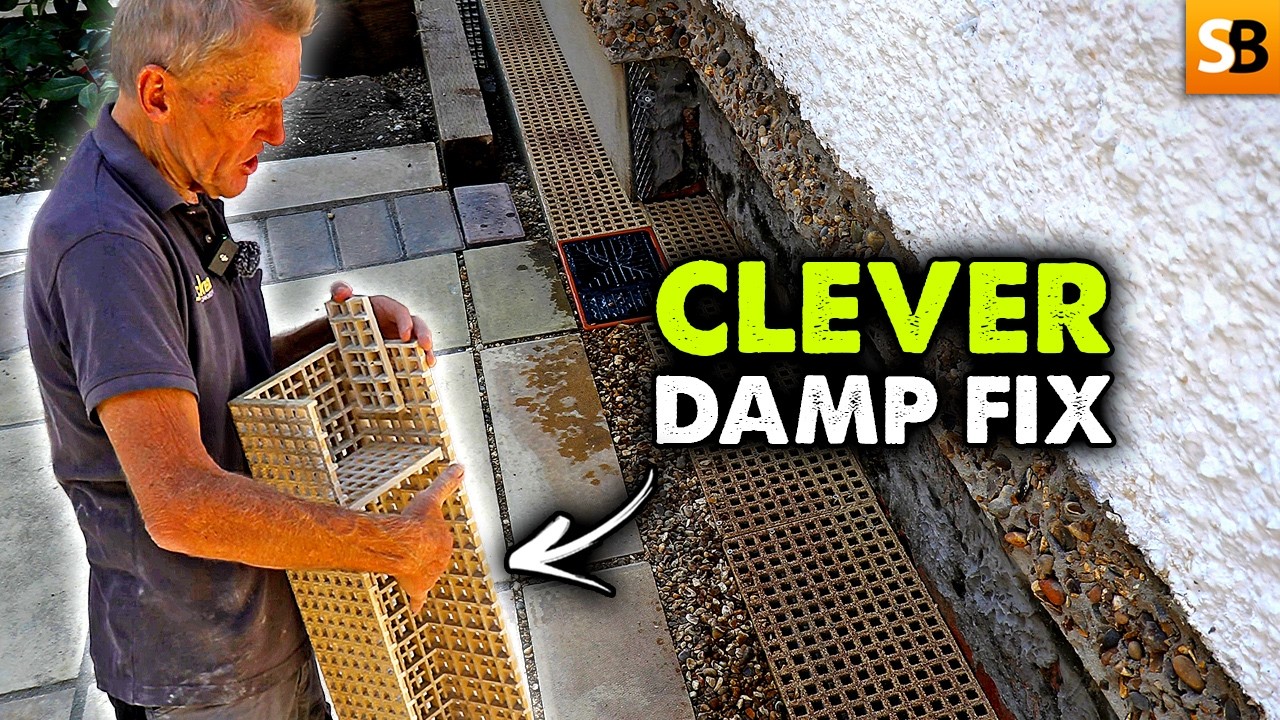
Damp proofing a 16th century flint cottage starts with proving where the water is actually going, not guessing at the wall in front of you.
The damp in this lounge was never one fault. A gully in the corner was taking the roof water and looking like it drained away when it didn’t, external ground level sits six courses above the internal floor, the slab had no membrane under it and barely half an inch of screed over bare mud, and the whole outside of the building had been painted for decades so nothing could dry outwards.
Roger Bisby is back with Robert from Tiffin, the 330 year old restoration and damp proofing firm, walking through a full specification on a listed flint cottage. Drainage survey first, then air drain, tanking, Dryrods, a properly built floor, lime repointing and paint removal outside, and an eaves detail rebuilt from scratch. It is a masterclass in why a damp fix on an old building is a system, not a product.
– Prove where every downpipe and gully actually discharges before you spend a penny on the wall, because a blocked or unconnected gully will beat any damp proofing system you put in front of it.
– Where external ground sits above internal floor level, the floor build up and the wall treatment have to be designed together or you just move the problem along the wall.
– Stick to one manufacturer’s system throughout, because the products are designed to work with each other and mixing systems on an old building is where the failures come from.
– A sand and cement parge coat would seal this wall shut, so on a saturated old building you stay vapour open and let the moisture leave through the outside face instead.
– Sand and cement with a waterproofer often carries salts, and those salts migrate through to give you white efflorescence over an otherwise perfect job.
– Paint on old masonry traps moisture behind it, which is why the paint came off this cottage before any pointing work started.
CHAPTERS
00:00 A cottage with a very long snagging list
01:01 The corner gully and why the ground level matters
01:37 Full drainage survey: prove, don’t assume
02:34 Inside the lounge, six courses below outside ground
03:39 Why the whole system has to stay vapour open
04:02 Parge coat, spatter coat and tanking slurry in order
05:29 Renovation plaster and the hi-lime finish
05:40 Sand and cement, waterproofers and salt problems
06:07 The new floor: insulation, membrane and three coats of bitumen
07:09 Floor covering, radiators and chasing for electrics
08:07 Dryrods set below the air drain level
08:42 Bitumen dressed up the brickwork
09:46 Stripping the outside paint so the wall can dry outwards
10:18 Damp climbing above the magic metre line
10:41 Fibrous brickwork and stainless helical bars
11:17 Why a physical damp proof course is impossible in flint
12:37 Embedded bonding timbers and how they rot
13:17 Why the bricklayer knew every trade that followed
14:13 Outside: raking out and repointing in lime
15:12 Why all the paint had to come off first
15:46 The plinth and where the air drain goes
16:35 The oak porch and what gets rebuilt
17:38 Cast iron effect rainwater goods
17:47 Every skip tells a story
18:35 Deep flow gutters and the missing eaves felt
19:25 Insulating the eaves: the duvet effect
19:46 Ventilation over the top of the insulation
20:26 New build corner: the DPC one course off the ground
21:06 Splashback on a southwest facing corner
21:47 Stormdry and the air drain working together
22:53 Dry walls are warm walls, and how long drying takes
23:44 All masonry is draughty
24:21 The wet garage question
25:11 Cavity wall insulation guarantees and their caveats
Solar panels are now a familiar sight on UK homes, but understanding whether you need Planning Permission for Solar Panels can still cause confusion before an installer reaches the roof. For most ordinary domestic installations, a full planning application will not be necessary, although the location of the property, position of the panels and individual planning rules can change that answer.
For homeowners, leaseholders and anyone responsible for a property, the question is not simply whether panels will physically fit. Roof design, building status, conservation restrictions, ownership arrangements and even the part of the UK in which you live can determine whether additional consent is required.
Solar installation specialists at Recharge Renewable reviewed current guidance across England, Wales, Scotland and Northern Ireland, including the rules affecting rooftop installations, listed properties and ground-mounted systems.
Do You Need Planning Permission for Solar Panels?
For a standard domestic rooftop system, Planning Permission for Solar Panels will usually not be required where the installation qualifies as permitted development and meets all relevant conditions. However, the rules differ across the UK, while flats, leasehold properties, listed buildings and homes where permitted development rights have been restricted require additional checks.
A spokesperson for Recharge Renewable said: “An installer can flag warning signs such as a listed property, a flat-roof array, an unusual wall position or a larger garden system, but only the local planning authority can confirm whether permission or prior approval is required, and leaseholders should also obtain any consent required by their landlord, freeholder or management company.”
Planning Permission for Solar Panels Across the UK
In England, panels fitted to a pitched roof must not normally extend above the highest part of the roof, excluding the chimney, or project more than 200mm from the roof or wall. Equipment on a flat roof is limited to 600mm above the highest part and can require prior approval on designated Article 2(3) land.
Wales also generally permits rooftop solar on houses where panels remain below the ridgeline and project no more than 200mm. Different conditions apply to flat roofs, including requirements concerning the distance between panels and the external roof edge.
Scotland allows attached solar equipment to project up to one metre, although additional restrictions apply to certain principal or road-facing elevations in conservation areas and to listed buildings. Northern Ireland has separate requirements, including restrictions on projection and height and tighter controls where panels are visible from a road within conservation areas or World Heritage Sites.
Because these rules differ, homeowners should check the requirements applying specifically to their nation rather than assuming Planning Permission for Solar Panels works identically throughout the UK.
Listed Buildings, Conservation Areas and Ground-Mounted Panels
Listed buildings and scheduled monuments require particular care. Depending on the property and proposed installation, permitted development rights may not apply and listed building consent can be required separately from planning permission. Article 4 directions and conditions attached to previous planning decisions can also remove development rights that would otherwise exist.
If permitted development is unavailable, this does not necessarily prevent solar from being installed. A homeowner can submit an application for Planning Permission for Solar Panels, while changing the layout, using a less prominent roof slope or positioning panels on an outbuilding may reduce their visual impact.
Ground-mounted panels are another option where the roof is unsuitable, but these installations have separate limits. In England, permitted development normally covers only the first standalone array and imposes restrictions on its area, dimensions, height and distance from the property boundary. Wales and Scotland operate different siting and height requirements.
Building Regulations and Grid Connections
Obtaining Planning Permission for Solar Panels, or establishing that it is unnecessary, is only one part of the process. Roof-mounted installations will normally also be subject to building regulations or building standards covering issues such as structural loading and electrical safety. An installer registered with an appropriate Competent Person Scheme may be able to self-certify relevant work and provide the necessary compliance documentation.
Grid connection requirements are separate again. In Great Britain, qualifying smaller installations may use the G98 ‘connect and notify’ process, while systems falling under G99 generally require approval before connection. Installers commonly handle this paperwork, but homeowners should confirm which process applies and retain the documentation.
Can You Install Solar Panels Yourself?
DIY solar kits are available, but permitted development does not remove responsibilities surrounding structural safety, electrical work, Building Control or building standards and electricity-network requirements. Missing paperwork can also create difficulties when a property is eventually sold.
Before proceeding, homeowners should establish whether the property is listed or within a conservation area, check whether an Article 4 direction applies, confirm that the proposed height and position meet local requirements and obtain any necessary landlord or freeholder consent.
Ultimately, Planning Permission for Solar Panels is straightforward for many conventional domestic installations, but it should never simply be assumed. Checking the planning position, building requirements and grid connection process before work begins can prevent delays and expensive alterations later.
Sources: Planning Portal, Welsh Government, Scottish Government and mygov.scot, Northern Ireland legislation and NI Direct, Historic England, and UK Government energy-device registration guidance. Checked 11 August 2026.
More Solar Advice from Skill Builder
Thinking about installing solar panels or already have a system at home? Explore more practical solar advice from Skill Builder:
Solar Panel Fires Are Rising – Here’s Why A closer look at common solar PV fire risks, including poor connections, isolators, battery storage and the importance of ongoing safety checks.
How to build railway sleeper steps up a steep bank, from setting out the rise and run to the final decorative chippings.
The short answer is that good sleeper steps are mostly groundwork. Get the overall rise and run measured properly, bed every box on a weak concrete mix, pin it with rebar, then build up a compacted sub base in thin layers. Do that and the steps stay level for years.
The bank on this job was a struggle for the client to climb, so Sam set out a full flight of sleeper steps to make it easy. Each step is a U-shaped box made from spruce railway sleepers ripped down to 177mm, cut into 1200mm fronts with 600mm side pieces. From there it is excavation, levelling, bedding, pinning, membrane, sub base and fill, one step at a time up the slope.
KEY TAKEAWAYS
– Set a peg at the top landing point and use a long straight edge and level down to the ground, so you have an accurate overall run and rise before you work out how many steps you need and how deep they will be.
– Build each step as a U-shaped box from sleepers, with a 1200mm front and 600mm returns, so it can be positioned, levelled and fixed as a single unit.
– Bed every box on a weak concrete mix at roughly 10 parts ballast to 1 part cement, which gives a stable base while keeping a degree of flexibility that suits landscaping work.
– Check every sleeper for level before moving on, because small errors early in the build become far more obvious as the flight goes up the slope.
– Use timber screws and rebar pins together, the screws for the structural connection between sleepers and the pins to anchor the steps into the ground and resist movement.
– Wrap the construction in a woven geotextile membrane so weeds are held back but rainwater still drains freely through the structure.
– Add MOT type 1 in 50mm layers and compact each one before adding the next, building up to about 150mm, which greatly reduces the risk of settlement later.
– Treat the timber before it goes in, including the buried ends with bitumen paint, because those are the parts sitting in ground moisture and they decide how long the whole job lasts.
00:00 Setting out the rise and run
01:33 Cutting and building the sleeper boxes
02:17 Excavating the steps
03:13 Bedding onto a weak concrete mix
03:49 Rebar pins
04:48 Timber screws, countersinking and dowels
06:15 Setting each step in place
07:06 Geotextile membrane
08:33 MOT type 1 in compacted layers
09:01 Protecting the timber
09:37 Filling the steps with chippings
10:02 The retaining wall that got added later
12:45 The finished flight
Would you have gone with a retaining wall from the start, or waited to see if the bank moved? Let us know in the comments, and tell us what you would like to see us build next.
Cutting PIR board straight is harder than it looks, and the reason is that you are cutting from the wrong side. Roger meets Jody Baxter on site to look at SlideGuide, a telescopic track system that runs underneath the board rather than on top of it, so the jigsaw blade cannot wander and the cut comes out square through the full depth.
Anyone who has cut Celotex or Kingspan by hand knows the problem. You follow the line perfectly along the top, then you turn the board over and the other face has drifted off by 10mm or more. The blade flexes, the cut tapers, and on a roof or between studs that gap is the difference between a tight fit and a cold bridge stuffed with expanding foam.
Jody has been testing blades as well as guides, and the Bosch blade used here is the one giving the least dust so far, a fine tooth pattern closer to a metal cutting blade than a wood one. A longer version is in development that should produce no dust at all. Because the track mounts on the underside, blade length is not the limiting factor, only how straight the blade stays.
We also look at the SlideGuide Mini, a single track version that opens to 1300mm and has 45-degree bevels built into the wear strips, aimed squarely at roofers cutting into eaves, ridges and under layboards where the waste is enormous.
• Mounting the guide on the underside of the board is what stops the blade meandering, because the cut is referenced from the face the blade exits rather than the face you can see.
• A tapered cut is caused by blade flex, not by a shaky hand, so a straight edge laid on top of the board will never fully solve it.
• A fine tooth metal cutting blade throws far less dust than a coarse soft material blade when cutting PIR and sandwiched metal roofing panels.
• The standard opening is 1118mm between the clamp pads, and releasing the thumb screws lets the telescopic rails extend to take a full length board.
• The Mini version cuts 45 degree bevels, which is where roofers waste the most board, and the clamp pads rotate so they can be set at an angle for bevel work.
WATCH NEXT
[Insulated roof panels video link]
[Loft insulation video link]
00:00 The problem with cutting PIR board
00:19 How the underside track system works
00:30 Choosing the right jigsaw blade
00:47 A longer blade with no dust at all
01:00 Dave, the millimetre perfect tradesman
01:20 Setting the opening and the clamp pads
01:47 Trimming off the damaged edge
02:02 The 40mm track saw rail
02:28 Squaring the board up in the guide
03:07 Marking 355 at both ends
03:40 The finished edge
03:57 Fitting the board between the studs
04:02 SlideGuide Mini, the single track version
04:55 Cutting a 45 degree bevel
05:39 The result and the limits of the blade
06:05 Where to buy it and the MKM rollout
Have you found a way of cutting PIR board that actually holds a line? Tell us in the comments.
Why Your Home EV Charger Could Cost More Than Expected
For UK households, a home EV charger sold as an £800 to £1,200 standard installation can end up costing more than £2,000 when the property falls outside an installer’s basic package. The increase in EV Charger Installation Cost usually comes from the route to the parking space or electrical work required inside the home, rather than the wallbox itself.
Home EV charging specialists at Recharge Renewable reviewed current UK installation benchmarks alongside government and electrical guidance, to identify five extras homeowners should ask about before accepting a quote. Energy Saving Trust puts a typical home ChargePoint installation at £800 to £1,200, while current market guides show that more complex installations can exceed £2,000.
The difference matters because headline installation prices are normally based on a defined set of conditions. A charger positioned close to a suitable consumer unit with an accessible cable route is one thing; an older property with a detached garage, long cable run or electrical work required before connection is another.
1. Longer Cable Routes Can Increase EV Charger Installation Cost
Standard installation packages commonly include a set amount of cable between the consumer unit and the charger, often around 10 metres. If the parking space is further away, the extra distance can increase both material and labour costs.
Current 2026 guides put additional cable at roughly £10 to £20 per metre beyond the standard allowance. The price can rise further where thicker cable is required or the route involves difficult access, drilling, containment or additional work through the building.
The physical distance is not always the only issue. A cable may need to pass around the outside of a property, through a garage or utility space, or follow a route that protects both the installation and the appearance of the building. Two homes requiring the same charger can therefore produce very different quotations simply because of where the consumer unit and parking space are located.
Before accepting a price, homeowners should ask how much cable is included and whether the proposed route is covered by the standard installation charge.
2. Trenching and Reinstatement Can Add Hundreds
Where the charger is fitted to the house or an attached garage, the cable may be installed without major groundworks. A detached garage, separate parking area or charger located away from the building can be more involved, because the electrical supply may need to cross a garden, path or driveway.
Published estimates put common groundworks at around £200 to £500. Checkatrade lists soft-ground trenching at approximately £30 per metre and a typical £300 minimum for digger hire.
The surface above the cable also needs to be considered. Digging through soil is very different from crossing block paving, concrete or an established driveway. Once the cable has been installed, disturbed surfaces may need to be reinstated, and that work is not necessarily included in the installer’s headline price.
For that reason, any quote involving buried cable should state who is responsible for excavation and making good afterwards. A lower EV Charger Installation Cost can quickly become less attractive if substantial groundworks have simply been excluded from the initial figure.
3. Consumer Unit Work May Be Required
A modern consumer unit with suitable protection and enough capacity may not require major alteration before a dedicated EV charger circuit is added. Older or already full units can present a different situation.
An EV charger introduces a significant new electrical load, so the existing installation needs to be assessed before connection. If the consumer unit is unsuitable, full or requires upgrading, that work can add hundreds of pounds to the project.
Current guides place consumer unit replacement work at roughly £300 to £800, depending on the board, specification and extent of the work required.
This does not mean that installing an EV charger automatically means replacing the consumer unit. In many homes it will not be necessary. What matters is that its condition and available capacity are assessed before the customer is given a final price.
A quote based solely on the cost of mounting the charger and running cable can therefore give an incomplete picture of the eventual EV Charger Installation Cost.
4. Load Management or Supply Upgrades
The additional charging load also has to fit within the electrical capacity available to the property. An installer needs to consider the home’s existing demand alongside the proposed EV charger, particularly where other high-demand electrical equipment is already installed.
Load management can help where available capacity is limited. These systems monitor demand within the property and can reduce the charger’s power when necessary, preventing the overall load from exceeding the available supply.
Some EV chargers already include load limiting or related technology, while others may require additional equipment. The quote should make clear which features are built into the charger and which are being supplied separately.
In less common cases, the incoming electrical supply itself may require alteration. IET guidance notes that EV charging can require load curtailment, an additional supply or another phase depending on the circumstances, while current cost guidance estimates that significant main-supply or capacity upgrades can add around £500 to £2,000.
These are not routine charges for every installation, but they illustrate why the electrical survey is an important part of establishing an accurate price.
5. Safety and Remedial Electrical Work
A home EV charger needs the correct circuit protection and earthing arrangement. Existing electrical defects or missing protective equipment may therefore have to be addressed before the charger can be connected.
Some modern chargers incorporate features such as open PEN protection within the unit. Where those protections are not built in, additional equipment may be necessary.
An isolator can also form part of the work. Checkatrade estimates a new isolator at around £100 to £200, while the cost of wider remedial work depends entirely on the condition of the property’s electrical installation.
Again, these costs do not apply universally. The installer should identify what protection is already provided by the charger, what the existing installation provides and whether anything else is required to make the installation compliant and safe.
A residential EV charging point installed beside a driveway for convenient home charging.
What Should A Standard EV Charger Quote Cover?
A standard package may include the charger, wall fixing, a defined amount of surface-mounted cabling, connection and circuit protection, testing, certification and DNO notification. Groundworks, unusually long cable routes, electrical upgrades and reinstatement are commonly outside that scope, although definitions vary between installers.
That variation makes comparing the headline EV Charger Installation Cost alone unreliable. One installer may include more cable, protection or administrative work than another, meaning a slightly higher initial quote could represent better value once every required element is taken into account.
With the final price driven heavily by the property’s cable route and electrical capacity, the survey should establish exclusions before the customer accepts the figure.
Recharge Renewable recommends asking the installer to state how much cable is included, whether disturbed surfaces will be reinstated, and whether load limiting, electrical protection, DNO paperwork and certification sit inside the quoted price. If the survey identifies extra work, each item should have its own cost and explanation so that competing quotes can be compared like for like.
How To Compare Home EV Charger Quotes
Homeowners should first make sure they are comparing the same charger power, model and tethered or untethered arrangement. They should then confirm the included cable length, proposed route and whether drilling, trenching or making good is covered.
The quote should also identify any consumer unit work, isolator, load management or remedial electrical work. VAT, electrical certification, DNO administration and warranties should be clearly shown rather than left as assumptions.
Grant eligibility and property permissions are worth checking before installation as well. Renters, leaseholders and people living in flats may need approval from a landlord, freeholder or managing agent before work can begin.
Government Support For EV Charger Installation Cost
From 1 April 2026, eligible renters and flat owners can receive 75% of purchase and installation costs up to £500, provided they meet the scheme rules and use an OZEV-authorised installer.
Households relying on on-street parking have a separate grant of up to £500 for an approved cross-pavement solution. An owner-occupier living in a house with private off-street parking cannot use the renters and flat owners scheme.
The grants are scheduled to run until 31 March 2027, so anyone considering an installation should check the latest eligibility requirements before relying on grant funding as part of their budget.
DNO Involvement And Home EV Charging
DNO involvement is a connection process and should not automatically be treated as a paid extra.
The Institution of Engineering and Technology states that if the whole property’s maximum demand remains below 13.8 kVA after installation, the Energy Networks Association must be notified within one month. Where demand exceeds that level, the DNO needs to be contacted before connection.
The installer should explain which route applies to the property and clearly itemise any network or supply work that genuinely carries an additional cost.
Understanding The Real EV Charger Installation Cost
The advertised price of a home charger is useful as a starting point, but it cannot account for every property. Cable distance, ground conditions, the existing consumer unit, available electrical capacity and remedial work can all change the final EV Charger Installation Cost.
These extras will not apply to every household. The important distinction is between work that is genuinely required by the property and work already covered by the installer’s standard package.
A detailed survey should establish that before the customer commits. Asking exactly what is included, what is excluded and why any additional work is necessary gives homeowners a far better basis for comparing quotes and reduces the risk of an £800 to £1,200 installation becoming a much more expensive job later.
As electric vehicles become a bigger part of everyday life..
Getting the charging setup right at home is only one part of the picture. Cost, range, charging time and how an EV performs in real working conditions all matter, particularly for tradespeople considering the switch. Skill Builder has also put an electric van to the test, looking at what it’s actually like to use one for day-to-day trade work and whether electric really makes sense on the road.
Solar panels are designed to be low-maintenance, but that does not mean they are completely maintenance-free.
Dust, bird droppings, leaves, pollen and lichen can gradually build up on the glass, reducing the amount of sunlight reaching the photovoltaic cells. For some households, particularly those with panels beneath trees or in dusty environments, that lost generation can translate into a surprisingly persistent cost.
But there is an important question homeowners should ask before reaching for the hose:
Is solar panel cleaning actually worth paying for?
At Recharge Renewable, the focus is not simply on keeping panels looking clean. With more than 20 years of experience in solar installation and aftercare, the team helps homeowners understand what affects solar performance and how to get the best long-term value from their system.
This guide explains how dirty solar panels can affect generation, how to spot genuine soiling losses, when cleaning makes financial sense and how to approach solar panel cleaning safely.
Can dirty solar panels reduce electricity generation?
Yes. Solar panels work by allowing sunlight to reach the cells beneath their glass surface. Anything that significantly obstructs that light can reduce the electricity the system generates.
This is known as soiling and can include:
Dust and airborne dirt
Bird droppings
Leaves and other plant debris
Pollen
Lichen and moss
Agricultural dust
Construction dust
Residue that collects along the lower edge of a panel
Not every dirty panel will suffer a significant performance loss. Light dust may be removed naturally by rainfall, while a stubborn deposit of bird mess or lichen can remain in place for much longer.
The Energy Saving Trust says solar panels generally require little maintenance and that rainfall can help keep roof-mounted panels clean, although homes exposed to trees, dust or bird droppings may need more frequent attention.
That distinction is important.
The aim should not be to clean solar panels simply because they are slightly dusty. The aim should be to identify when dirt is actually affecting performance.
How much money can dirty solar panels cost?
For a typical example, consider a 4kW domestic solar PV system generating around 3,800kWh of electricity a year.
Using the July 2026 Ofgem electricity price-cap rate of 26.11p per kWh, every unit of electricity that a household fails to generate may represent another unit that has to be purchased from the grid, assuming the household would otherwise have used that solar generation itself. Ofgem’s 26.11p figure applies to the average Direct Debit electricity unit rate under the price cap from 1 July to 30 September
The potential value of lost generation looks like this:
Estimated output lost to dirt
Electricity lost each year
Approximate value
3%
114kWh
£30
4%
152kWh
£40
5%
190kWh
£50
10%
380kWh
£99
15%
570kWh
£149
The calculation is straightforward: annual generation is multiplied by the percentage of output lost, then by the electricity unit rate.
So a 10% reduction in generation on a 3,800kWh system represents around 380kWh of lost electricity. At 26.11p per kWh, that is approximately £99 of electricity.
At 15%, the theoretical value approaches £149 a year.
These are illustrative figures rather than a guarantee of what any individual household will save. Actual generation varies according to the property’s location, roof orientation, pitch, shading, system design and weather.
There is another important consideration: self-consumption.
If a household exports a large proportion of its solar generation, the financial value of recovering that electricity will generally be lower than the cost of buying electricity from the grid. Export payments vary between tariffs, so homeowners should use their own import and export rates when calculating the potential return from cleaning.
Which homes are most likely to benefit from solar panel cleaning?
Some solar installations are naturally more exposed to soiling than others.
Recharge Renewable recommends homeowners pay particular attention if their panels are:
Beneath trees
Trees can create several problems at once. Leaves can settle on the panels, pollen can form a film over the glass and bird activity may increase around branches.
Leaves are particularly worth checking because they can become trapped along the bottom edge of panels, where rainfall may not remove them.
In areas with lots of bird activity
Bird droppings can create concentrated areas of obstruction rather than an even layer of dust.
A single small mark may have little practical effect, but persistent deposits across several panels deserve attention.
On shallow-pitched roofs
Panel angle influences how effectively rain can wash across the glass.
A shallow installation may be less effective at shedding accumulated material, particularly when deposits become sticky or embedded.
Near agricultural or construction activity
Dust from fields, roads and building work can settle on panels and may accumulate more quickly than ordinary household dirt.
Where lichen or moss is visible
Lichen is a different proposition from loose dust.
It can remain attached to the surface and create persistent areas of obstruction that ordinary rainfall is unlikely to remove.
How can you tell if solar panel cleaning is necessary?
This is where homeowners can avoid spending money unnecessarily.
Don’t judge your system on appearance alone.
A dirty-looking panel is not automatically an underperforming panel, and a sudden fall in generation does not automatically mean the panels need cleaning.
Instead, use two pieces of evidence:
1. Look at the panels.
From ground level, check for obvious deposits, particularly bird mess, leaves, lichen or areas of heavy dirt.
2. Check the performance.
Open your inverter or solar monitoring app and look at generation over several bright days.
A persistent reduction in output combined with visible soiling is a much stronger reason to investigate than either sign on its own.
One cloudy week is not enough evidence. Solar generation naturally changes with weather, season, shading and other conditions.
Recharge Renewable’s advice is simple: visible buildup and a lasting performance drop should point in the same direction before homeowners spend money on cleaning.
If generation suddenly falls or one section of the system appears to stop producing altogether, contact the installer or a qualified solar professional. The cause could be an inverter, wiring, monitoring or panel fault rather than dirt.
Does rain clean solar panels?
Sometimes – but not always.
Rain is useful at removing loose dust and surface debris, which is one reason solar panels generally do not require intensive routine maintenance. The Energy Saving Trust notes that rain can do a good job of keeping roof-mounted panels clean, particularly where panels are positioned at an effective angle.
However, rain is less effective against stubborn deposits.
Bird droppings, sticky pollen, lichen and material trapped around panel edges can remain even after repeated rainfall.
That is why “it rains a lot in the UK” does not necessarily mean every solar panel will stay clean.
The right question is not how much rain the property receives. It is whether the panels are visibly accumulating material and whether that accumulation is affecting performance.
Safe solar panel cleaning
Safety should come before efficiency.
Never climb onto your roof to clean solar panels
This is the most important rule.
Solar panels are usually installed in locations that are difficult and dangerous for homeowners to access. A relatively small improvement in electricity generation is not worth risking a fall.
For panels that can safely be reached from ground level – such as installations on a garage or single-storey extension – a homeowner may be able to carry out basic solar panel cleaning.
For anything on the main roof, professional cleaning is the safer option.
Use soft equipment
For safely accessible panels, use a soft brush on a telescopic pole.
Plain water is generally sufficient for light dirt. If necessary, a small amount of mild washing-up liquid can be used, followed by a thorough rinse with clean water.
Avoid anything abrasive that could scratch the glass or damage its surface.
Clean when the panels are cool
Early morning or evening is preferable.
Cleaning hot panels can cause water to dry quickly, potentially leaving streaks and mineral deposits. A significant temperature difference between cold water and very hot glass is also best avoided.
Never use aggressive cleaning equipment
Avoid:
Pressure washers
Abrasive pads
Metal scrapers
Harsh chemicals
Aggressive cleaning products
These can damage the panel surface, coatings, seals or frame.
If in doubt, check the panel manufacturer’s maintenance instructions or ask the original installer.
Is professional solar panel cleaning worth the cost?
This is ultimately a calculation rather than a rule.
The cost of professional solar panel cleaning varies according to the number of panels, roof accessibility, location and cleaning method. A whole domestic system may cost somewhere in the region of £80 to £150, although quotes can be higher or lower depending on the installation.
That means a homeowner should compare the cleaning quote with the realistic amount of generation they expect to recover.
For example, if cleaning costs £100 but the evidence suggests the system is only losing around £30 of useful electricity a year because of light soiling, the financial case is weak.
If the same £100 clean addresses heavy soiling that is plausibly costing close to £100 or more a year, the calculation looks very different.
This is why Recharge Renewable’s approach is about evidence rather than a fixed cleaning schedule.
A high-risk, heavily soiled array may benefit from professional attention. A clean-looking system in a rainy location may not.
How often should solar panels be cleaned?
There is no universal answer.
Some homes may benefit from occasional cleaning, while others can go much longer without intervention.
The Energy Saving Trust currently advises cleaning solar panels every 12–18 months, with more frequent attention where panels are exposed to dust, trees or bird droppings. It also stresses that roof-mounted panels can benefit from natural rainfall.
For homeowners, the most sensible approach is to combine that general guidance with the circumstances of the individual installation.
Ask:
Are there visible deposits?
Are leaves accumulating?
Is there lichen?
Are birds regularly fouling the panels?
Is the property near a dusty environment?
Does the monitoring data suggest a persistent performance issue?
Will the likely recovered generation justify the cleaning cost?
That gives you a much better answer than simply putting “solar panel cleaning” in the diary every year.
When should you call a solar professional?
Cleaning and fault diagnosis are not the same thing.
If the system’s performance changes gradually alongside visible dirt, cleaning may be a reasonable first consideration.
If output suddenly drops, one panel or section behaves differently from the rest, the inverter reports an error, or generation appears abnormal despite clean panels, contact the installer or a qualified professional.
Recharge Renewable has more than 20 years’ experience designing, installing and supporting solar PV systems, and provides aftercare alongside its installation services. The company is MCS accredited and also holds RECC, TrustMark, Quality Mark and NICEIC credentials.
That combination matters because the best solar advice is not simply about cleaning glass. It is about understanding the entire system and distinguishing normal variation from a genuine performance problem.
The bottom line: clean your solar panels when the evidence says to
Solar panel cleaning can be worthwhile, but it should not become another household chore performed simply because the calendar says so.
A little dust washed away by rain is unlikely to justify paying for a professional clean. Heavy bird mess, trapped leaves, lichen and persistent grime are different – particularly when monitoring data suggests that generation is suffering.
For homeowners, the best starting point is remarkably simple:
Look at the panels. Check the generation. Then calculate the potential saving before paying for cleaning.
And if the panels are difficult or dangerous to access, don’t take the risk yourself.
Recharge Renewable’s expertise is ultimately about helping homeowners get more from their renewable-energy investment, from the original system design and installation – through to understanding performance and keeping that investment working effectively for the long term.
For homeowners who are unsure whether their solar system is performing as it should, the sensible next step is to speak to an experienced renewable-energy specialist, rather than guessing.
A cleaner panel may generate more electricity. But knowing whether it needs cleaning in the first place is where the real saving begins.
More Solar Advice from Skill Builder
Want to learn more about looking after your solar installation and getting the most from renewable energy? Explore these related guides from Skill Builder:
Solar Panel Fires Are Rising – Here’s Why A closer look at the risks associated with solar PV systems and the steps homeowners can take to keep their installation safe.
Damp in an old house is almost never one problem. Roger Bisby walks through a 1900s renovation near Nottingham to work out where it is really coming from.
The short answer is that most of the moisture here is coming up from the ground rather than in through the walls. There is no damp-proof membrane under the floors, the clay subsoil is holding water even after weeks of heat, and hard sand and cement render is trapping whatever does get in. The cure is ventilation, a proper membrane lapped up the wall, and belt-and-braces damp-proofing rather than tearing out a damp-proof course that is still doing its job.
AJ went to auction on this place, watched it fail to sell, and bought a house that had stood empty for years. He is turning it into a multigenerational home for himself, his wife and his parents, with the old garage block becoming a self-contained side for mum and dad. Stripping out the ground floor turned up rotten skirtings, crumbling fireplace surrounds and a mystery black coating on one of the floors that turns out to be a piece of local building history.
• Dry rot draws moisture in from elsewhere with its roots, so cutting out the localised damage is not enough, whereas wet rot dies once you take the water away.
• If a house has an original slate or bitumen damp proof course, leave it alone. Drilling into it destroys it, so go above it or below it if you want to add chemical rods.
• Air bricks at the front only give you ventilation at the front. Without a matching route out the back you get no through flow under a suspended floor, and moisture just sits there.
• Clay subsoil holds water all year, which is why a floor with no damp proof membrane can still be visibly wet after a long dry spell.
• Strong sand and cement render with waterproofer in it does not solve damp, it just moves the problem into the wall and pushes the moisture somewhere else.
• Coal tar was used extensively as a damp-proof course and membrane material, and near an old colliery it is exactly what local builders would have had to hand.
• If you are fitting retrofit underfloor heating, get the drawings from the manufacturer and follow them to the letter. Ignoring them is where these jobs go wrong.
00:00 A 1900s house being turned into a multigenerational home
00:45 Dry rot or wet rot, and how to tell the difference
01:09 Suspended floor, solid floor and missing air bricks
01:40 The survey findings and no DPM under the fireplaces
01:56 Retrofit underfloor heating: gas now, heat pump later
02:45 The original damp proof course and why you must not drill it
03:20 How chemical damp rods actually work
03:57 Internal wall insulation on the external walls
04:43 Digging out the floor: clay, tiles and no membrane
05:24 Building a new slab the right way
05:55 Boiler position and following the underfloor heating drawings
06:39 1980s inset fireplaces and where the chimney damp comes in
07:13 Wood burners and a lifetime supply of wood
07:37 Three phase supply, EV charging and a future heat pump
08:14 Rotten skirtings: wet rot and woodworm
08:47 A quick word about the statue
09:41 Auction, trees and the condition it was bought in
09:59 The mystery black coating on the floor
10:53 Sealing the floor and lapping it up the wall
11:41 Hard sand and cement over an old damp problem
13:25 Wrapped joists and moisture under the newer floor
14:11 Cutting a channel through for ventilation
15:38 The tar smell and what it tells us
16:44 Coal tar as a damp proof course
17:55 Converting the garages for the parents
18:33 The gardens, palm trees and fruit trees
20:01 Follow the renovation on Instagram [HANDLE NEEDED]
Renovating something similar? Tell us what you found under your floors in the comments.
Correct natural slate fixing is essential for creating a durable, reliable roof that can withstand the conditions it will face throughout its service life. To make the specification process simpler, CUPA PIZARRAS has launched a new online Fixing Specification Tool for architects, specifiers and roofing professionals.
The free digital tool generates project-specific fixing recommendations based on factors including location, exposure, roof pitch and slate selection, helping professionals establish appropriate fixing requirements quickly and accurately.
Why is natural slate fixing important?
Natural slate is renowned for its durability and long service life, but achieving the best performance from a slate roof depends on correct design, specification and installation.
The fixing method must be suitable for the individual roof and the conditions to which it will be exposed. Factors such as roof pitch, geographical location and exposure can all influence the fixing specification.
Getting natural slate fixing requirements right during the design stage can help reduce the risk of problems later in the project and contribute to the long-term performance of the finished roof.
A new tool for natural slate fixing specifications
CUPA PIZARRAS’ new Fixing Specification Tool has been designed to simplify this process.
Rather than professionals having to work through the specification process independently, the online platform guides users through a straightforward series of steps.
Project information is entered into the tool, including key details such as:
Location
Exposure
Roof pitch
Slate selection
Using this information, the tool produces tailored fixing requirements that can be incorporated into project documentation.
This gives architects, specifiers and contractors a convenient way of establishing an appropriate natural slate fixing specification while supporting compliance with relevant industry standards.
Making roof specification quicker and easier
Time spent establishing technical requirements during the design stage can have a significant impact on how smoothly a roofing project progresses.
By bringing the relevant project information together within one digital resource, CUPA PIZARRAS aims to make specifying natural slate roofs more efficient while helping reduce the possibility of specification errors.
The Fixing Specification Tool can also be accessed at any stage of the design and specification process, making it useful for professionals working across different stages of a roofing project.
Julian Gómez, Marketing Director at CUPA PIZARRAS, said:
“Correct specification is fundamental to the long-term performance of any natural slate roof. Our new Fixing Specification Tool has been developed to make the process faster and easier for architects, specifiers and contractors, providing reliable fixing recommendations that support compliance, efficiency and best practice.”
Technical support for natural slate roofing
The new tool forms part of CUPA PIZARRAS’ wider range of technical resources for construction professionals.
Alongside guidance for natural slate fixing, the manufacturer provides technical documentation and expert services designed to support architects and contractors throughout the design, specification and construction process.
Its growing range of resources also includes BBA-certified façade systems and RIBA-approved CPD seminars.
By combining digital specification tools with technical guidance and professional support, CUPA PIZARRAS aims to make it easier for construction professionals to specify natural slate correctly and confidently.
The longevity of a natural slate roof depends not only on the quality of the slate itself but also on appropriate specification and installation.
Establishing the correct natural slate fixing requirements from the outset can therefore play an important role in creating a roofing system capable of delivering reliable long-term performance.
CUPA PIZARRAS’ new online tool provides architects, specifiers and roofing professionals with a quick way to generate project-specific fixing recommendations while supporting efficient project planning and best practice.
The Fixing Specification Tool is available free of charge through the CUPA PIZARRAS website and can be accessed throughout the design and specification process.
Summer brings warmer weather, longer evenings and more time spent outdoors. It also brings increased insect activity, with wasps becoming a common concern for homeowners as nests develop and colonies become more active.
Wasps are an important part of the natural environment, helping control other insect populations and contributing to biodiversity. However, when they build nests close to homes, gardens or regularly used areas, they can become a genuine nuisance and, in some situations, a safety concern.
For homeowners looking at wasp nest removal, understanding where nests appear and having the right treatment solution available can make managing summer pest problems much easier.
This is where Safeguard NOPE! Wasp and Hornet Killer provides a practical solution.
Why Wasps Become A Summer Problem
Wasp activity increases throughout the warmer months as colonies grow. While a nest hidden away from people may not cause an issue, problems can arise when wasps choose locations close to everyday activity.
Common problem areas include:
Roof eaves
Loft spaces
Garages
Sheds
Wall voids
Chimneys
Outdoor structures
Why Wasp Nest Removal Is More Common In Summer
Summer brings warmer weather, longer evenings and more time spent outdoors. It also brings increased insect activity, with wasps becoming a common concern for homeowners as nests develop and colonies become more active.
Wasps are an important part of the natural environment, helping control other insect populations and contributing to biodiversity. However, when they build nests close to homes, gardens or regularly used areas, they can become a genuine nuisance and, in some situations, a safety concern.
For homeowners looking at wasp nest removal, understanding where nests appear and having the right treatment solution available can make managing summer pest problems much easier.
This is where Safeguard NOPE! Wasp and Hornet Killer provides a practical solution.
Why Wasps Become A Summer Problem
Wasp activity increases throughout the warmer months as colonies grow. While a nest hidden away from people may not cause an issue, problems can arise when wasps choose locations close to everyday activity.
Common problem areas include:
Outdoor structuresnce, helping improve control while keeping both feet firmly on the ground.
Roof eaves
Loft spaces
Garages
Sheds
Wall voids
Chimneys
Safeguard NOPE! Wasp and Hornet Killer provides long-range targeted treatment for wasps, hornets and hidden nests around the home.
A 5-Metre Spray Range For Safer Application
Access is often one of the biggest challenges when dealing with wasp nests.
A nest hidden beneath roof eaves, inside a shed roof or within a difficult-to-reach area can make treatment challenging.
The extended reach of Safeguard NOPE! helps overcome this problem by allowing targeted application from further away.
The precision spray can be used for individual flying insects or directed towards nest entrances where appropriate, providing flexibility depending on the situation.
Users should always follow the product label instructions, check wind direction before spraying and avoid treating nests if they may be at risk of an allergic reaction to stings.
No Messy Residue For Easier Clean-Up
When treating areas around the home, the effectiveness of a product is only part of the consideration. Ease of use and clean-up also matter.
Unlike foam-based products that can leave behind visible deposits, Safeguard NOPE! Wasp and Hornet Killer uses a high-strength liquid formula designed to leave zero residue.
This makes it suitable for practical areas around the property where homeowners want effective treatment without creating additional cleaning work afterwards.
More Than Wasp Nest Removal: Protecting Your Property
Small gaps, overlooked openings and sheltered spaces can provide opportunities for insects to enter and establish nests.
Simple maintenance checks can help reduce potential problems:
Inspect roof edges and eaves for gaps
Check sheds and garages regularly
Seal unnecessary openings around service routes
Maintain external areas around buildings
Look for signs of insect activity during warmer months
A well-maintained property is easier to protect from a wide range of potential problems.
Responsible Pest Management For Homes
While wasp nest removal may sometimes be necessary, it is important to remember that wasps have an important role in the ecosystem.
The aim is not to remove insects unnecessarily, but to manage situations where nests are located close to homes, workplaces or areas where people regularly spend time.
Safeguard NOPE! Wasp and Hornet Killer provides homeowners with a targeted solution when action is required, combining long-range application, effective treatment and practical ease of use.
As summer insect activity increases, having the right product available can help homeowners protect their properties while taking a responsible approach to pest management.
Explore More From Safeguard’s Pest Control Range
Protecting your home doesn’t stop at wasp nest removal. Safeguard also offers targeted solutions for other common household pests.
🐜 NOPE! Ant Killer – For fast treatment of ant trails and nests.
Damp proofing an old building usually means undoing what somebody else did to it. Roger is back with Robert from Tiffin, a restoration firm trading since 1695, at a 1906 school with damp all the way along one elevation.
The short answer is that the building was fine until people started helping it. Over the years, the ground outside was raised five brick courses without anyone excavating back down, which buried the damp-proof course completely. Then the walls were sprayed with a plastic coating that sealed the moisture in. Four or five weeks after the render came off, in the middle of a hot, dry summer, the brickwork was still saturated.
Robert walks Roger through the repair, including the AirDrain system he developed himself. It is a resin C-section channel fixed against the brickwork with the open side facing the wall, so air moves along its whole length and the masonry can evaporate instead of holding water. Below that sits a land drain about half a metre down in this case, and the existing air bricks now vent into the drain rather than into wet ground. Behind the render they also found a brick plinth built on edge about seventy years ago with no membrane, no ties and no damp proof course, which had gone completely live and had to come out. You never know what you will uncover when you start these jobs.
00:00 A restoration firm trading since 1695
00:38 The damp-proof course five courses down
01:13 Why the ground falls towards the building
01:53 Under the render: brick, sand and cement
02:20 What the plastic coating did to the wall
02:49 Rotten wall plates and suspended floors
03:23 What the air drain actually is
03:55 The land drain at the base of the wall
04:20 Surveying the rest of the school
04:46 Is damp work energy-related for VAT?
05:07 The hidden brick plinth
05:33 Rendering with no waterproofer
06:16 Gutters, roof runoff and new gullies
07:03 Brick on edge with no DPC behind it
07:24 The maintenance-free spray coating
08:28 Vegetation and vertical slate damp-proofing
09:17 What Robert would do instead
Have you seen a damp-proof course buried like this? Tell us what you found and how you dealt with it in the comments.
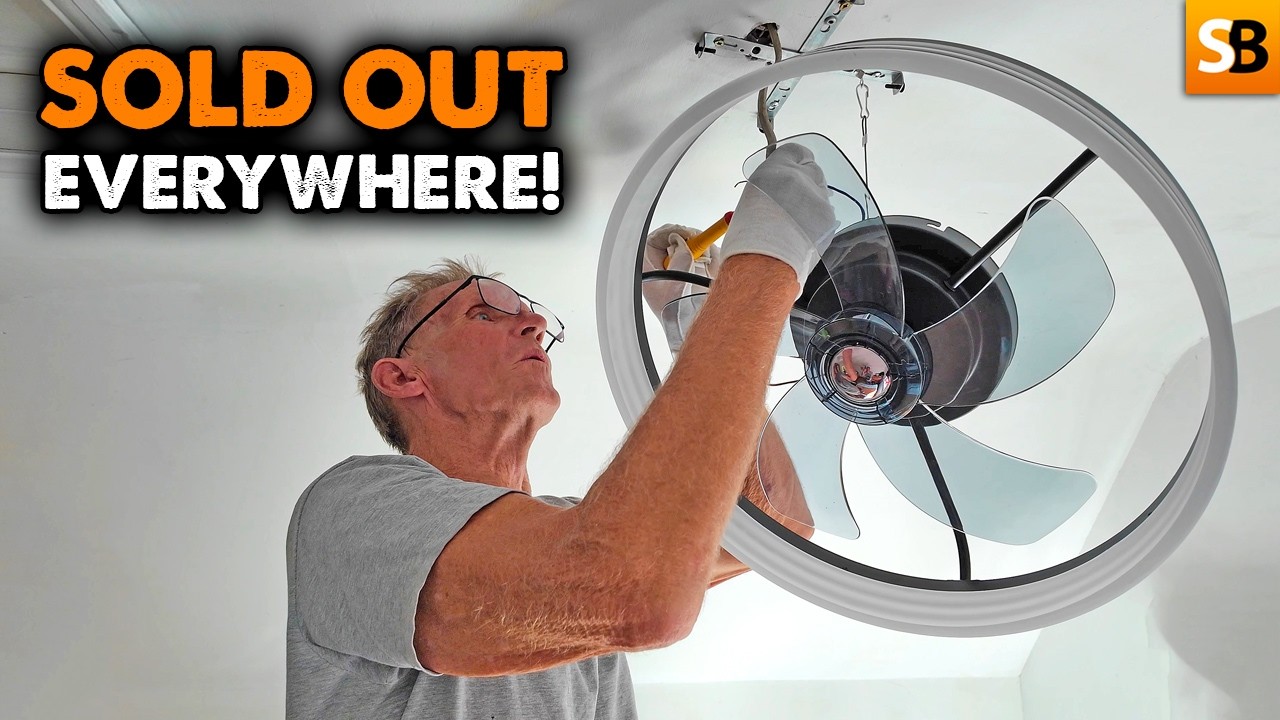
A ceiling fan is a moving load, not a static one. Whatever you fix to has to take the weight and the vibration for years, not just hold it while you let go.
Concrete ceilings, common in flats, take an expanding concrete fixing. Some packs include them, otherwise the right plug will do the job.
On a timber ceiling, do not rely on the screws in the box. Go longer and drive up into something solid behind. Backing the fixing with timber is worth the fiddle.
Check the ceiling point before you order. A straight switch connection is simple. A loop in at the rose means more terminals to sort out.
The hanging chain or hook on the bracket is the feature you appreciate on the day. It takes the weight while you make off the connections instead of holding a fan above your head.
Isolate at the consumer unit and prove it dead before you touch anything. If you are not confident with the electrics, get someone in for that part.
A tenement bathroom renovation in a Glasgow tenement can look simple on paper, but then you lift a floorboard, trace the drainage or work out how a new bath is getting up the close.
That’s the reality of working with older flats. They’re entirely workable, but they come with constraints you won’t usually find in a newer property. Knowing what you’re dealing with before work starts can save a lot of expensive changes later.
Confirm where the WC can go before designing anything
Fix the pan position first, then design the bathroom around it. The soil stack serves every flat on that side of the building, and the WC needs a short branch into it at the correct fall. Move the toilet across the room, and you may need a longer waste run and deeper boxing, which can quickly eat into the space you were trying to gain.
In a compact Govanhill tenement shower room, there may only be one sensible position for the pan. Establishing that early saves you designing a layout that has to be redrawn later. The other fittings give you more flexibility. Basins, showers and towel rails only need the appropriate supply and waste connections, so they can usually move around fairly freely. A bath will often move too, provided its waste can still reach a suitable connection at the right gradient. Ask your contractor to confirm the stack position and existing branch before you commit to the layout. Without that information, you’re designing around guesswork.
Check the walls and floor before choosing fittings
Once the basic layout works, look at what the room itself will allow. Don’t settle the final specification until someone has properly checked what they’re working with. That means more than standing in the doorway with a tape measure; a useful survey may involve lifting a board and looking behind a panel.
Sandstone external walls don’t take fixings like a modern stud wall and can be slow to chase. Lath-and-plaster partitions crack easily, don’t carry much weight and often hide earlier repairs. All of that matters if you’re planning wall-hung sanitaryware or large-format tiles, where the condition and flatness of the substrate become important.
Firms that regularly work with period properties should survey these details before committing to the job. It’s one reason owners of older flats often approach bathroom renovation specialists in Glasgow such as HomeDecorZone, who carry out a free property survey first and set the scope around what they actually find. Skip that step and the specification gets rewritten once the room is open. Working with one firm that handles the plumbing, joinery, tiling, and electrics also saves you from chasing four trades when something turns up.
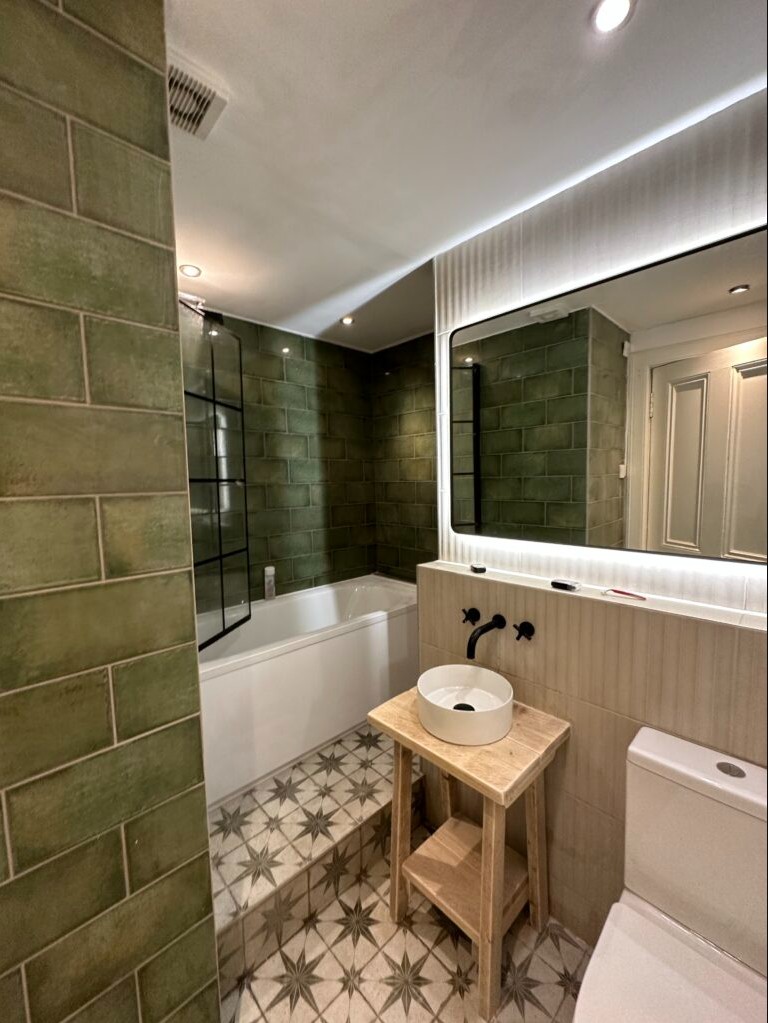
A carefully planned bathroom renovation can work within the constraints of a traditional tenement flat.
Ask what happens if something turns up
That survey may also uncover problems that weren’t visible beforehand. Lead tails still in service, redundant dead legs, or a joist end that has gone soft beneath a bath that has been leaking for years are all possible in an older property.
A well-planned bathroom renovation in Glasgow should allow for that possibility at survey stage and explain, in writing, how genuine unforeseen problems will be dealt with. Ask before work begins what happens if the floor comes up and something needs repairing. A vague answer at this stage is a good warning sign that the project could drift later.
Establish whether you need a Building Warrant
The next question is whether the work needs formal consent. Scotland has its own system, with warrants issued under the Building (Scotland) Act 2003 and the Building (Scotland) Regulations 2004. Part P, which appears in a lot of English renovation advice online, doesn’t apply in Scotland.
Replacing sanitaryware like for like in its existing position is exempt, so a straightforward refit doesn’t require an application. A warrant must be granted before work begins for:
Forming a bathroom where there wasn’t one before
Relocating the WC or altering the soil pipe
Structural alterations, including opening up a wall
New below-ground drainage
Check your proposed layout against that list while you’re still at the design stage. Applications go to Glasgow City Council Building Standards through the eBuilding Standards portal, and mygov.scot explains the process and timescales. Finding out halfway through the job can mean stopping work until the warrant is granted.
Agree who is certifying the electrics
Consent isn’t the only paperwork to settle before work starts. Bathroom electrics fall under BS 7671 and should be certified by an electrician registered with SELECT or NICEIC, so confirm that electrical certification is included and that you’ll receive the paperwork at handover.
Keep it with any Building Warrant approval and the rest of your renovation documents. It may not seem important once the bathroom is finished, but it can matter years later when a solicitor asks for the paperwork during a sale.
Sort access and neighbours before the start date
Then there’s the practical side of working in a tenement. Everything has to come up the stairs by hand, and that needs planning rather than assuming it will somehow work on the day. A 1700mm bath, for example, isn’t much use if it won’t make the turn on the half-landing.
Agree the following before the start date:
How materials will reach the flat, including whether a 1700mm bath or full-length wet wall panels will fit through the stair
Where waste will go and who will arrange the skip permit, as kerb space isn’t guaranteed on every street
How the old suite will leave the property, particularly if there’s a cast iron bath that needs breaking up in the room
How the common stair will be protected and who will clean it each day
What working hours apply and whether your title deeds contain any restrictions
Speak to the flats above and below before work on the stack is scheduled, because their drainage will be unavailable for part of the day. It’s also worth checking your deeds and contacting the factor about anything affecting common parts. Five minutes spent speaking to people in the close beforehand can prevent complaints that hold the job up later.
Agree the sequence and the scope in writing
With the layout, property condition, consent and access understood, the final step is getting the actual job clearly defined. Ask for a written programme with indicative timings covering strip-out, first-fix plumbing and electrics, tanking and forming falls if you’re creating a wet room, wall preparation, second fix, sealing and snagging.
Some stages need time to cure before the next one can begin, and the same specification will generally take longer to complete in a tenement than it would in a newer flat. However, be wary of anything promising a complete refit inside a working week, because something has probably been left out.
Before agreeing terms, make sure the written scope covers:
Joist repair and floor preparation
Making good and reinstating walls after first fix
Waste removal
Tanking where an open shower area is involved
Electrical certification
Who is supplying the materials
Make sure that you get all of that in writing, along with insurance details and the workmanship guarantee being offered. A contractor who regularly works on period properties should have no problem providing it.
Book a Survey Before Committing to a Layout
Tenement constraints are workable when you find them during the survey rather than after the floor is already up. Before ordering fittings, arrange for a contractor with genuine period-property experience to identify the stack position, check the walls and floor, confirm the consent position and consider access.
Ask them to explain clearly what your proposed layout involves and put the scope in writing. A firm that can do that and point you towards verified reviews on MyBuilder or Checkatrade is the one worth considering taking forward.
Why Herringbone Carpets Work So Well in Period Homes
Period properties can take pattern well, but the floor still has to work with the building rather than compete with it. Hallways, stairs and landings can bring several original features together, from timber balustrades and deep skirting to decorative plasterwork, so the carpet becomes part of a wider renovation decision rather than a finishing touch chosen in isolation.
Herringbone carpet can suit that setting because the pattern adds definition without relying on a bold colour. For builders, fitters and homeowners, the practical questions are how the pattern will work in the space, how it will meet adjoining areas and what needs checking before the carpet is ordered.
Start With the Route Through the Property
On a renovation job, the hallway and stairs are often the first places where a patterned carpet is considered. They connect several rooms, remain visible from more than one angle and usually have fixed architectural features that the new finish needs to sit beside.
Before choosing a pattern, look at the full route from the entrance to the landing rather than treating each section separately. Doorways, turns in the staircase and changes in width can all affect how much of the design remains visible. A small sample may look quiet on a table but become much more prominent once it runs across several metres of floor.
For period renovation projects where a patterned carpet is needed for stairs, landings or hallways, Urmston Carpets offers herringbone carpet options in wool, wool-blend and stain-resistant synthetic fibres. Viewing a larger sample can help before the final choice is made because both scale and colour are easier to judge in context.
Match the Pattern to the Space
The direction of a herringbone carpet design becomes particularly noticeable in narrow spaces. That makes it worth deciding the intended orientation before ordering rather than leaving the question until fitting day.
In a straight hallway, the pattern can be planned around the main line of travel. On stairs, the visual effect also depends on how the design continues from tread to riser and then onto the landing. Where several sections meet, consistency matters. A pattern that changes direction unexpectedly can draw attention to the join rather than the overall finish.
Room size matters too. The scale of the repeat is worth viewing in the space itself. A design that looks subtle on a small sample can appear much stronger across a landing, stair or corridor. There is no single correct scale for a period property, so the surrounding joinery, wall colour and available floor area should guide the choice.
Measure With Pattern Matching in Mind
Patterned carpet needs more planning than a plain surface because the repeat has to be considered where separate lengths meet. That is particularly relevant on stairs, landings and hallways where several pieces may need to look continuous once fitted.
A room measurement alone does not tell the whole story. The fitter also needs to know the carpet width, the pattern repeat and where joins are likely to fall. Stairs can add another layer of planning because winders, landings and changes in direction may alter the amount of material required.
It is worth settling this before the quote is finalised. Allowing for the pattern at the ordering stage reduces the chance of discovering later that there is too little material for a clean match. It also gives the client a clearer picture of how the chosen design will work across the whole area.
Herringbone carpet can add definition while complementing traditional features.
Check the Existing Floor Before Fitting
A patterned carpet will not solve problems in the floor beneath it. Loose boards, raised fixings, damaged sections and uneven surfaces are better dealt with before the underlay and carpet go down.
Older properties deserve a careful look because the floor may have been repaired or altered several times. What appears to be a minor uneven area can turn out to be a loose board or an old patch once the previous covering is lifted. Not every period floor will need major work, but any defects that could affect the finished fit are better identified at this stage.
The same applies at doorways and transitions. Check how the carpet will meet timber, tile or another floor covering in the next room, and confirm that doors will still clear the finished build-up. These details are much easier to solve before fitting than after the carpet is already in place.
Choose Fibre and Underlay for the Actual Job
Herringbone describes the pattern, not one fixed carpet construction. Available ranges can use wool, wool blends or synthetic fibres, and the right choice depends on the room, the household and the level of use expected.
For a staircase or entrance hall, the client may prioritise resilience and straightforward maintenance. In a bedroom or sitting room, feel underfoot may carry more weight. Rather than assuming one fibre is automatically best for a period renovation, check the specification of the particular range and whether it is intended for the area being covered.
Underlay should be treated in the same way. It needs to suit the carpet, the subfloor and the location, so the product guidance and fitter’s recommendation are more useful than a generic rule. On stairs, the way the carpet is secured and aligned also deserves particular attention because a repeated pattern can make poor fitting more noticeable.
Make the Final Details Part of the Plan
The edges and transitions matter almost as much as the main field of carpet. Skirting, thresholds, stair rods, runners and adjoining finishes can all change how traditional or contemporary the final result feels.
If the carpet is being used as a runner, border and edging choices should be agreed before the material is cut. In a fully carpeted hallway, the emphasis may instead be on keeping the pattern aligned as it passes doors and reaches the foot of the stairs. Neither approach is automatically more suitable for an older property. The right one depends on the building and the brief.
For renovation work, herringbone carpets work best when the pattern is considered alongside the building itself. The repeat, direction, existing floor and choice of material all affect how convincing the finished result feels. Planning those details before fitting helps the carpet sit naturally within the property rather than looking like a decorative addition chosen at the last minute.
Related Skill Builder Guides
Floor Levelling Compound – Learn more about preparing and levelling floors before fitting new flooring.
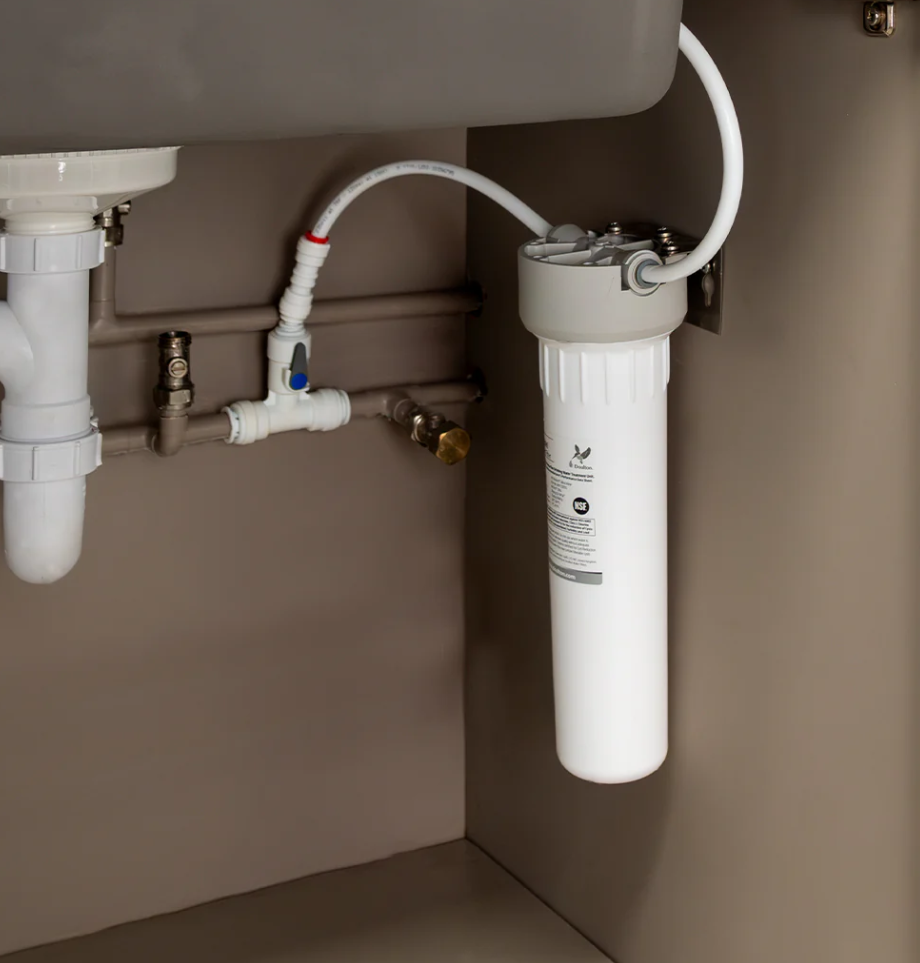
Doulton Water Filters explains what every homeowner should know before choosing a home water filter
As interest in home water filter systems continues to grow, British filtration specialist Doulton Water Filters is encouraging consumers to look beyond marketing claims and understand what really matters when choosing the right filtration solution.
Marking National Water Quality Month this August, Doulton Water Filters is helping homeowners make informed decisions by highlighting the importance of independent certifications, contaminant reduction, long-term value and ongoing maintenance. With many consumers unaware that not all water filters are independently tested to the same standards, understanding the differences can help ensure you invest in the right home water filter for your household.
According to Joy Delaney, NPD & Technical Director at Doulton Water Filters, one of the biggest misconceptions is that all water filters perform in the same way.
“One of the biggest misconceptions is that all water filters perform in the same way, but that’s simply not the case,” says Joy. “Taking the time to understand independent testing and certifications, checking which contaminants a filter has been tested to reduce, and researching whether testing has been performed to the full capacity claimed by the manufacturer will help consumers make a much more informed purchasing decision. NSF and WRAS certifications provide added reassurance because they independently help verify that a product is safe to use and performs as claimed.”
Whether you’re buying your first home water filter or replacing an existing system, Doulton Water Filters shares five expert tips to help you choose with confidence.
1. Check Home Water Filter Certifications
One of the first things to look for when comparing a home water filter is independent certification.
Doulton Water Filters recommends looking beyond product marketing and checking whether a filter has been independently tested against recognised safety and performance standards. Certifications such as NSF and WRAS provide reassurance that products have undergone rigorous assessment, although consumers should always check exactly what each certification covers.
Not every certification measures the same criteria, so it’s important to understand what the filter has been tested to reduce, how long the testing covers and whether it matches your household’s needs.
2. Choose a Home Water Filter That Meets Your Water Quality Needs
Every household has different priorities when it comes to drinking water.
Some homeowners want to improve the taste and odour of their tap water, while others are looking to reduce chlorine or address other contaminants. Doulton Water Filters recommends researching your local water quality before choosing a home water filter, helping you identify the filtration system best suited to your requirements.
Understanding what you want your filter to achieve makes it much easier to compare products and avoid paying for features you don’t need.
Gravity-fed water filters provide a flexible home filtration solution without requiring permanent installation.
3. Consider the Long-Term Cost of a Home Water Filter
The purchase price is only one part of the investment.
A quality home water filter can help reduce reliance on bottled water, potentially saving money over time while also cutting down on single-use plastic waste. When comparing products, it’s worth considering replacement cartridge costs, expected lifespan and maintenance requirements rather than focusing solely on the upfront price.
Choosing a reliable filtration system can deliver better long-term value while providing cleaner, better-tasting drinking water every day.
4. Select the Right Home Water Filter System
There is no one-size-fits-all solution when it comes to water filtration.
Whether you’re renting, renovating or simply looking for an easy way to enjoy filtered water, Doulton Water Filters offers a range of solutions to suit different lifestyles. These include under-sink systems, countertop filters, gravity-fed systems and reusable filtered water bottles.
When selecting a home water filter, consider available space, ease of installation, how much filtered water your household uses and ongoing maintenance requirements. Choosing a system that fits naturally into your daily routine makes it more likely you’ll enjoy the benefits of filtered water every day.
5. Maintain Your Home Water Filter Properly
Even the best home water filter needs regular maintenance to continue performing effectively.
Doulton Water Filters recommends replacing filter cartridges at the manufacturer’s recommended intervals and following maintenance guidance carefully. Choosing products that have been independently tested to verify cartridge lifespan provides added confidence that your filter will continue performing as intended.
Regular maintenance helps ensure your water filtration system delivers consistent performance and drinking water quality throughout its lifespan.
Doulton Water Filters offers under-sink filtration systems designed for modern kitchens.
Why Doulton Water Filters Recommends Independent Testing
Drawing on more than 200 years of British filtration expertise, Doulton Water Filters believes independent testing should be one of the most important factors consumers consider when purchasing a home water filter.
By understanding certifications, researching local water quality and selecting a filtration system that matches your household’s needs, consumers can make informed decisions based on evidence rather than marketing claims.
As National Water Quality Month highlights the importance of safe, high-quality drinking water, Doulton Water Filters hopes more homeowners will take the time to understand what sets one filtration system apart from another before making a purchase.
Frequently Asked Questions
What does a home water filter do?
A home water filter is designed to improve drinking water by reducing specific contaminants, improving taste and odour, and providing cleaner, better-tasting water straight from the tap. Different filtration systems are designed to address different water quality concerns.
Why are NSF and WRAS certifications important?
Independent certifications such as NSF and WRAS help verify that a water filtration product has been tested against recognised safety and performance standards. They provide additional reassurance that a product performs as claimed.
How often should a home water filter be replaced?
Replacement schedules vary depending on the type of filter and the manufacturer’s recommendations. Following the recommended replacement intervals helps maintain filtration performance and water quality.
Is a home water filter worth the investment?
For many households, a home water filter can provide long-term value by improving drinking water quality, reducing reliance on bottled water and helping cut down on single-use plastic waste.
What should I look for when buying a home water filter?
Doulton Water Filters recommends checking for independent certifications, understanding which contaminants the filter is designed to reduce, considering long-term maintenance costs and selecting a filtration system that suits your home and lifestyle.
Low water pressure after a new bathroom fit? If the plumber swapped your 22mm pipes for 15mm, that is a big part of it, but it is not the whole story.
The short answer: a gravity-fed system cannot supply taps and showers designed for mains pressure, no matter how the pipework is run. Narrower pipe and lots of bends make it worse, but the fix is either an unvented cylinder or a shower pump.
Darren wrote in after a new bathroom left him with a dribble and a bath that takes 30 minutes to fill. In this one we go through how much head height a loft tank actually gives you, why raising the tank does not rescue it, and the two ways out with rough costs for both.
KEY TAKEAWAYS
Pipe diameter and bends matter more than people expect. Going from 22mm down to 15mm and adding bends piles on friction, and on a low pressure system there is no headroom to absorb it.
Gravity pressure comes from head height, and one bar is 9.8 metres of it. The drop from a cold tank to a shower head might be three feet. Fine for old low pressure fittings, nowhere near enough for anything specified for one bar. Raising the tank into the apex of the roof buys you very little.
An unvented cylinder puts the house on mains pressure and solves it properly. Budget around a thousand pounds for the cylinder and another three to four hundred for the install. It cannot create pressure that is not already coming into the house.
A shower pump is the cheaper route, and the space under the hot water cylinder is usually the right place for it. It needs its own dedicated cold feed off the tank rather than sharing the one already feeding the cylinder, plus a proper hot tapping off the top of the cylinder with a Surrey flange.
Keep the pump as low as you can so it stays flooded. Run it off the existing hot supply and it will pull air in through the vent pipe, and that is what makes a shower splutter and lose pressure as the cylinder empties.
00:00 Darren’s problem, 22mm swapped for 15mm
00:34 Why modern taps and showers need mains pressure
01:02 How little head a loft tank actually gives you
01:36 One bar is 9.8 metres of head
02:13 Option one, an unvented cylinder and what it costs
02:45 Option two, fitting a shower pump
03:17 Dedicated cold feed and tapping the cylinder
04:15 Getting the pump into the supply pipework
04:47 Why a badly fitted pump splutters
Got a job that has gone wrong or a question you want answered on the channel? Drop it in the comments.
Schindler’s smart building solutions are redefining hospital logistics by connecting Automated Guided Vehicles with intelligent elevator systems
Healthcare facilities are becoming increasingly connected, with intelligent building technology playing a greater role in day-to-day operations. One of the biggest developments is the rise of Automated Guided Vehicles (AGVs), autonomous robots designed to transport supplies safely and efficiently throughout hospitals.
From delivering meals and clean laundry to transporting medicines, sterile equipment and clinical waste, Automated Guided Vehicles are helping hospitals streamline logistics and free up valuable staff time. However, while the robots often receive the attention, they can only operate effectively if the building itself is intelligent enough to support them.
This is where Schindler is leading the way.
At HOCH Health Ostschweiz in St. Gallen, Switzerland, Schindler has successfully integrated Automated Guided Vehicles with its intelligent elevator systems and digital building technologies, creating one of Europe’s most advanced examples of automated hospital logistics.
Automated Guided Vehicles Need More Than Just Robots
Modern hospitals are complex environments, with thousands of people, supplies and pieces of equipment moving through the building every day. While Automated Guided Vehicles can navigate corridors independently, moving between multiple floors presents a completely different challenge.
Without intelligent elevator integration, an autonomous robot would simply stop at the lift and wait for human assistance.
Schindler has solved this challenge by creating an ecosystem where elevators, robots and building management systems communicate with one another automatically, allowing Automated Guided Vehicles to travel throughout an entire hospital without manual intervention.
A Smart Hospital Built Around Intelligent Mobility
HOCH Health Ostschweiz is currently undergoing one of Switzerland’s largest hospital modernisation programmes, with the newly completed Haus 07A/B representing a major milestone in the redevelopment.
The new facilities include a large operating and interventional floor alongside 96 modern patient rooms, all supported by Schindler’s vertical transportation technology.
Haus 07A alone features 20 Schindler elevators, while a further six elevators are being installed in Haus 07B as construction continues.
Originally, the project focused on modernising the hospital’s vertical transportation systems. During construction, however, the hospital identified a growing need to support Automated Guided Vehicles across the campus.
Rather than treating this as a separate project, Schindler adapted the building infrastructure, expanding its digital ecosystem so autonomous robots could become a fully integrated part of the hospital’s daily operations.
Schindler’s intelligent elevator systems are helping Automated Guided Vehicles transform hospital logistics at HOCH Health Ostschweiz.
Schindler StratOS Creates One Connected Ecosystem
At the heart of the project is Schindler StratOS, the company’s digital ecosystem that connects multiple technologies into a single interoperable platform.
Rather than operating as standalone systems, elevators, robotics, access management and building controls work together, allowing hospitals to add new technologies as their requirements evolve.
As Florian Trösch, Head of Global Digital Business at Schindler, explains, every digital solution within Schindler StratOS is designed to work together, providing customers with the flexibility to scale projects and introduce new capabilities without redesigning existing infrastructure.
That flexibility proved particularly valuable at HOCH Health Ostschweiz, where the requirement for Automated Guided Vehicles was introduced after construction had already begun.
Schindler CoLab Allows Automated Guided Vehicles To Use Elevators
The key technology enabling the project is Schindler CoLab, the company’s building integration platform.
Schindler CoLab allows third-party software controlling Automated Guided Vehicles to communicate directly with Schindler’s elevator systems.
When a robot approaches an elevator, it automatically sends a request through Schindler CoLab.
The system calls the appropriate lift, ensures the doors remain open long enough for the robot to enter, transports it to the correct floor and allows it to continue its journey without requiring any assistance from hospital staff.
This seamless communication between robots and elevators transforms what would otherwise be isolated technologies into one intelligent logistics network.
Schindler PORT Optimises The Movement Of People And Robots
Alongside Schindler CoLab, the project also uses the Schindler PORT transit management system.
Designed for large and complex buildings, Schindler PORT manages elevator traffic intelligently, reducing waiting times while improving passenger flow throughout the hospital.
By integrating Automated Guided Vehicles into the same system, Schindler ensures robots and people can move safely and efficiently within the building, maintaining smooth operations even during busy periods.
Rather than competing for elevator capacity, passengers and autonomous robots become part of one coordinated transportation strategy.
More Than 30 Automated Guided Vehicles Already In Operation
Today, more than 30 Automated Guided Vehicles supplied and managed by Schindler’s robotics partner are already operating within the hospital.
Using third-party navigation software connected through Schindler CoLab and Schindler PORT, the robots transport food, laundry, medical equipment and waste throughout the campus while travelling independently between floors.
The success of the initial deployment has led to further expansion.
By the time the hospital’s redevelopment is completed in 2027, every elevator across the campus will be fully prepared to support Automated Guided Vehicles, allowing up to 50 autonomous robots to operate throughout the site.
This will position HOCH Health Ostschweiz among Europe’s leading examples of intelligent hospital logistics.
A Blueprint For Future Healthcare Buildings
Although Schindler has previously delivered successful Automated Guided Vehicles integration projects across sectors including retail and hospitality, healthcare presents an even greater challenge.
Hospitals require continuous operation, exceptional reliability and the highest standards of safety. Every movement must be carefully coordinated without disrupting patients, visitors or clinical staff.
The successful deployment at HOCH Health Ostschweiz demonstrates that intelligent building infrastructure can meet these demanding requirements while supporting increasingly automated healthcare environments.
Rather than simply supplying elevators, Schindler has shown how digital building technologies can become the backbone of modern hospital logistics.
The Future Of Automated Guided Vehicles
As hospitals continue investing in digital transformation, Automated Guided Vehicles are expected to play an increasingly important role in healthcare logistics.
However, autonomous robots alone are only part of the solution.
Their full potential depends on intelligent buildings capable of connecting elevators, robotics, access management and building systems into one coordinated ecosystem.
The work completed by Schindler at HOCH Health Ostschweiz demonstrates exactly how this can be achieved.
By combining advanced elevators with Schindler StratOS, Schindler CoLab and Schindler PORT, the company has created an infrastructure where Automated Guided Vehicles can operate seamlessly across an entire hospital campus.
As healthcare facilities become smarter and increasingly automated, projects such as this offer a compelling blueprint for the next generation of hospital design, proving that intelligent mobility is no longer just about moving people – it is about connecting every part of a building into one efficient, integrated system.
CUPA PIZARRAS has announced a new 100-year natural slate guaranteeacross its entire UK product range, reinforcing its commitment to quality, sustainability and long-term performance.
The guarantee gives architects, roofing contractors, developers and homeowners added confidence by providing assurance directly from the company that owns and operates the quarries where the slate is sourced. Unlike many roofing warranties that rely on third-party suppliers or distributors, CUPA PIZARRAS oversees every stage of production, from geological assessment and extraction through to manufacturing and quality control.
A Guarantee Backed by the Quarry Owner
As one of the world’s leading producers of natural slate, CUPA PIZARRAS is uniquely positioned to offer long-term natural slate guarantees because it controls the complete supply chain.
Its in-house team of geologists assesses each quarry, while strict quality control processes ensure every slate meets the company’s high standards before reaching the UK market.
This direct oversight means customers receive a guarantee backed by the source of the material itself, providing greater confidence in product consistency and durability over the lifetime of a roof.
Designed for Long-Term Roofing Performance
Natural slate has long been recognised as one of the most durable roofing materials available. When correctly specified and professionally installed, slate roofs can last for well over a century.
The new natural slate guarantee reflects that long-term performance and supports projects where reliability and lifecycle value are key considerations.
For contractors and specifiers, choosing roofing materials with proven longevity can help reduce maintenance costs while offering clients greater peace of mind.
Sustainability Credentials Strengthened
Alongside the new guarantee, CUPA PIZARRAS continues to strengthen its sustainability credentials through two of its premium products, CUPA 12 and Heavy 3.
Both roofing slates are supported by independently verified Environmental Product Declarations (EPDs), providing transparent information about their environmental impact. These independently assessed declarations help architects, designers and developers make informed material choices while supporting sustainability targets on modern construction projects.
With environmental performance becoming an increasingly important factor in building specification, combining independently verified sustainability data with a 100-year guarantee provides an attractive proposition for both commercial and residential developments.
Industry Confidence
Julian Gómez, Marketing Director at CUPA PIZARRAS, said:
“A guarantee is only as strong as the organisation standing behind it. As quarry owners, we have complete oversight of our products, from the geology of the deposit through to the finished slate.
“That level of control gives us the confidence to offer a 100-year guarantee on all UK products and provides customers with assurance that comes directly from the source.
“Combined with the independently verified environmental credentials of CUPA 12 and Heavy 3, the guarantee demonstrates our commitment to delivering some of the highest-performing and most sustainable natural slate solutions available to the UK market.”
What This Means for the Roofing Industry
The launch of a 100-year natural slate guarantee reflects growing demand for roofing materials that combine durability, sustainability and verified product quality.
For roofing professionals, architects and developers, products backed by both long-term guarantees and independently verified environmental data can help deliver projects that meet increasingly demanding client expectations and building standards.
As construction continues to focus on whole-life performance and environmental responsibility, natural slate remains one of the industry’s most trusted roofing materials for projects designed to stand the test of time.
Related Articles
Continue exploring roofing news, skills and construction best practice with these related guides from Skill Builder:
The 1 Leak Nobody Could Stop – Discover how proper detailing and installation techniques can prevent one of the most common causes of roof leaks in slate roofing systems.
Home Maintenance and Prevention: How Small Repairs Can Save Thousands
Many of the most expensive home repairs start as small issues that could have been prevented with routine maintenance. The English Housing Survey notes that the average cost of bringing a home up to standard stands at over £11,000, although a full mid-range kitchen refit can cost tens of thousands of pounds. Britain also has the largest share of old housing stock in Europe, with about 38% of UK properties having been built before 1946, compared with an EU average of 18%.
Older properties can have character, solid construction and attractive original features, but they also require careful attention. Ageing roofs, outdated wiring, deteriorating mortar, leaking gutters, inefficient heating systems and hidden plumbing problems can gradually worsen when they are ignored. This is why Prevention should be considered an essential part of home ownership rather than something that only happens when something goes wrong.
Regular inspections and preventive maintenance are particularly important for minimising deterioration. Prevention is generally far less disruptive than major repair work, and detecting problems while they are still relatively minor can make a substantial difference to the eventual cost. Detecting and solving problems early can help save money while also improving a home’s safety, preserving its value and boosting energy efficiency.
The importance of Prevention is particularly clear when considering Britain’s ageing housing stock. A small crack around a window, for example, may initially seem insignificant. However, if water gets behind the external finish, it can gradually affect masonry, timber, insulation and internal plaster. Likewise, a blocked gutter might appear to be a simple cleaning job, but repeated overflowing can saturate walls and contribute to damp problems.
Energy efficiency makes regular maintenance even more important. Britain’s goal of achieving a net-zero housing stock by 2050 means homeowners will increasingly need to think about how their properties perform as well as how they look. Preventing heat loss, moisture ingress and equipment failure can therefore form an important part of a wider strategy for improving an existing home.
Ensuring Heating and Electrical Systems Are Safe
Heating and electrical maintenance are vital for safety, comfort and Prevention. These systems are often hidden from view, meaning homeowners may not realise there is a problem until something stops working or becomes dangerous.
Measures to take include annual boiler servicing, checking boiler pressure, inspecting loft insulation and replacing worn draught seals around doors and windows. Boiler servicing is particularly important because a qualified professional can identify faults that may not be obvious during everyday use.
It is also vital to release trapped air from central heating radiators. Over time, air can accumulate inside heating systems, preventing hot water from circulating properly. A radiator that is cold at the top but warm at the bottom can be a simple indication that it needs bleeding. Taking care of minor heating problems can improve comfort and efficiency while reducing unnecessary strain on the system.
Homeowners should also pay attention to unusual noises, changes in heating performance or unexplained increases in energy consumption. A boiler that suddenly takes longer to heat the home or repeatedly loses pressure should not simply be ignored. Prevention means investigating changes in performance before they develop into a larger failure.
Electrical systems deserve the same approach. One proactive measure that can help spot problems early is an Electrical Installation Condition Report (EICR). The typical cost of an EICR test ranges from around £100 for a small flat to £300 or more for very large properties.
Although an EICR is legally required every five years for most rental properties, homeowners who buy an older property should consider having one periodically. An EICR examines the condition of an electrical installation and can potentially identify ageing wiring, overloaded circuits and other faults that can become expensive or dangerous if left unattended.
Older homes may have undergone numerous alterations over the decades, and previous owners may have added sockets, lighting or appliances without considering the capacity of the original installation. Prevention is particularly valuable in these circumstances because hidden electrical faults can be difficult for an untrained homeowner to identify.
Protecting Your Roofs, Gutters and Brickwork
A home’s roof, gutters and brickwork can be considered its external ‘envelope’. These features form the first line of defence against rain, sun and wind, and regularly maintaining them can help prevent problems such as timber rot, insulation damage, damp penetration and internal ceiling and plaster repairs.
Roof inspections should form part of a regular Prevention routine. Homeowners should look for missing, cracked or slipped tiles, damaged flashing, blocked valleys and signs that water may be entering the roof space. Problems are often easier and cheaper to address when they are confined to one small area.
Gutters are equally important. Begin by cleaning gutters at least twice a year and inspect them more frequently where trees surround the property. Leaves, moss and other debris can quickly accumulate, preventing rainwater from flowing freely. When gutters overflow, water can run down walls and around window openings, increasing the risk of moisture penetration.
Chimney flashing and brickwork should also be inspected for cracks and other signs of deterioration. Small cracks do not necessarily mean that major structural work is required, but they should not automatically be dismissed either. Monitoring changes over time can form an important part of Prevention.
Remove excessive moss and organic growth between roof tiles where appropriate, and ensure that drains and downpipes remain clear. A collapsed drain requiring excavation can cost thousands of pounds to repair. To help avoid this expense, remove leaves and debris from drain covers and grates, sweep patios and driveways so that loose dirt does not wash into drains, and periodically flush suitable drains with water from a garden hose.
The principle is simple: keep water moving away from the building. Good drainage is one of the most effective forms of Prevention because uncontrolled water is responsible for a wide range of problems, from staining and damp to erosion and structural deterioration.
Keeping Water Damage at Bay
Problems with plumbing and moisture control can rob a home of enjoyment, and they can also be costly to fix. Damaged flooring, mould growth and structural deterioration are not only unsightly but can potentially affect a family’s health and safety. Persistent leaks can also result in higher water bills.
A tap that drips once every second wastes up to 15 litres of water a day. That’s around 7,000 litres per year, equivalent to more than 90 bathtubs full of water. What appears to be an insignificant plumbing fault can therefore continue costing money every day.
Regularly inspecting your home for issues such as dripping taps, leaking pipes, leaking toilets and condensation will help nip problems in the bud. This is where Prevention becomes particularly valuable: homeowners do not need to wait for a ceiling stain, swollen floorboard or mould patch to appear before investigating moisture.
Key actions include insulating exposed pipes before winter, resealing baths, showers and sinks, and ensuring extractor fans are efficiently removing condensation. Check around toilets, washing machines, dishwashers and under sinks for signs of moisture. A small damp patch inside a cupboard may be an early warning of a leak.
Condensation should also be treated as a potential maintenance issue rather than simply an unavoidable part of winter. Poor ventilation, inadequate heating and excessive indoor humidity can contribute to condensation on windows and walls. Regular ventilation and properly functioning extraction can help reduce the amount of moisture accumulating inside the property.
In older homes, it is particularly important to understand where moisture is coming from. Damp patches can have several possible causes, including plumbing leaks, penetrating damp, condensation and problems with external drainage. Applying a quick cosmetic solution without identifying the source can allow the underlying problem to continue.
Effective Prevention therefore starts with diagnosis. Before painting over a damp mark or replacing damaged plaster, homeowners should consider why the moisture is present in the first place.
Looking After Walls, Windows and External Finishes
Walls are another area where early Prevention can save considerable expense. External masonry is exposed to changing temperatures, wind-driven rain, frost and pollution throughout the year. Over time, mortar joints can deteriorate and bricks can become damaged.
Regularly inspect external walls for cracked mortar, damaged bricks, open joints and areas where water appears to be entering. Pay particular attention around windows, doors, roof junctions and other points where different materials meet.
Windows and doors should also be checked regularly. Worn seals can allow draughts and rainwater into the building, while damaged frames can gradually deteriorate. Replacing a seal or carrying out a small repair is usually far less disruptive than replacing an entire window or dealing with associated water damage.
This is another example of why Prevention should be viewed as an ongoing process. A home does not remain in good condition simply because it was built well. Every component is exposed to wear and weather, and regular attention helps slow that deterioration.
Small but Vital Jobs That Preserve Your Property’s Value
In addition to following a maintenance schedule, it pays to be proactive and constantly look out for issues that can be repaired as soon as possible. From trimming vegetation away from walls to lubricating locks and hinges or checking window and door seals, simple jobs can prevent minor deterioration from becoming major work.
Inspect both the exterior and interior of your home, remembering areas that are sometimes forgotten, including driveways, paths, garages, loft spaces and outbuildings.
Vegetation deserves particular attention. Climbing plants and dense vegetation growing directly against walls can retain moisture and make it harder to identify cracks or deterioration. Keeping plants under control can therefore contribute to Prevention, particularly around older masonry.
Doors and windows should open and close correctly without excessive force. If a door begins sticking, for example, it may simply need adjustment, but it could also indicate movement, swelling or another underlying issue. Addressing the change early gives homeowners the opportunity to investigate before it becomes a more complicated repair.
The same principle applies to flooring. Creaking boards, loose tiles or small areas of movement can be early signs of wear or moisture problems. They should not automatically be treated as emergencies, but monitoring them allows homeowners to spot whether a minor defect is getting worse.
Create a Home Maintenance Routine
One of the easiest ways to make Prevention part of everyday home ownership is to create a simple maintenance routine.
Rather than waiting until something fails, divide maintenance into regular checks. Gutters might need attention twice a year, heating systems require professional servicing, and electrical installations in older properties may benefit from periodic inspection. Smaller jobs, such as checking seals and looking for leaks, can be incorporated into everyday routines.
A quick inspection after heavy rainfall can be particularly useful. Look at gutters, downpipes, external walls and areas around windows to see whether water is flowing as expected. After particularly cold weather, check exposed pipework for signs of freezing or damage.
Seasonal changes are also a useful reminder. Before winter, check heating systems, insulation, gutters and exposed pipes. During spring, inspect the roof and external masonry for damage caused by winter weather. Summer is a good opportunity to carry out exterior maintenance, while autumn provides a final chance to clear gutters and drainage before heavier winter rainfall arrives.
This approach turns Prevention from an occasional activity into a normal part of looking after a property.
Prevention Can Save More Than Money
The biggest advantage of Prevention is not necessarily avoiding one specific repair bill. It is reducing the likelihood that several small problems will combine into one major problem.
A blocked gutter can contribute to damp. Damp can damage plaster and decoration. Persistent moisture can affect timber and insulation. If the problem remains unresolved, the eventual repair may involve several trades rather than one simple maintenance task.
The same pattern can occur with plumbing, heating, electrical systems and roofing. Small defects rarely become expensive overnight. They usually worsen gradually, which gives homeowners an opportunity to intervene.
Following a strict maintenance schedule can therefore help keep your home safe, comfortable and attractive as the years go by. Prioritise regular cleaning and inspection of both interior and exterior structures, and consider having an EICR conducted if your home is older.
Be watchful of small as well as larger issues, fixing the former promptly and relying on experienced professionals for specialised work such as plumbing and electrical repairs.
Ultimately, Prevention is about taking action before a problem has the opportunity to become a crisis. In an ageing UK housing stock, that approach can protect the building, improve efficiency, preserve property value and reduce the likelihood of unexpected repair costs. A few hours spent inspecting, cleaning, maintaining and repairing a home can be a far better investment than waiting until a small defect turns into a major renovation project.
Good home maintenance is not about constantly spending money on a property. It is about spending wisely, identifying problems early and understanding that Prevention is often the cheapest form of repair.
New Data Highlights Major Changes in the UK Farming Industry
The UK farming industry is undergoing significant change after new Government data revealed that England has 14.6% fewer agricultural holdings than it did 20 years ago. Analysis by LandSale shows the number of agricultural holdings has fallen from 247,500 in 2005 to 211,500 in 2025, highlighting a long-term shift in the structure of the UK farming industry.
While some farmers are retiring or leaving the sector, others are expanding existing operations by purchasing neighbouring land, creating fewer but often larger farming businesses. This trend reflects the ongoing evolution of the UK farming industry, where consolidation and changing business models are reshaping the rural landscape.
The findings come as the Financial Times reports that more English farms are being offered for sale than at any point over the past two decades, signalling a period of significant change across rural Britain.
Why Are There Fewer Farms in the UK Farming Industry?
Several factors are contributing to the decline in agricultural holdings across England and affecting the wider UK farming industry.
These include:
Farmers reaching retirement age without successors.
Changes in agricultural policy and environmental schemes.
Increasing land values encouraging owners to sell.
Diversification into non-farming businesses.
Although the number of farms has fallen, this does not necessarily mean less land is being farmed. Instead, ownership is becoming more concentrated, with larger agricultural businesses managing greater areas of land, a trend that continues to reshape the UK farming industry.
More Farms Are Coming Onto the Market
The changing structure of the UK farming industry is reflected in the growing number of farms currently for sale.
LandSale says demand for specialist agricultural property platforms has increased following the closure of UK Land & Farms, one of the UK’s best-known online marketplaces for rural property.
With more farms changing hands, landowners are increasingly looking for dedicated platforms that connect sellers with buyers interested in farmland, rural estates and agricultural businesses.
According to LandSale founder Adam Morris:
“The agricultural sector has always evolved, with land changing hands as farmers retire, businesses grow and owners make decisions about the future of their assets.”
He added that farmers still need reliable ways to advertise agricultural land despite the closure of established marketplaces.
What Does This Mean for the UK Farming Industry?
The changes affecting the UK farming industry are creating both challenges and opportunities for farmers, landowners, agricultural businesses and people considering careers within the sector.
Although the number of farms has declined, opportunities within agriculture continue to evolve. Today’s UK farming industry increasingly relies on technology, environmental management and specialist skills.
Modern farms require professionals in areas including:
Agricultural engineering
Precision farming technology
Livestock management
Crop production
Environmental conservation
Farm business management
Agricultural surveying
Rural estate management
As farms become larger and more technologically advanced, employers are increasingly looking for workers with formal qualifications and practical experience.
Skills Needed in the UK Farming Industry
The UK farming industry is undergoing rapid transformation as automation, GPS-guided machinery, drones, robotics and data-driven farming become increasingly common.
Employers are seeking candidates with a combination of traditional farming knowledge and technical expertise. Qualifications in agriculture, land management, engineering, environmental science and business management can all provide valuable routes into the sector.
Apprenticeships are also playing an important role in developing the next generation of skilled agricultural workers, helping to ensure the UK farming industry has access to the talent needed for future growth.
Opportunities Beyond Traditional Farming
The UK farming industry extends far beyond food production, creating opportunities across the wider rural economy.
Career opportunities continue to grow in:
Renewable energy projects
Forestry
Conservation
Environmental consultancy
Rural surveying
Estate management
Equestrian businesses
Agricultural technology (AgTech)
As land use changes, demand for professionals who understand agriculture, sustainability and modern technology is expected to increase across the UK farming industry.
The Future of the UK Farming Industry
The reduction in England’s agricultural holdings reflects decades of structural change rather than a sudden decline in farming itself.
Land continues to change ownership as businesses expand, farmers retire and rural estates adapt to new economic and environmental pressures.
For people considering a career in agriculture, the UK farming industry still offers a wide range of opportunities. However, today’s employers increasingly value specialist skills, qualifications and the ability to work with modern farming technologies.
As the UK farming industry continues to embrace innovation, sustainability and digital technology, education, training and professional development will become even more important. Those entering the sector with the right skills will be well placed to build rewarding careers while supporting the future of British agriculture.
Key Statistics
The platform attracts over 320,000 monthly visitors and has welcomed more than 800,000 users since launch.
Agricultural holdings in England fell from 247,500 (2005) to 211,500 (2025).
Overall decline: 14.6%.
More English farms are reportedly on the market than at any point in the past 20 years.
LandSale launched in 2026 and now hosts more than 23,000 rural property listings.